Docker Image
Each user can manage his/her own docker images in the image page. User saved images are private which can only seen by the user itself, unless the image is tagged under group namespaces and all users in the same group share the images.
List Image
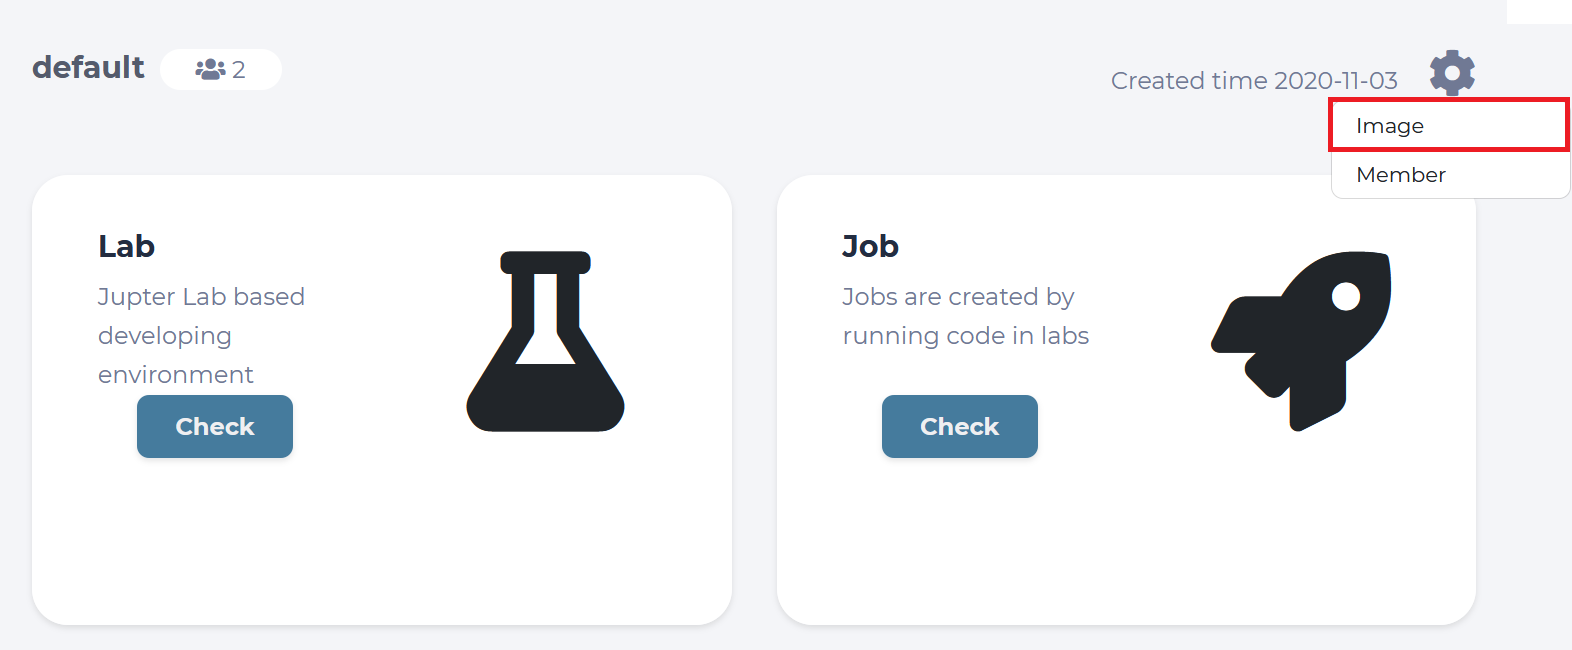
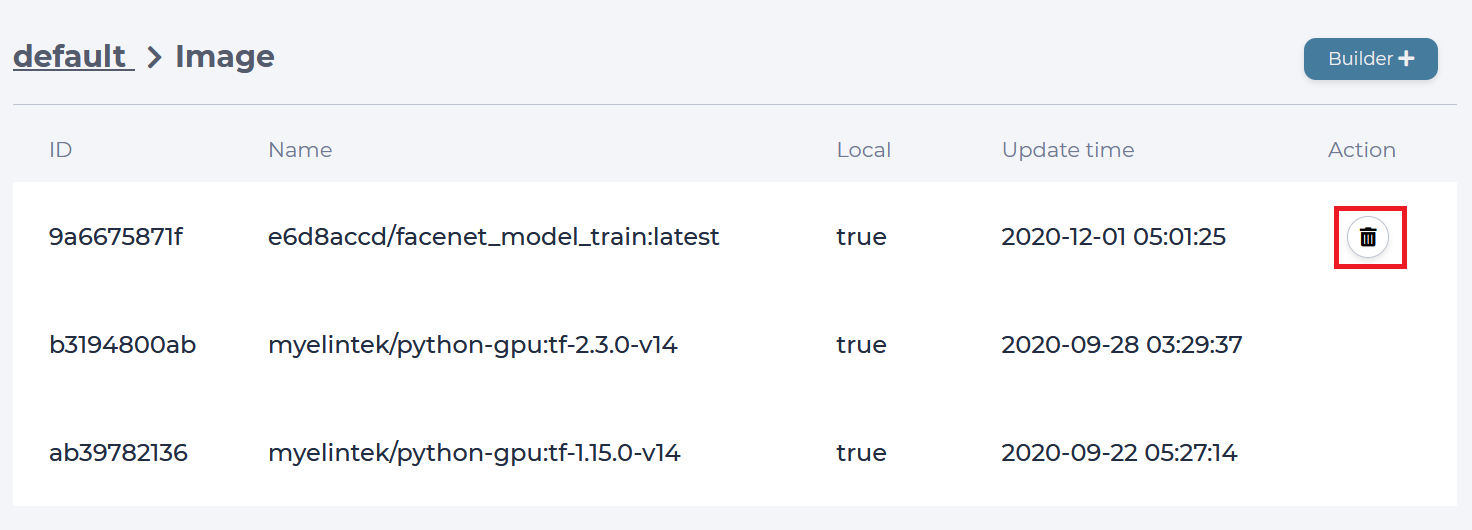
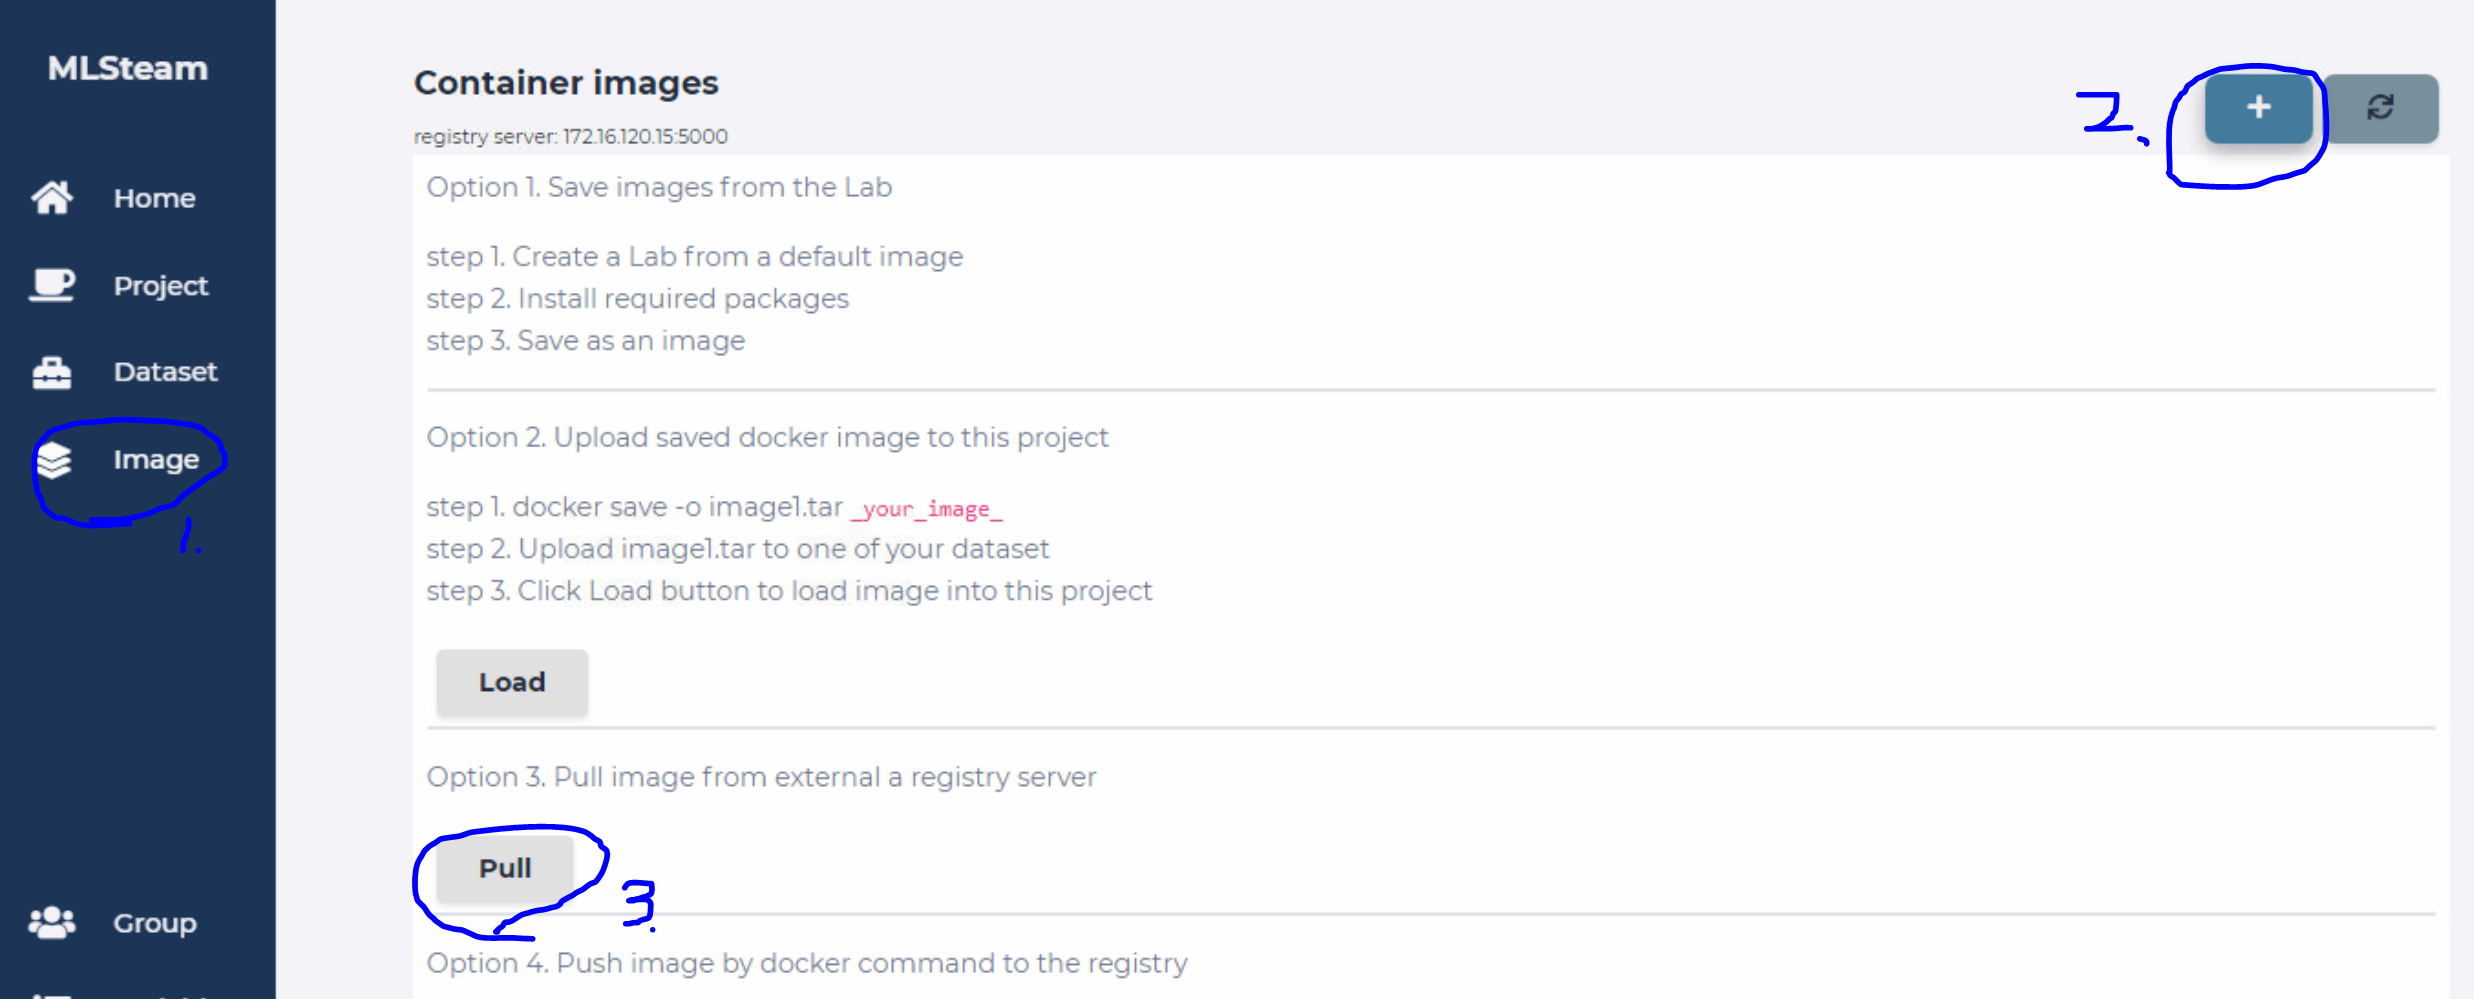
Click the Image botton in a project, the image list table shows all available container images.
Delete Image
Click the trash icon of the image you want to delete.
Save Image
In the lab page, you can save the lab environment as an image. Click “Save as” button in a running lab and type-in image name to store the image.
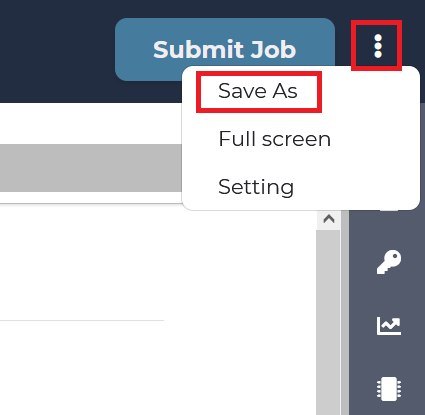
click save as image button
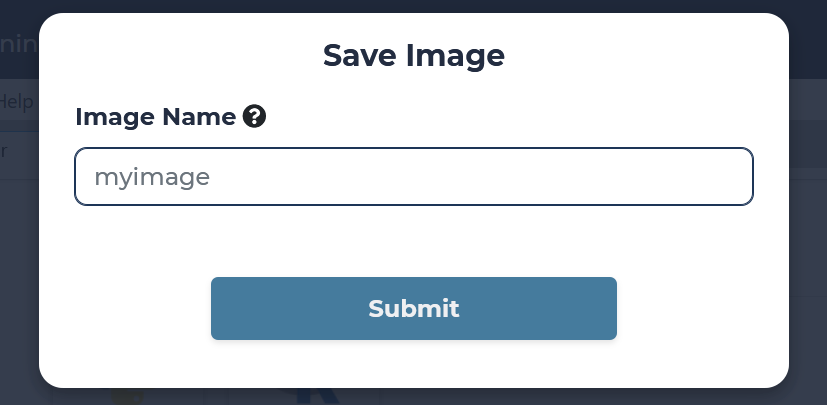
type-in image name
Note
Image name must be valid ASCII, lowercase, uppercase letters, digits, underscores, periods and dashes.
Build Image
Following steps show you how to upload a dockerfile to build your own image
Enable docker build config
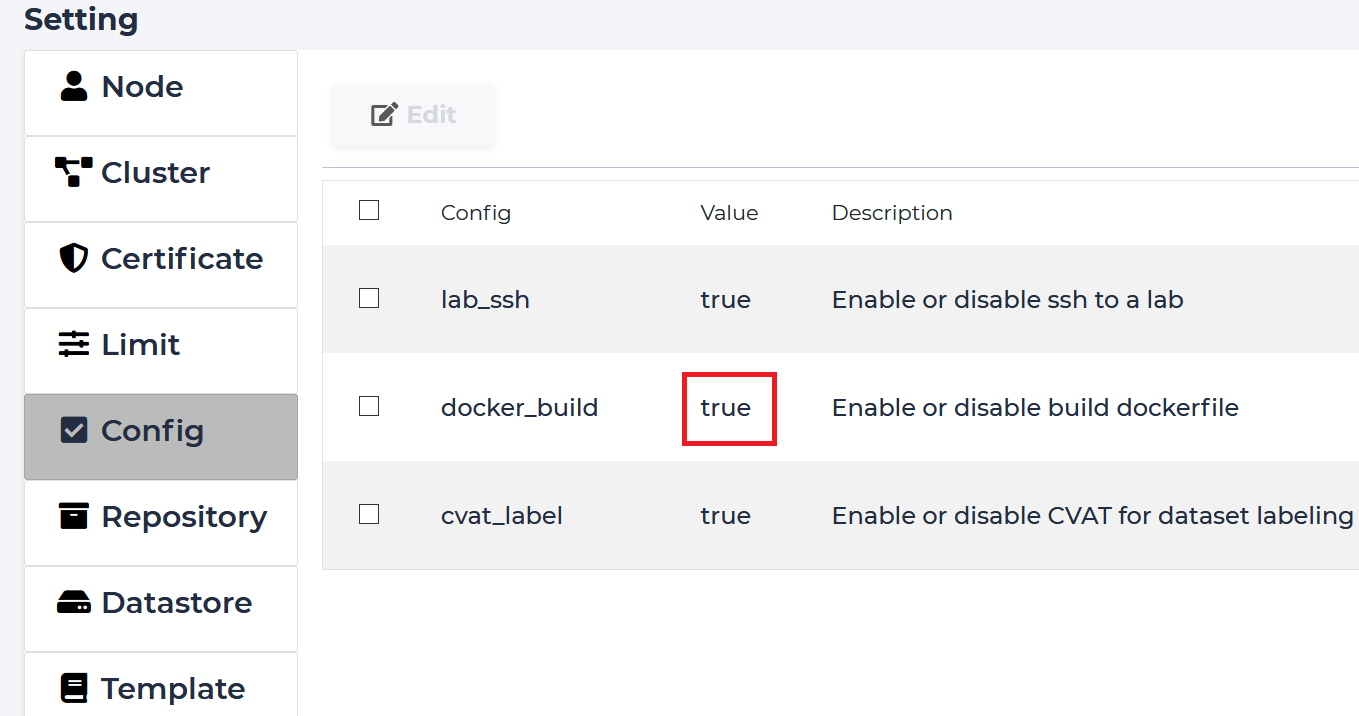
Login as administrator. Click “Setting”.
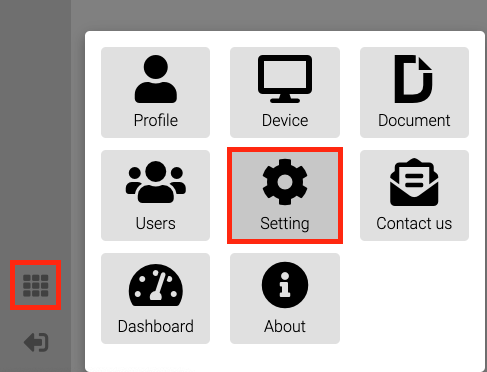
Click “Config”. Tick the docker_build checkbox.
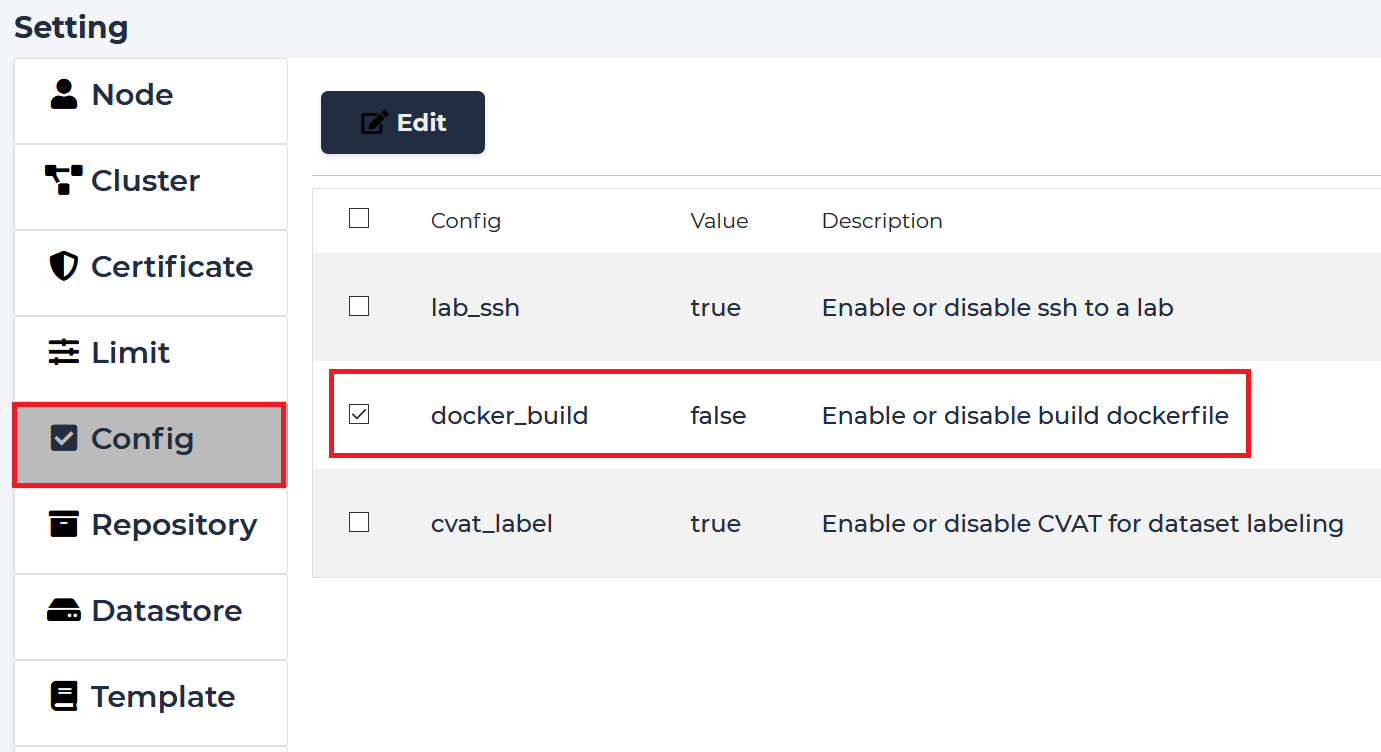
Click Edit to change value
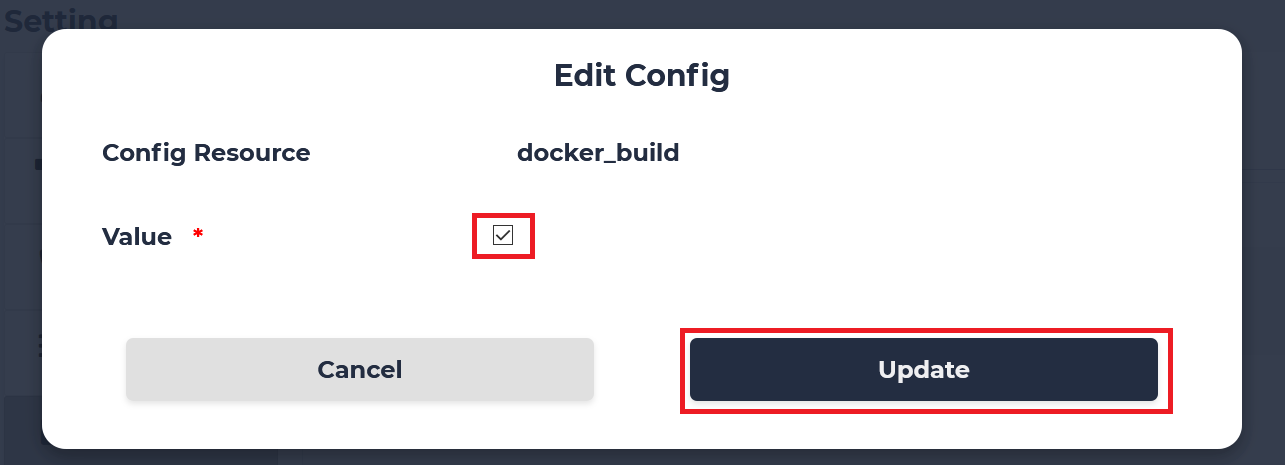
Update value
Check the result
Create a DockerFile
In this step, you write a Dockerfile that builds a Docker image.
For example, create a file named Dockerfile and paste the following:
FROM nvcr.io/nvidia/tensorflow:18.08-py3
RUN pip3 install jupyterlab
RUN rm -rf /usr/lib/x86_64-linux-gnu/libcuda.so /usr/lib/x86_64-linux-gnu/libcuda.so.1 /tmp/*
WORKDIR /mlsteam/lab
CMD ["bash", "-c", "source /etc/bash.bashrc && jupyter notebook --notebook-dir=/tf --ip 0.0.0.0 --no-browser --allow-root"]
Build DockerFile
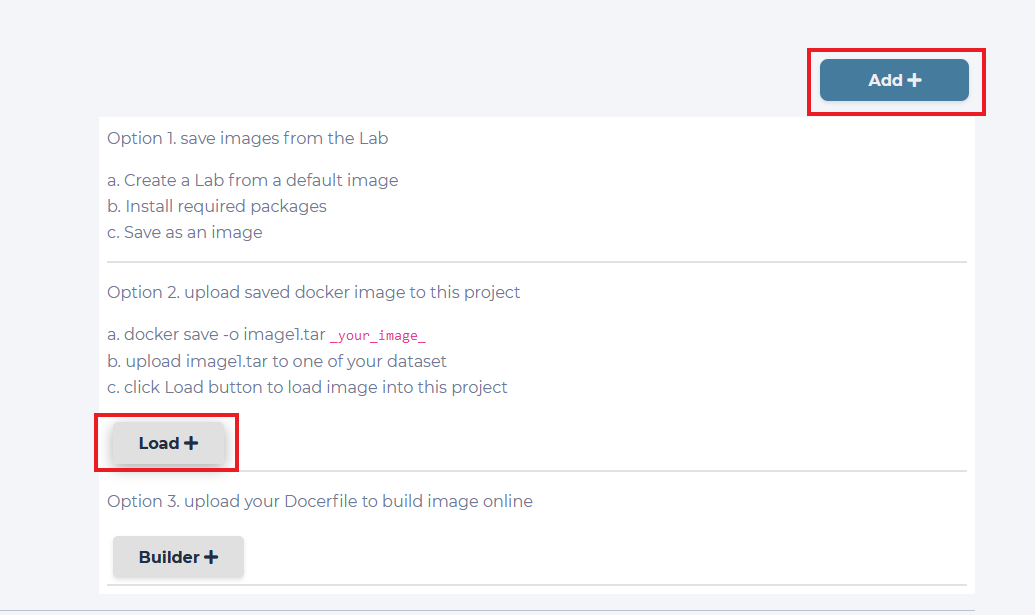
If you want to upload your own dockerfile and build it into an image. Click the “Add” button inside image list, then click “Builder”.
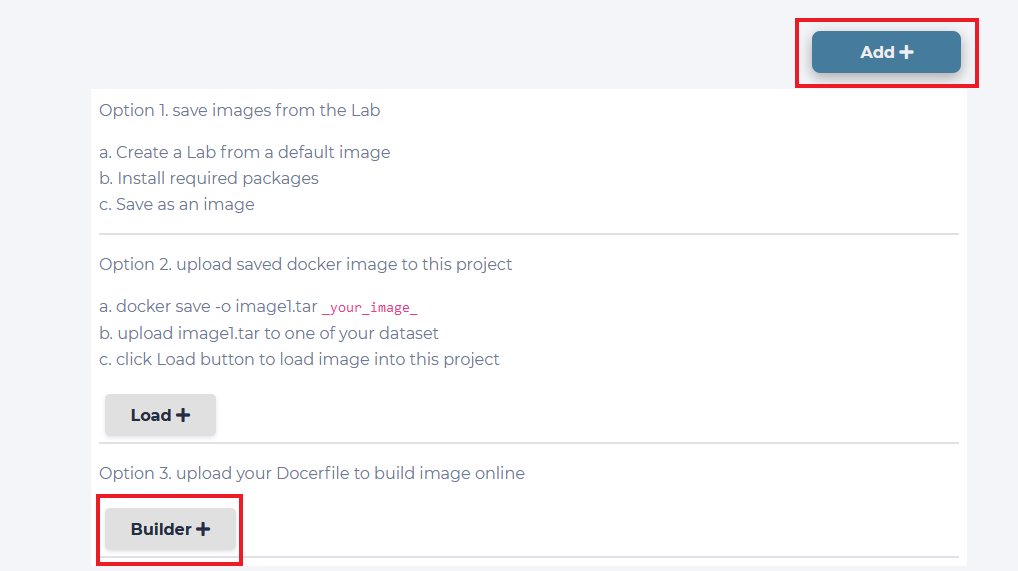
Type the image name and select dockerfile in your file system.
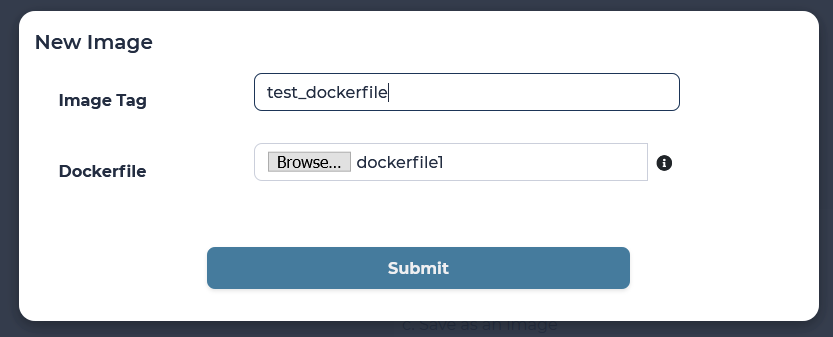
System will start building dockerfile once you click submit.
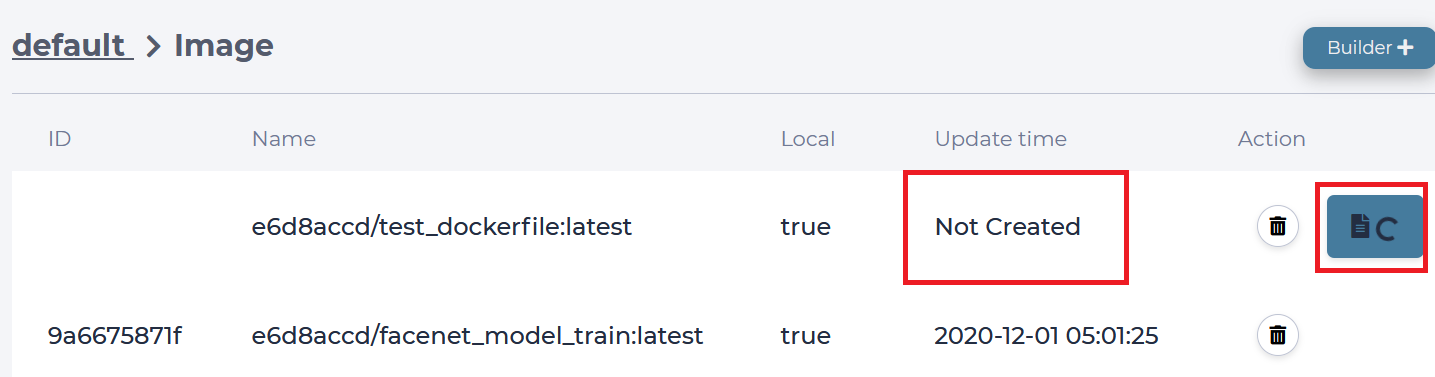
If the build is successfull, the image will be given an ID and saved locally.
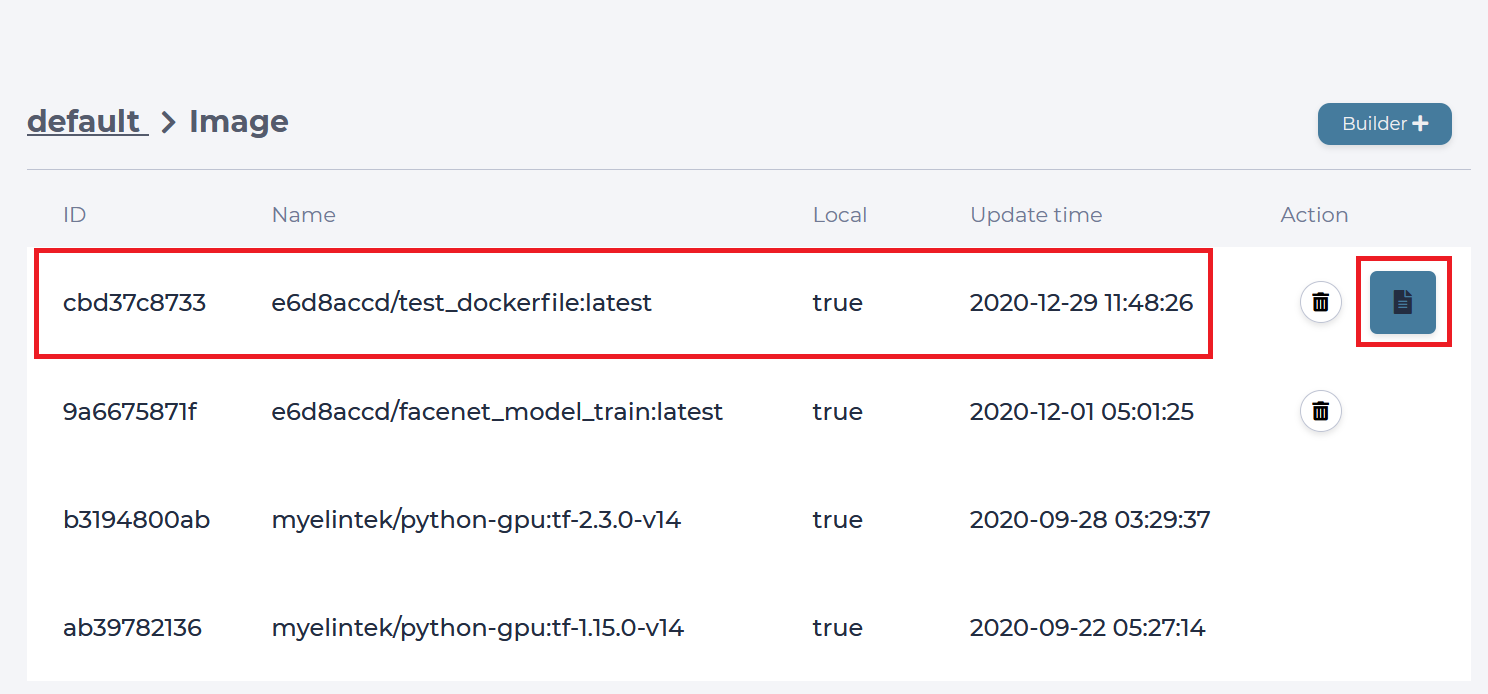
You can view the building log message by clicking the image file icon.
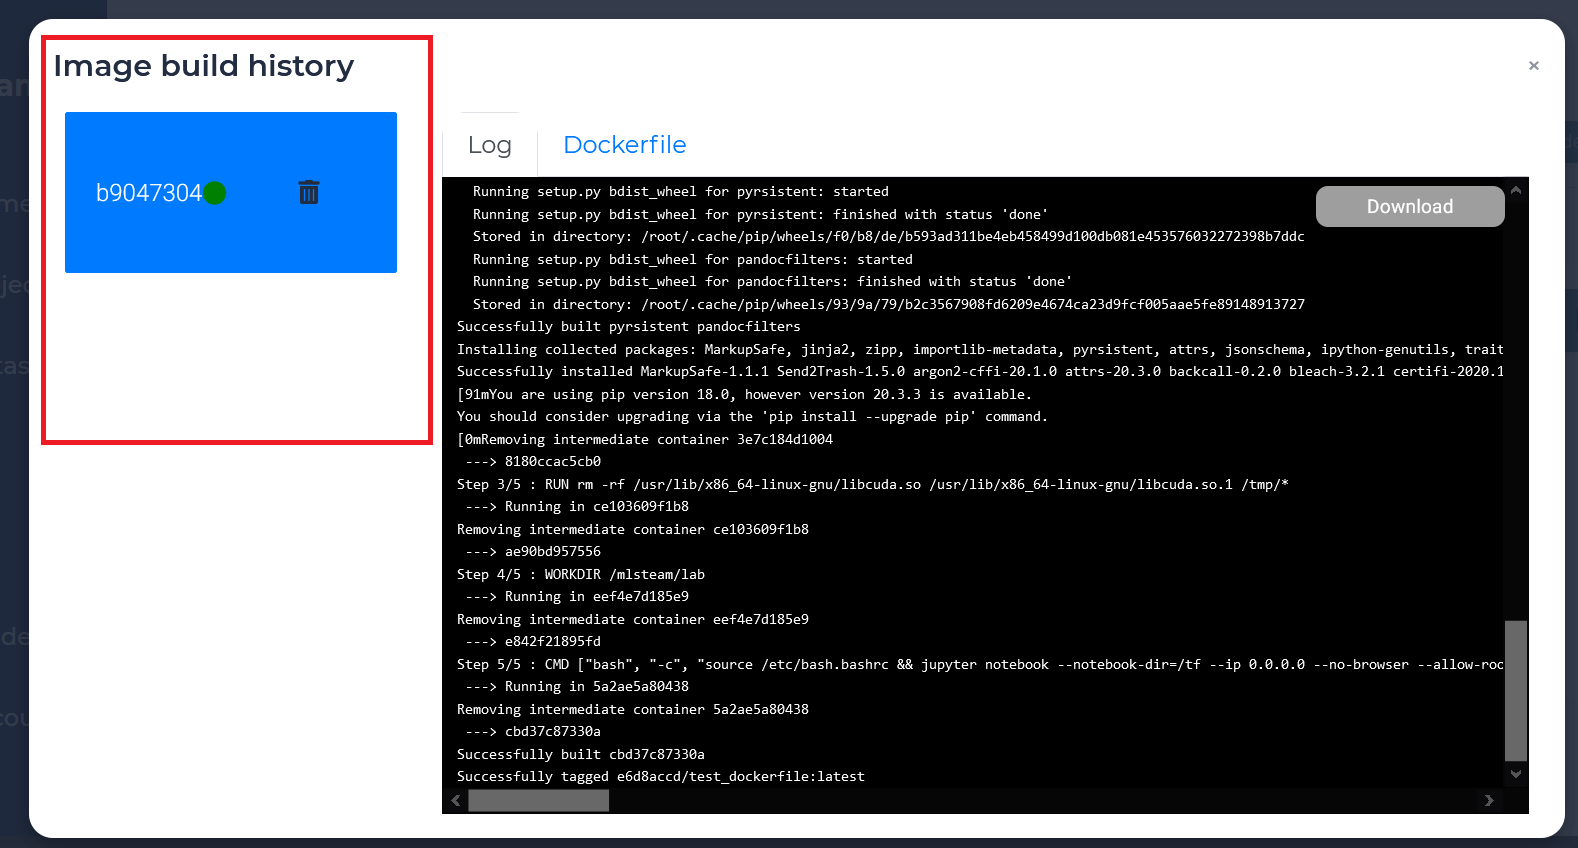
dockerfile with same image name will be grouped
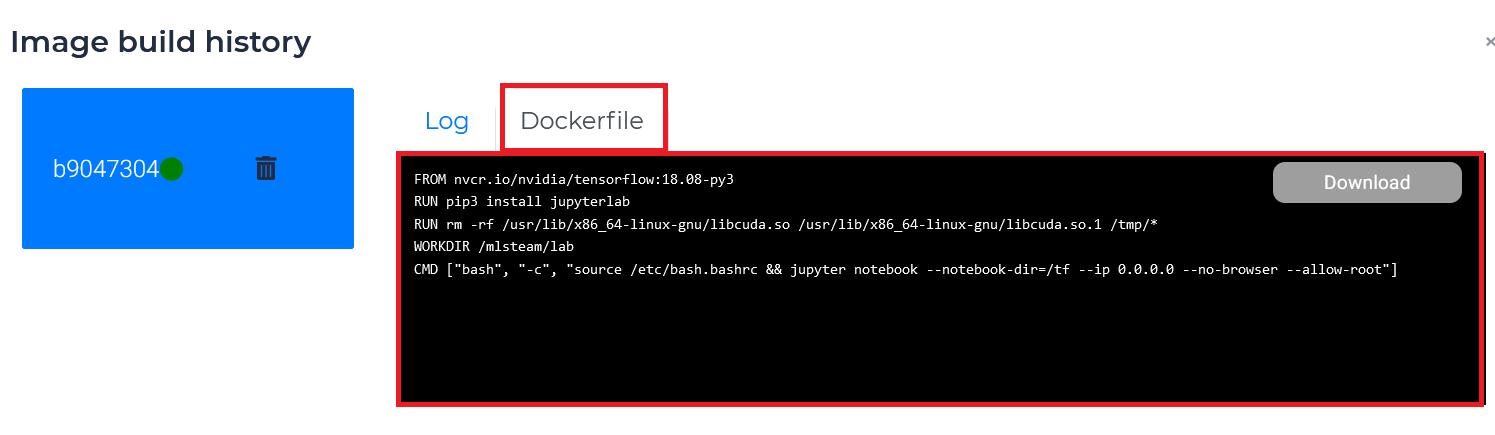
The contents of the dockerfile used to build the image are shown in the Dockerfile tab
Load Image File
Upload tar file to the dataset of your choice.
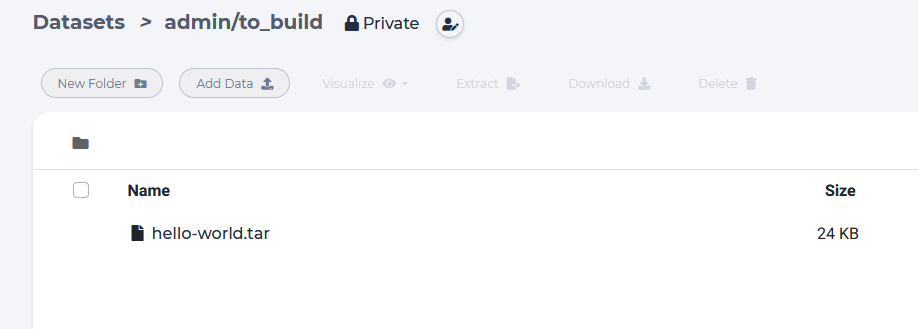
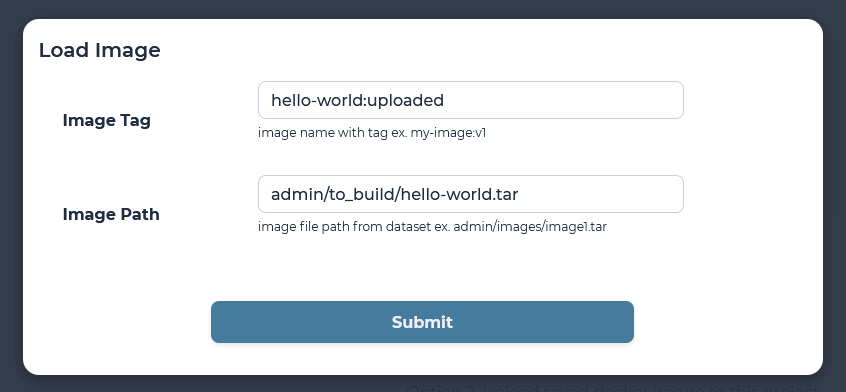
Click the “Add” button inside image list, then click “Load”.
Type prefered image tag. Type image path. Path format is the following: <username>/<dataset name>/<path in dataset>, ex: admin/to_build/hello-world.tar
Wait for image to appear on the list (might take some time for a bigger images).

Push & Pull Image
Following steps show how to manage project images from your PC Your PC has to install docker for managing images from command.
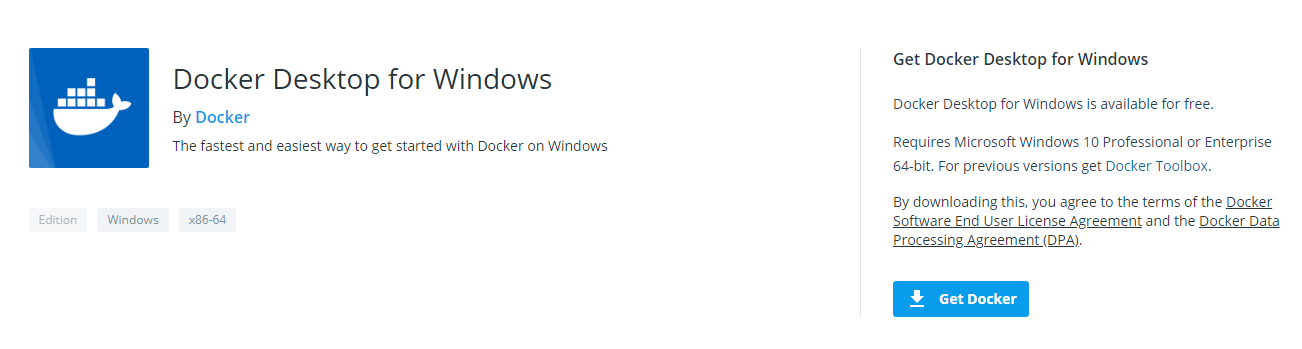
If your PC is Windows, install the Docker Desktop
Install Docker Desktop
Docker Desktop for Windows is Docker designed to run on Windows 10.
System Requirements
Windows 10 64-bit: Pro, Enterprise, or Education (Build 15063 or later).
Hyper-V and Containers Windows features must be enabled.
- The following hardware prerequisites are required to successfully run Client Hyper-V on Windows 10:
64 bit processor with Second Level Address Translation (SLAT) 4GB system RAM
BIOS-level hardware virtualization support must be enabled in the BIOS settings. For more information, see Virtualization.
You can get Docker Desktop on Windows from following link.
https://hub.docker.com/editions/community/docker-ce-desktop-windows/
Legacy desktop solution. Docker Toolbox is for older Mac and Windows systems that do not meet the requirements of Docker Desktop for Mac and Docker Desktop for Windows. We recommend updating to the newer applications, if possible.
You can get Docker Toolbox on Windows from following link:
https://docs.docker.com/toolbox/toolbox_install_windows/
Double-click Docker for Windows Installer to run the installer.
When the installation finishes, Docker starts automatically. The whale in the notification area indicates that Docker is running, and accessible from a terminal.
Please add insecure registry. Edit daemon.json for Linux OS.
Add insecure registry
Add the following contents in the daemon.json file, whose default location is /etc/docker/daemon.json on Linux or C:\ProgramData\docker\config\daemon.json on Windows Server. If you use Docker Desktop for Mac or Docker Desktop for Windows, click the Docker icon, choose Preferences, and choose +Daemon.
An example for Linux:
vim /etc/docker/daemon.json
{
    "insecure-registries" : ["<domain.sample.com>:<port>"]
    ,"runtimes": {
        "nvidia": {
            "path": "nvidia-container-runtime",
            "runtimeArgs": []
        }
    }
}
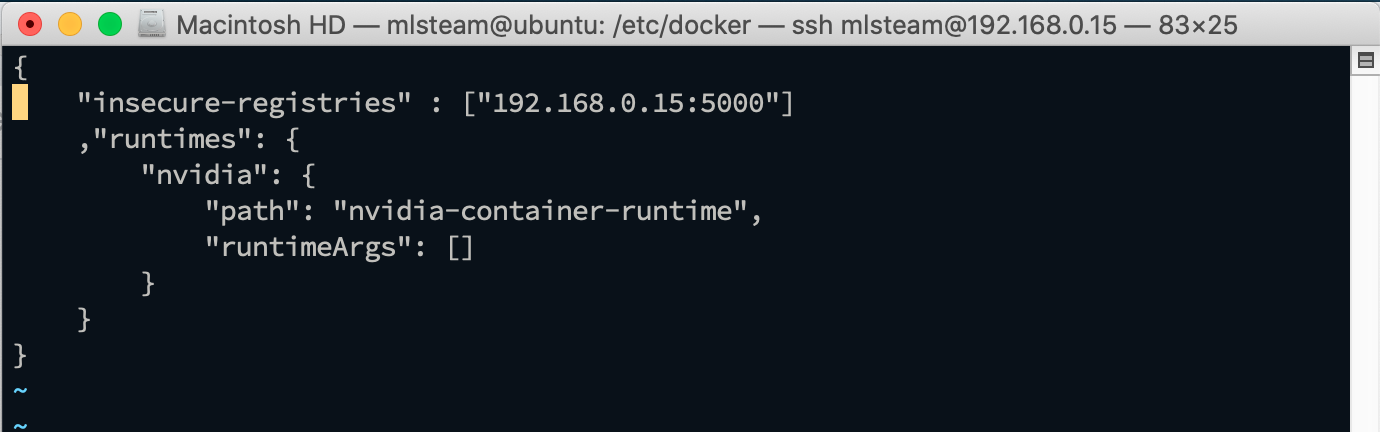
Substitute the address of your insecure registry for the one in the example.
Note
You can find the registry address in Project -> Image page.
Remember to restart Docker for the changes to take effect.
systemctl restart docker
Login registry
Turn on a terminal and login to registry.
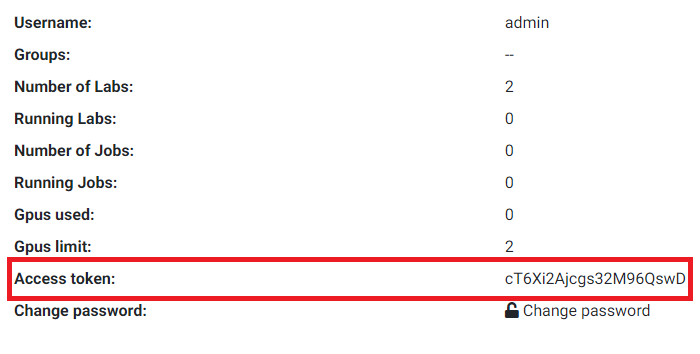
sudo echo "cT6Xi2Ajcgs32M96QswD" | docker login <domain.sample.com>:<port> -u admin --password-stdin
Note
You can find out access_token in profile page.

Pull image from the project
Your access_token can only pull images if you are project member.
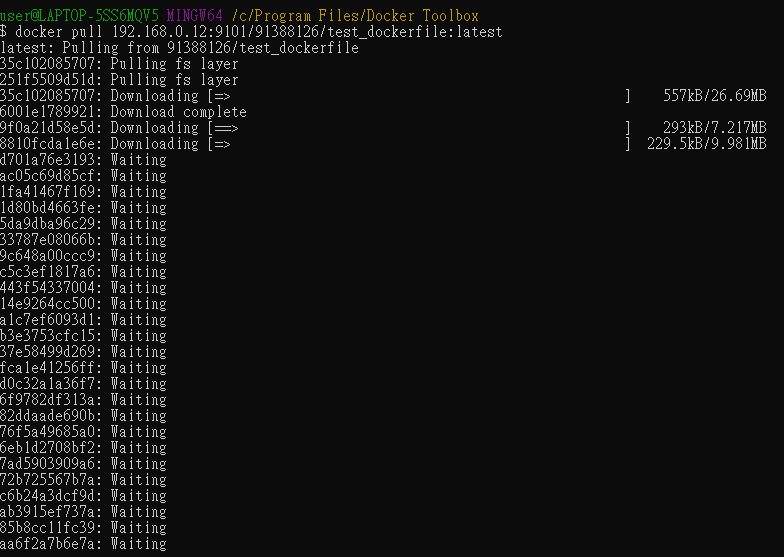
Pull the image we just uploaded.
docker pull 192.168.0.12:9101/91388126/test_dockerfile:latest
You can also pull the public image, hello-world.

Push image to the project
Tag image name under the project id namespace if you want to push the image to the project.
docker tag hello-world:latest 192.168.0.12:9101/91388126/hello-world:latest

Then, push the image.
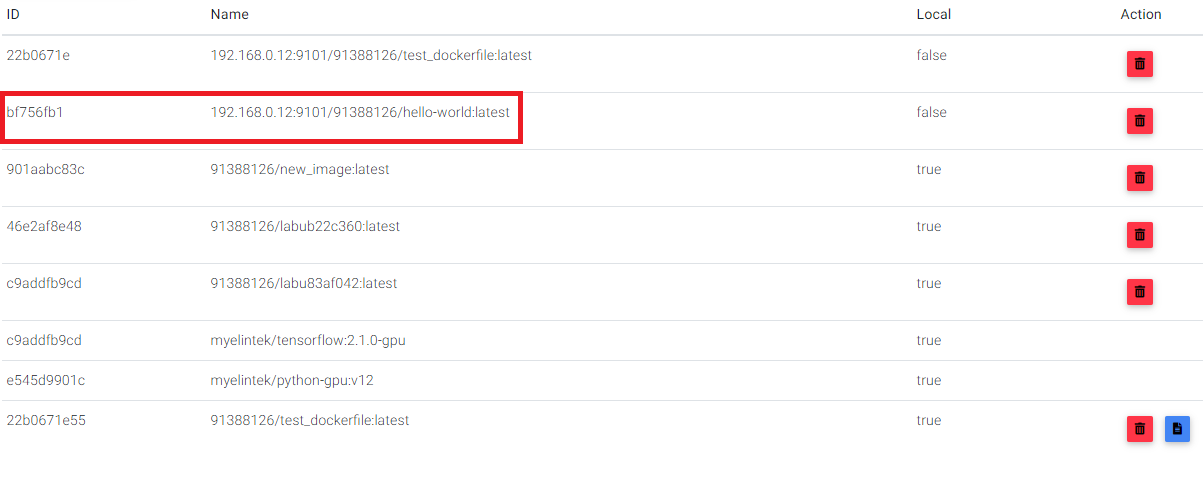
docker push 192.168.0.12:9101/91388126/hello-world

You will see the image shown in the project image list.
Download Image
Here show you how to download docker image from NGC (nvidia gpu cloud)
Step 1. click Pull button on your Image page
Step 2. put full docker image path in Image Link input and the image name you want (including namespace, name and tag)
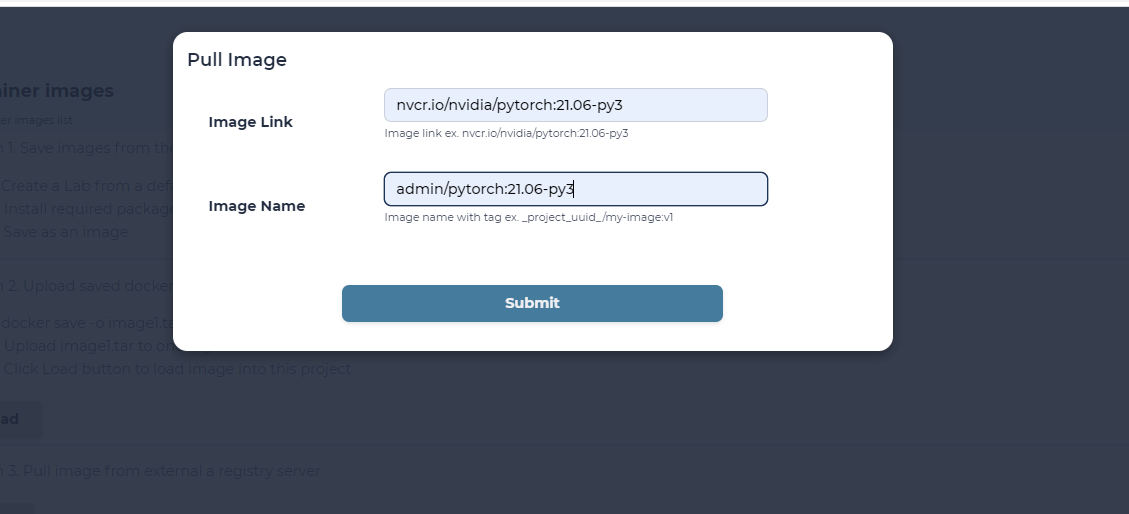
Note
Image namespace could be your project uuid, your account name, or your group name
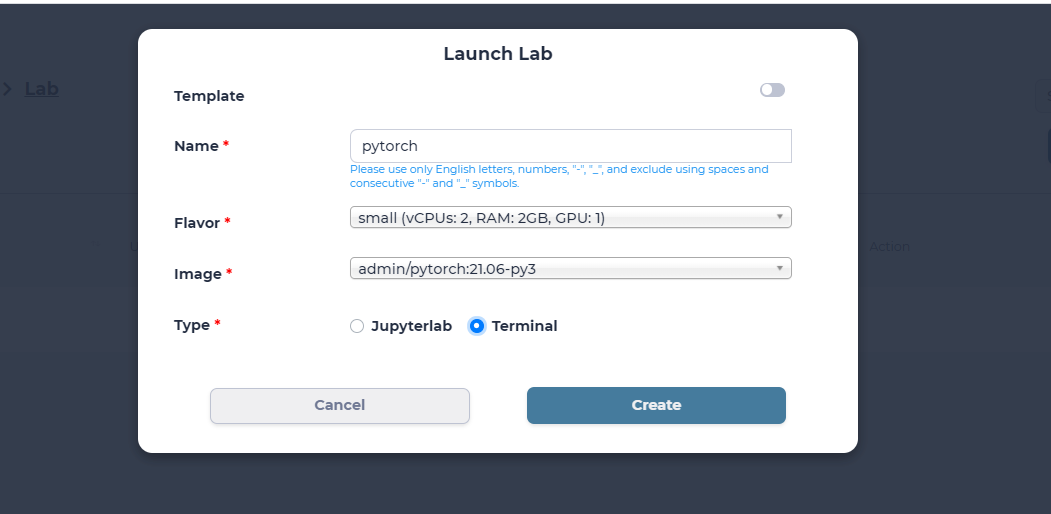
System will start pulling the image. You can see the image in the create lab page once the image downloaded.
Tag Image
Once you downloaded an image, you may want to share the image with other users. Here shows you the steps to share your image with other users in the same group
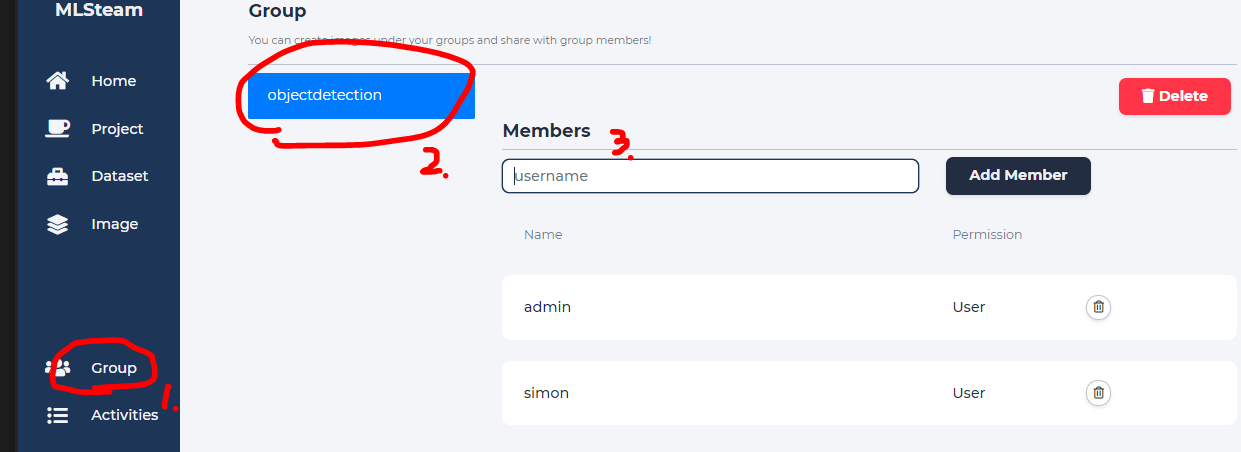
Step 1. admin should already created a group and add you and other users in the same group. You will see groups you have joined in the Group page. ex. objectdetection group Click the group name to see members in the group
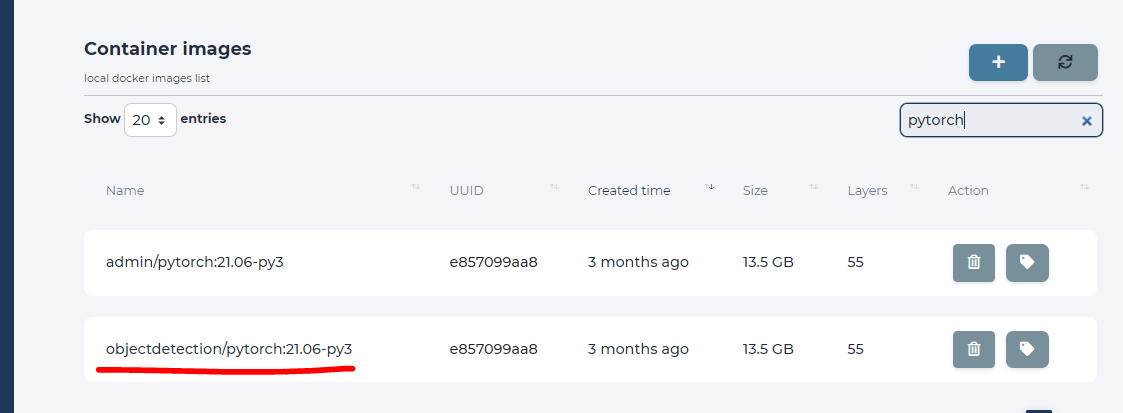
Step 2. in the Image page, click tag button of the image you want to share, type the image name with the group as namespace ex. objectdetection/pytorch:21.06-py3
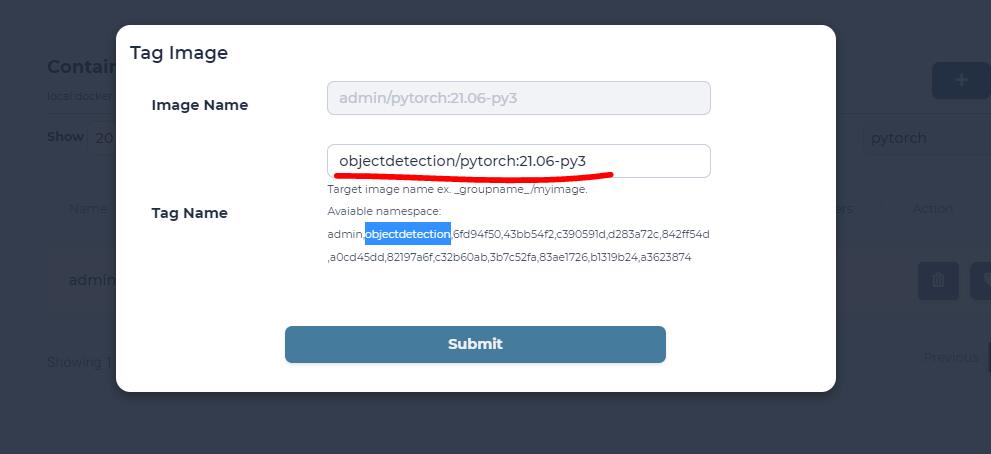
Now you will see the image in both admin and objectdetection namespaces. Other users in the objectdetection group will be able to use the image.