Project
Create project
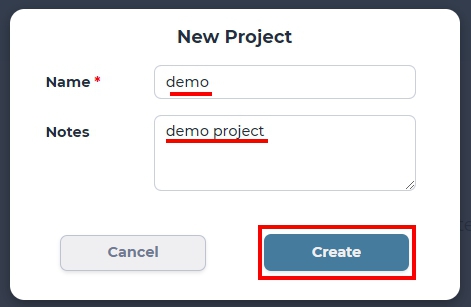
Click “Project” or “Create Project” button.

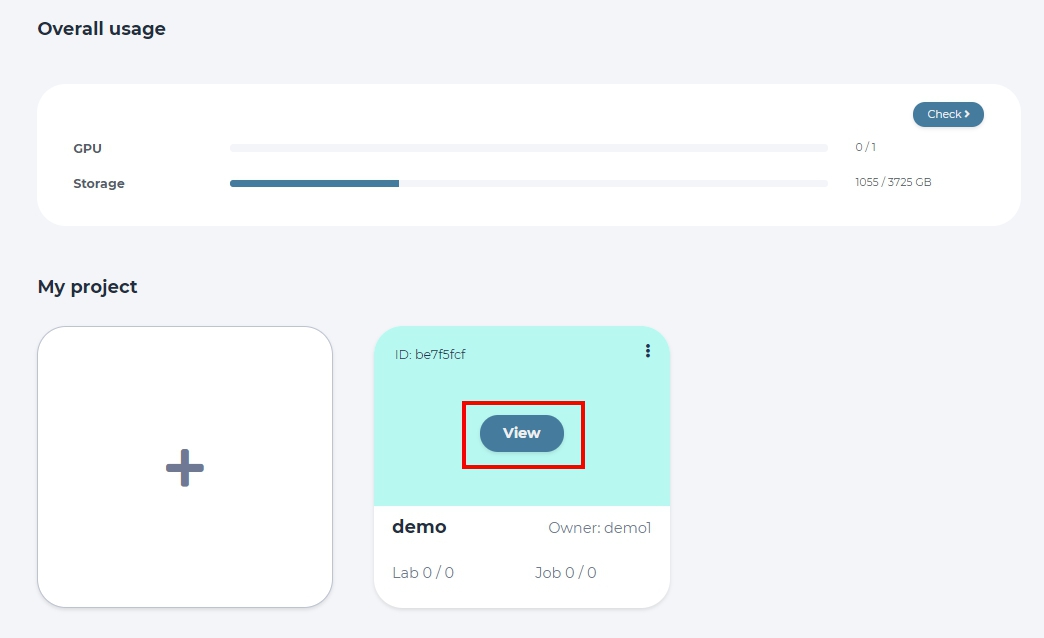
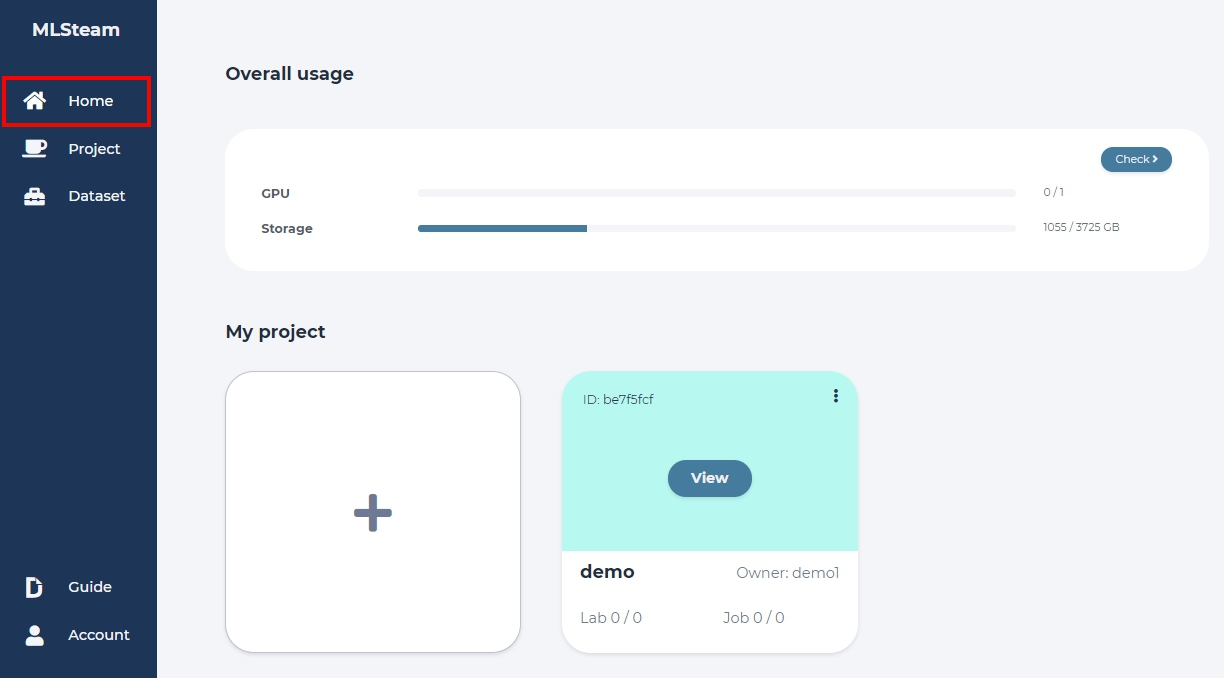
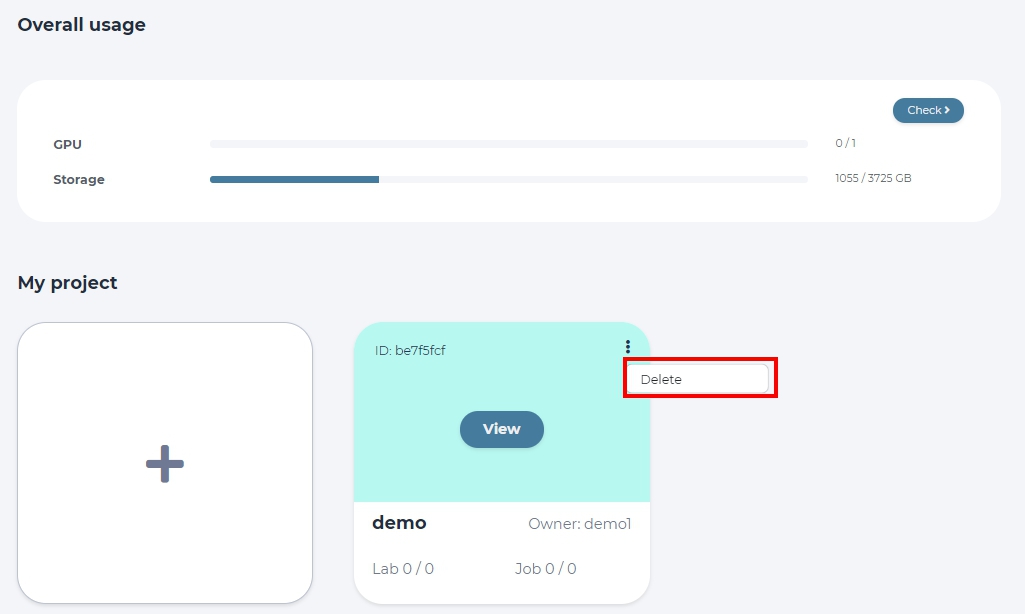
At the Home tab, you will see a dashboard with overall usage of resources available to you and browse all created projects. You can add a new project here.

Input project name and any related notes, then click “Create”.
The last created project becomes the default project and can be directly accessed from the Project tab.
View project
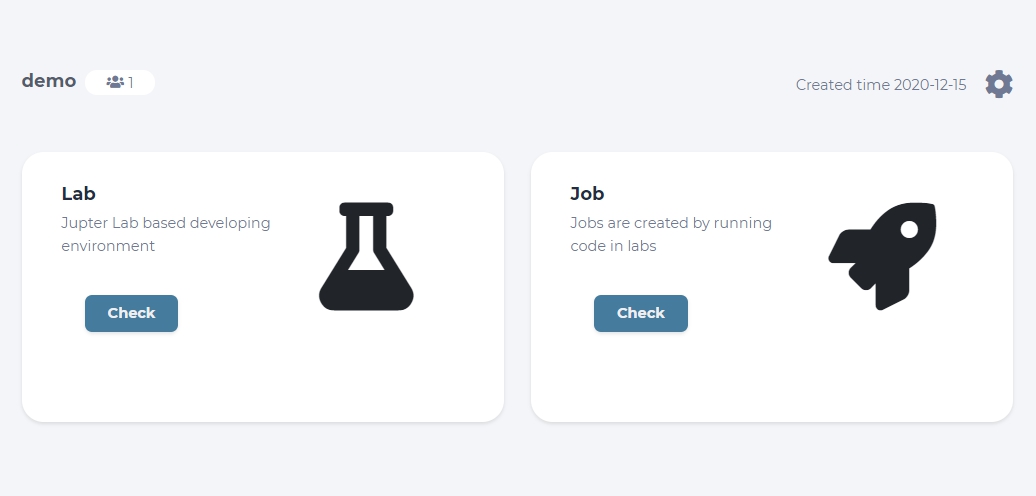
Click the “View” button to see your project status and the dashboard.
From this dashboard, you can access your Labs, Jobs, as well as settings of your chosen project.
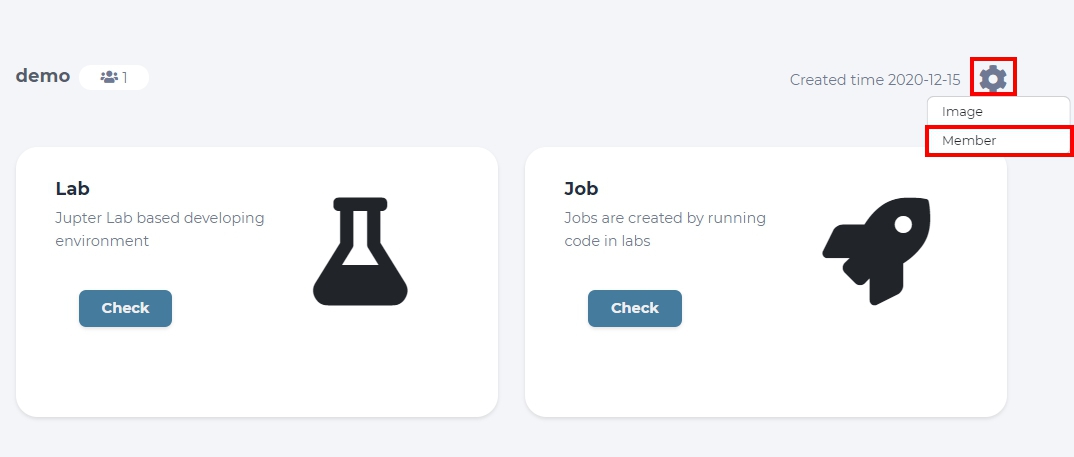
Add member
In your projects’ dashboard click the setting button at the upper right of screen and choose the “Member” option from teh drop-down list.
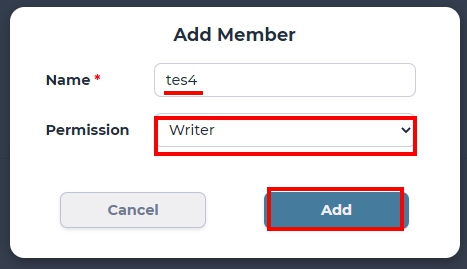
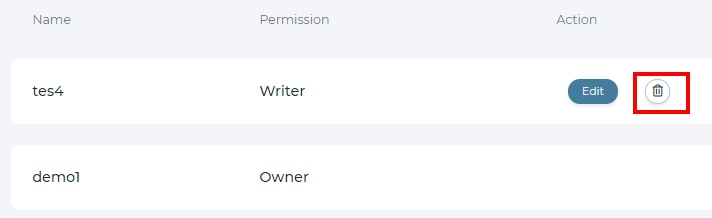
In the page you’ve been redirected, you can see all members of a given Project, yourself included. You can add other members to your project by clicking the “Add Member” button.

Write the name of the member to add and set their permission. Writer can modify your project, while Reader can only look at the code and run Jobs.
You can edit permissions by clicking “Edit” or remove an unwanted member from your project with a “Delete” button next to that users’ name.
Delete project
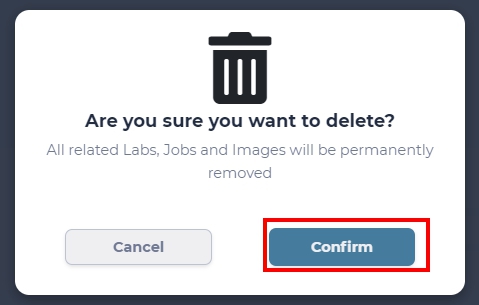
To delete a project, you must navigate back to the Home dashboard first.
Click the additional settings button at the top left corner of the project you with to remove, and click “Delete” button that will appear.
Make sure you have selected the right project for removal and then confirm this change.