Image Classification
This part will show how to train an image classification model from template.
Quick start
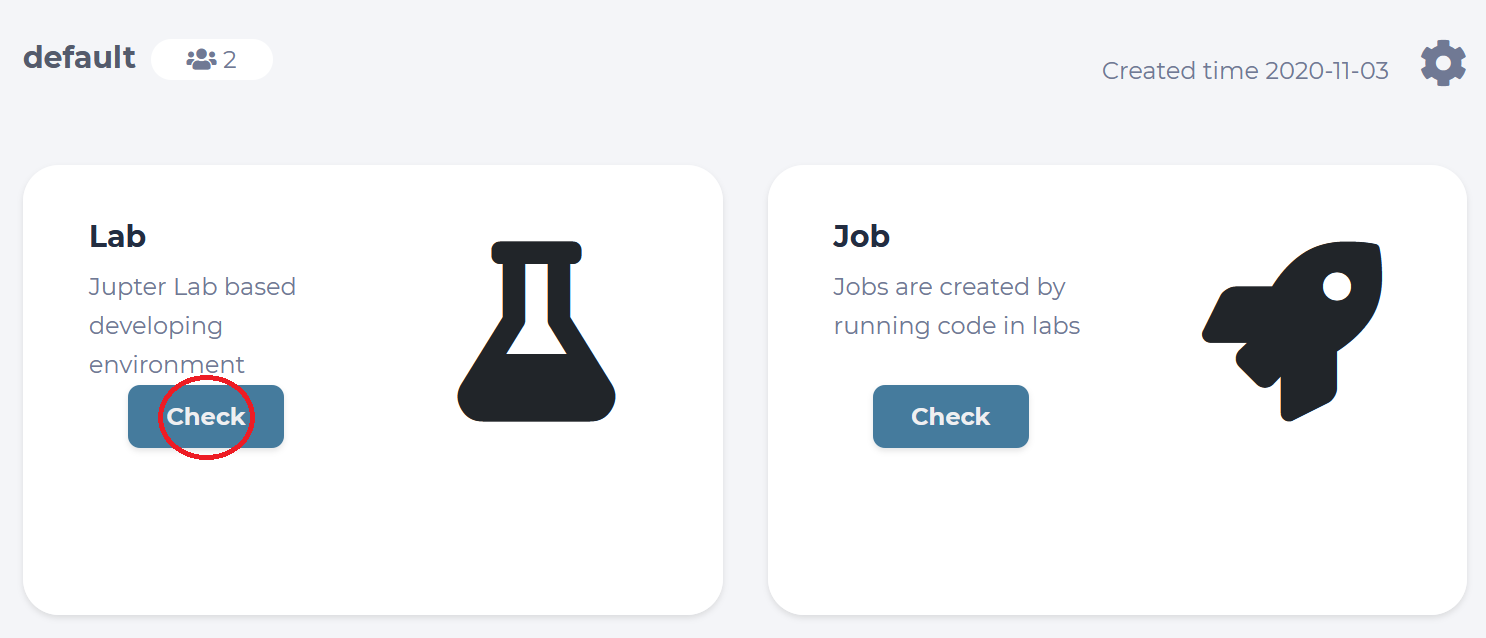
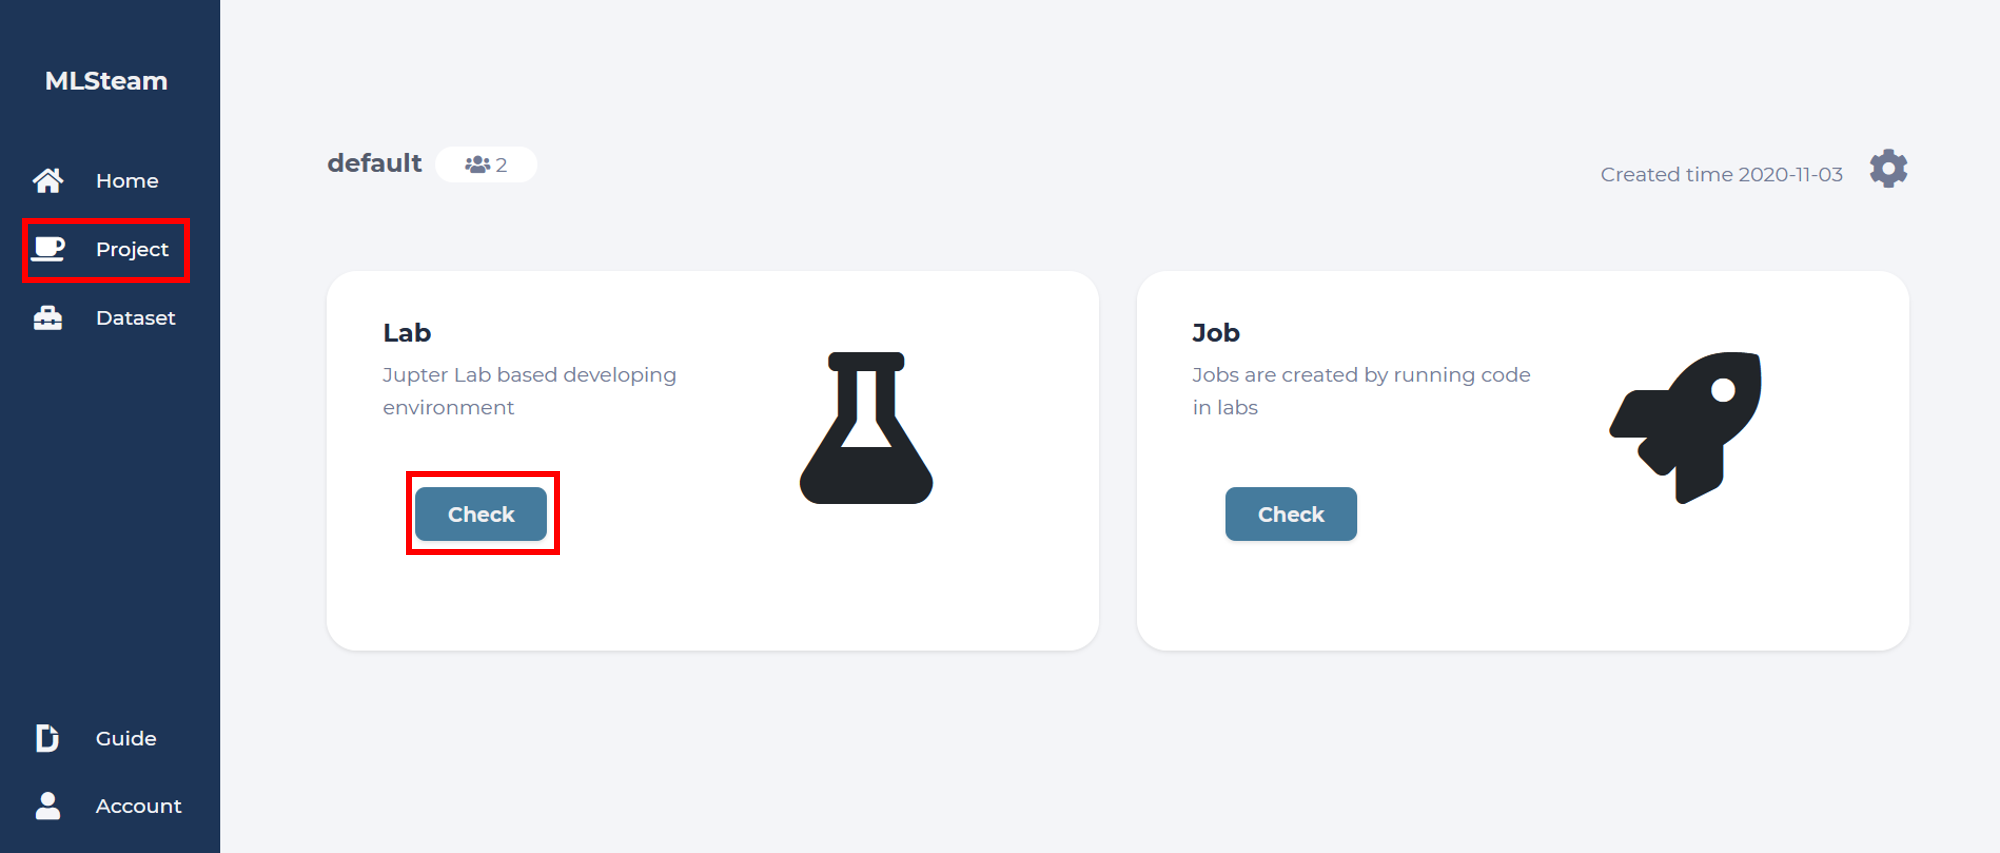
In the left bar click “Project” to enter your default project or create new project.

Enter the Lab environment by clicking “Check” button on the Lab board.
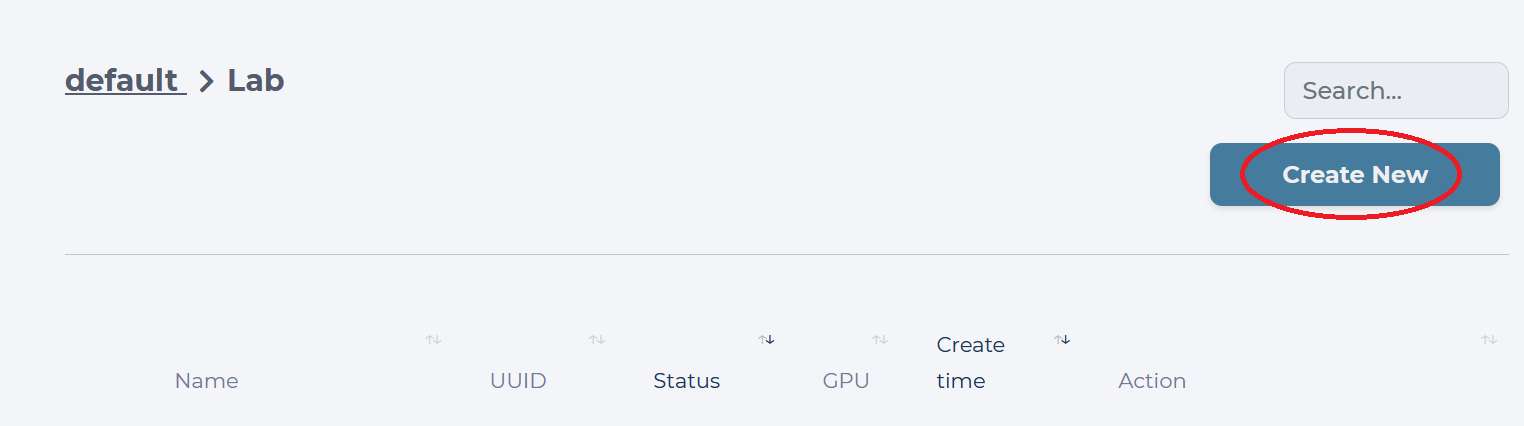
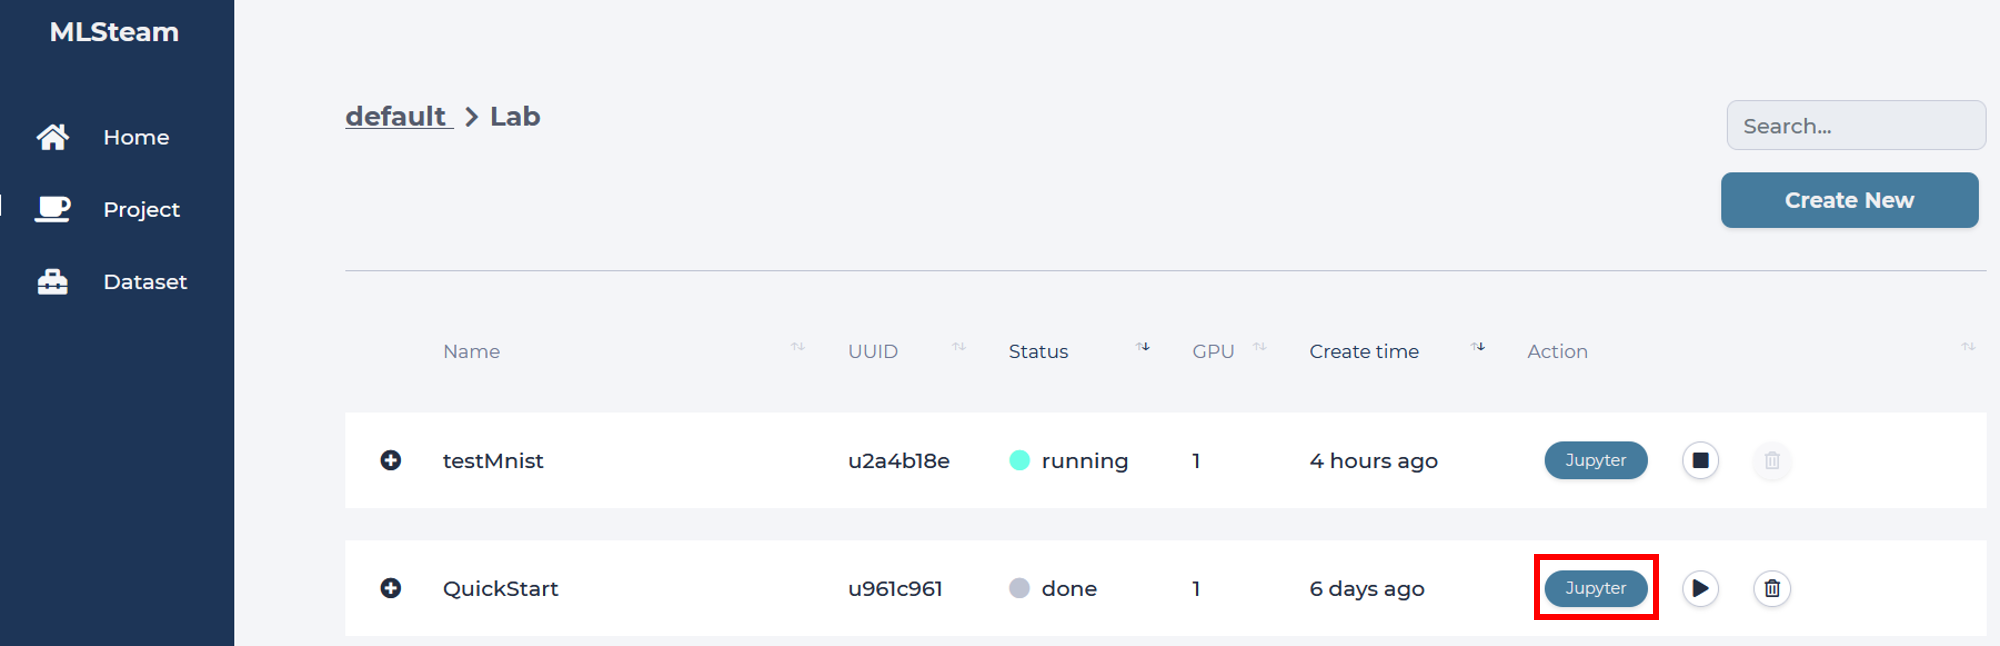
Inside your default Project, you will see all Labs you have created. Our goal is to create a new Lab using the template for classification, so we click the “Create New” button.
We are prompted with the “Launch Lab” window, where we need to toggle the “Template” option, come up with a name for this new Lab, choose a “Flavor” for it, and finally select which template to use.

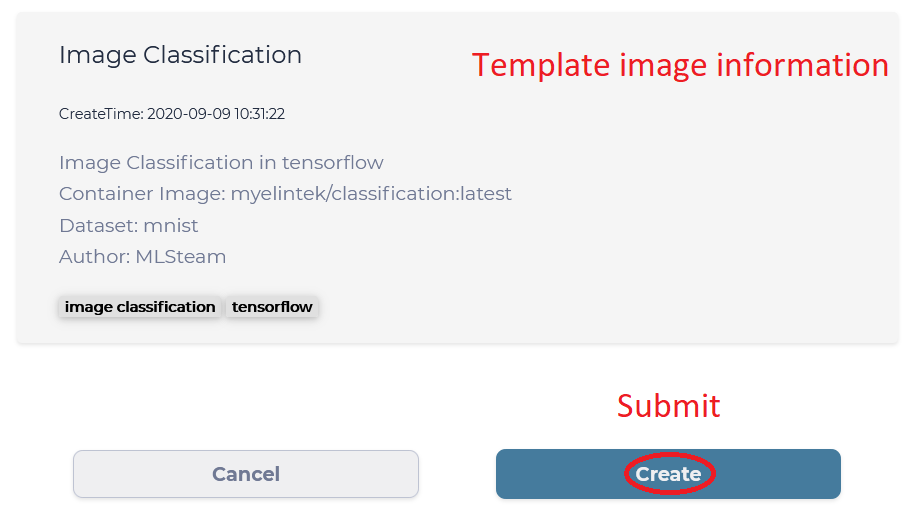
We will use “QuickStart” as the name of the Lab in this guide, but you are free to give it any name shorter than 12 characters. “Flavor” of the Lab tells us what kind of hardware is available, and “small” Flavor should be enough, since it has one GPU we can utilize inside the Lab. Finally, “Image Classification” template is the one we need for this guide and it already has the MNIST Dataset attached and ready to use. Click “Create” button to submit this new Lab.
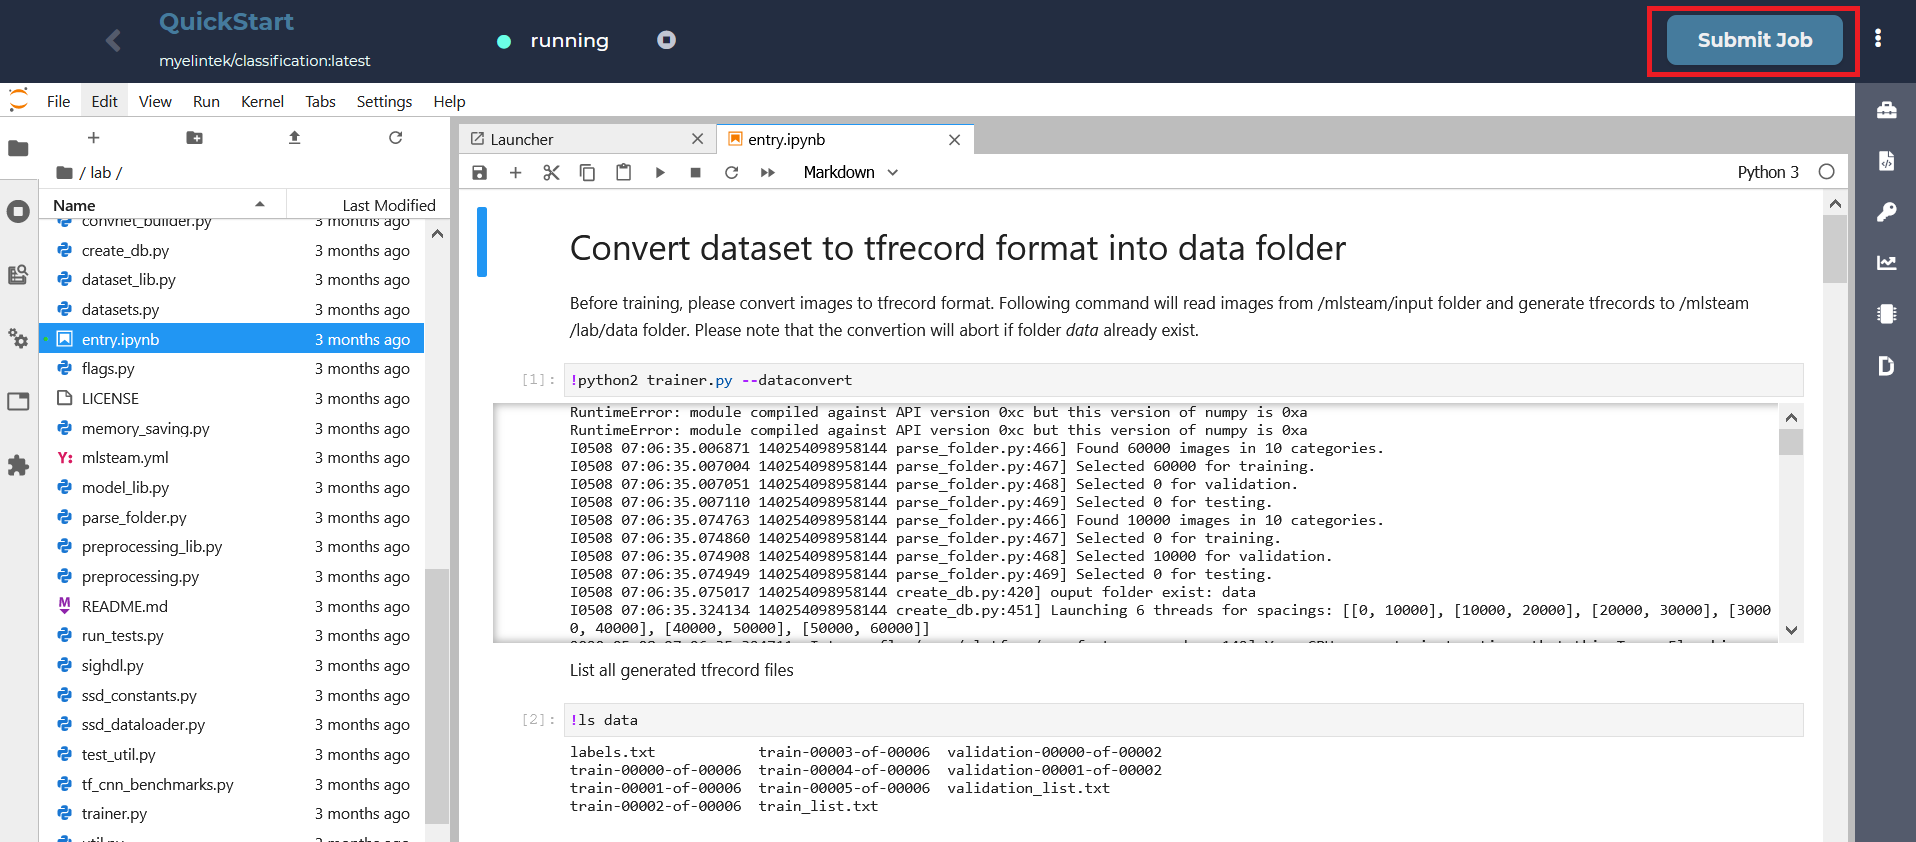
To start a training job from this template, we need to click “Submit job”.
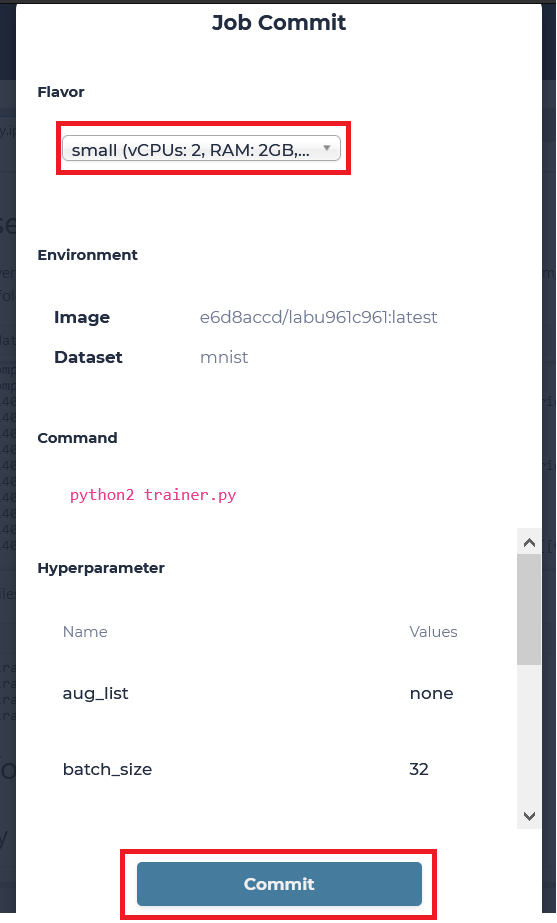
Choose a desired flavor and commit our job to start. We will be transferred to see all Jobs of our default Lab.
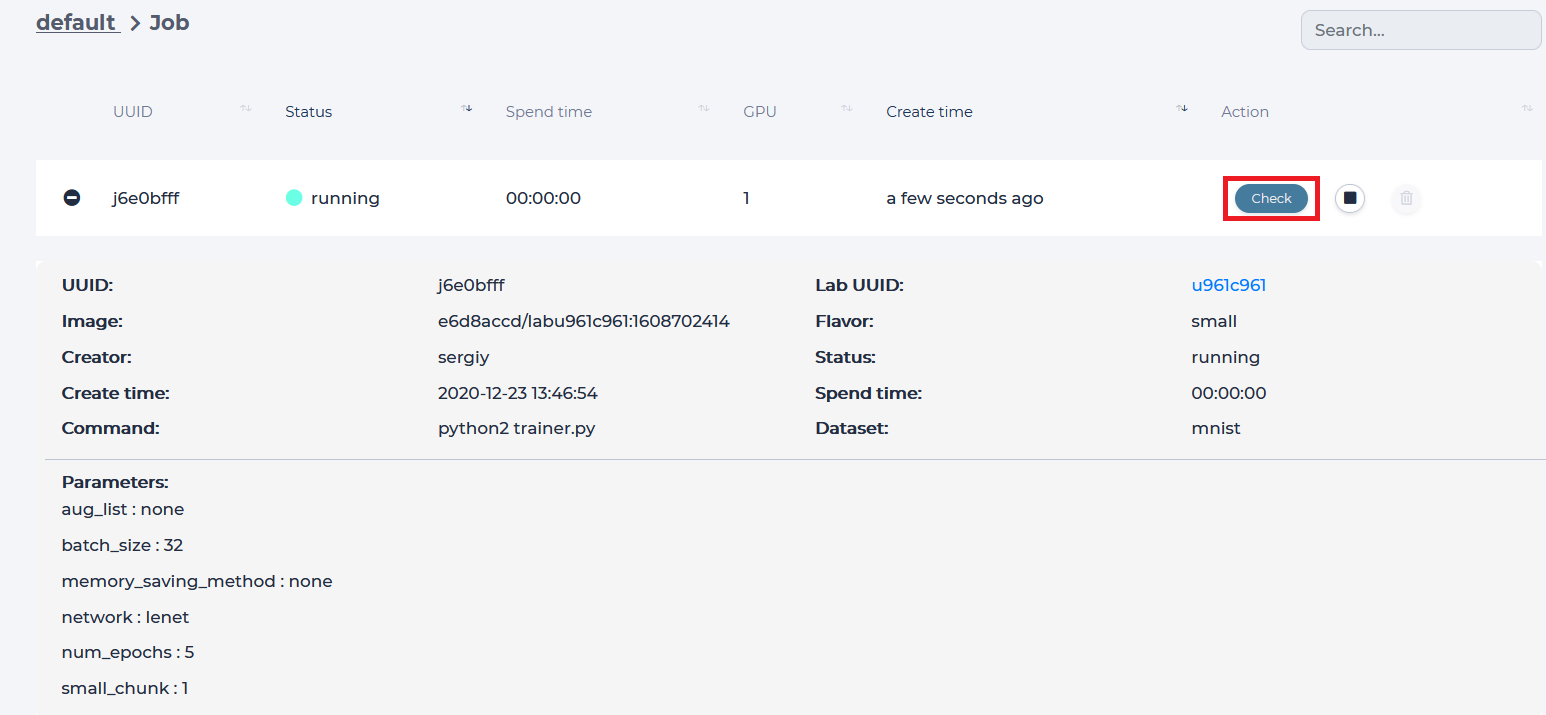
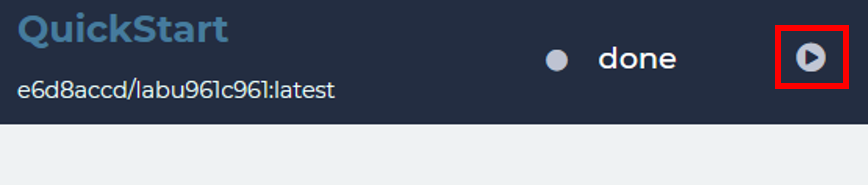
Click on the Lab UUID to return to the Lab, which started this Job or press the “Check” button to view the progress of this Job.
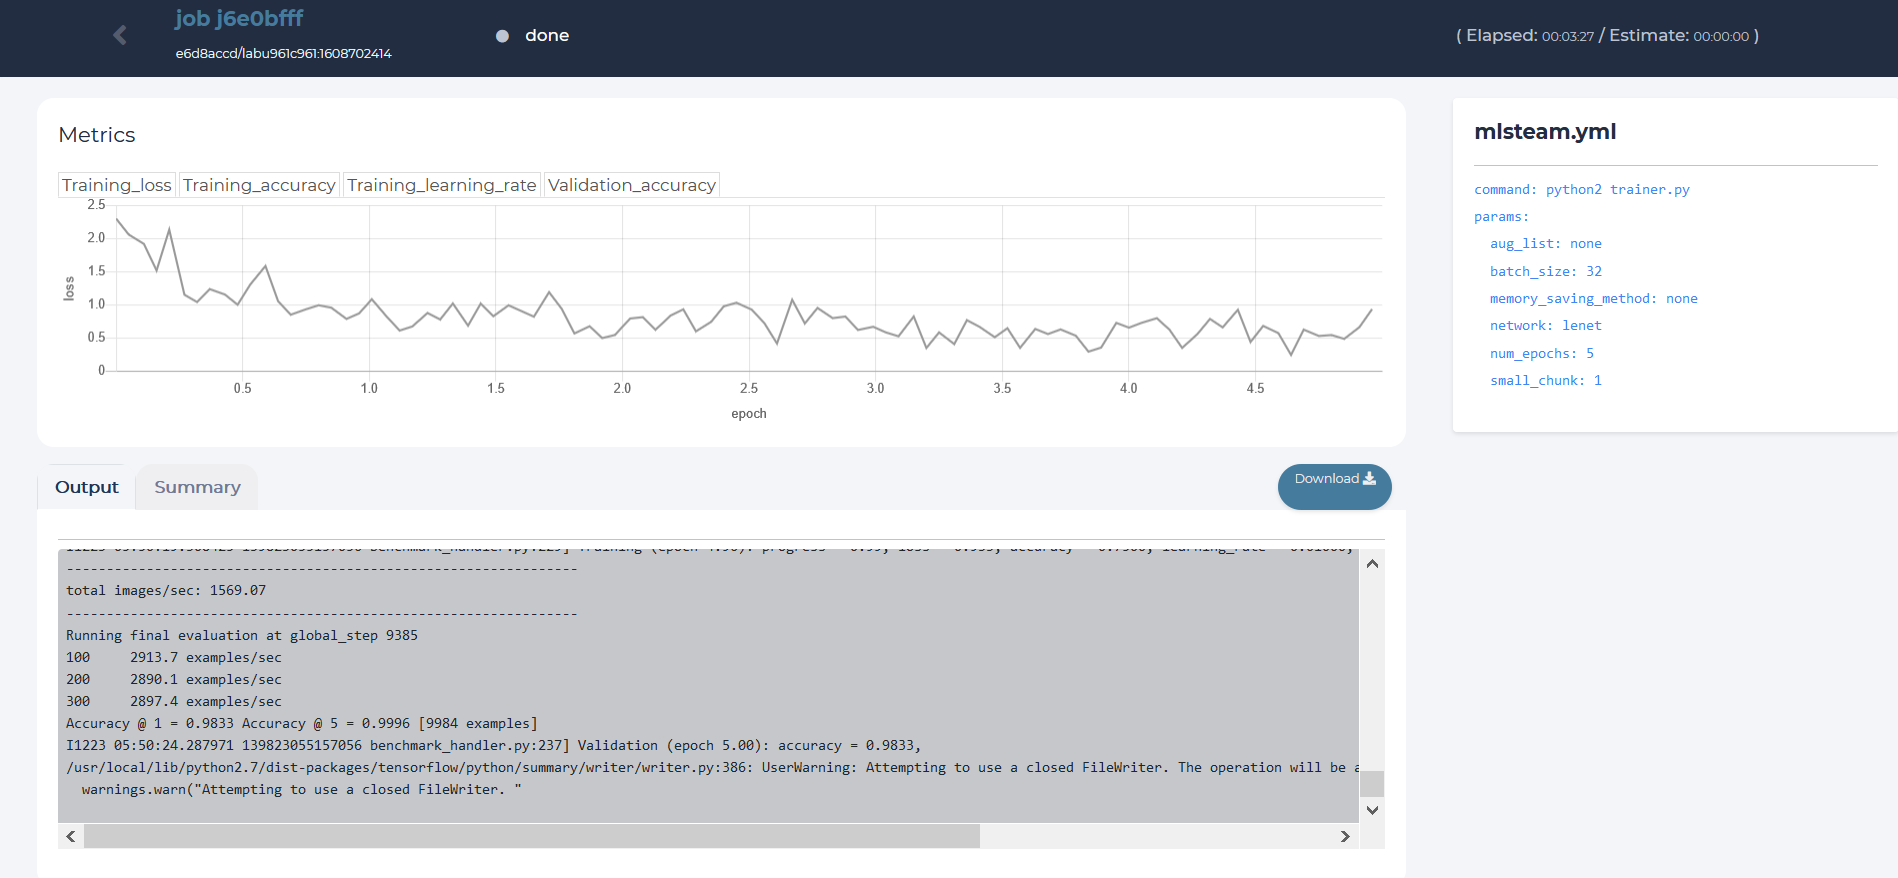
Job page displays
Loss value graph
Log output
Configuration file (mlsteam.yml)
Job name, used docker image name, status indicator, elapsed and estimated time(top panel)
Use your own dataset
First create lab from classification template and enter attached lab.
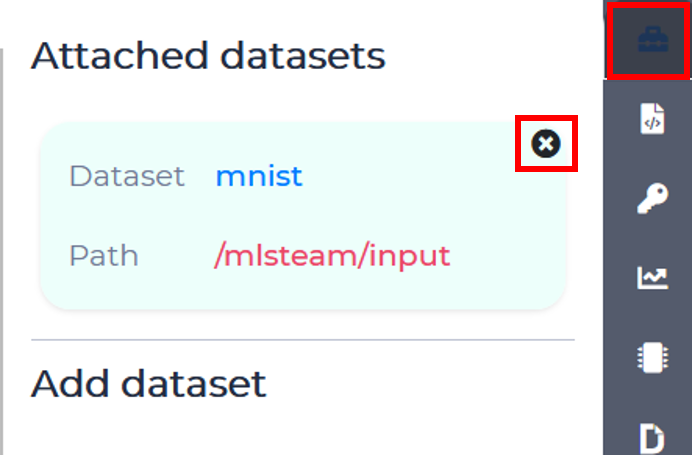
MNIST dataset attached to the Image Classificaiton is read-only by default, so you will not be able to make any changes to it. In order to use an arbitrary dataset, we need to create an empty dataset and attach it to the lab. In this example it will be called “demo”.
For this go to Dataset page and click “New Dataset”. Then enter dataset name and click create.
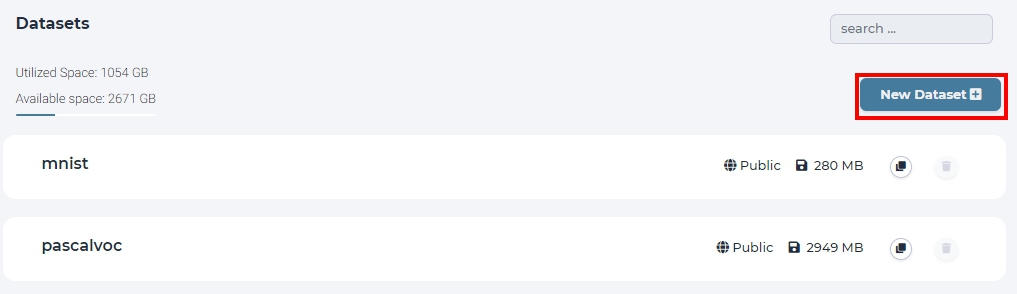
click new dataset button on the dataset page
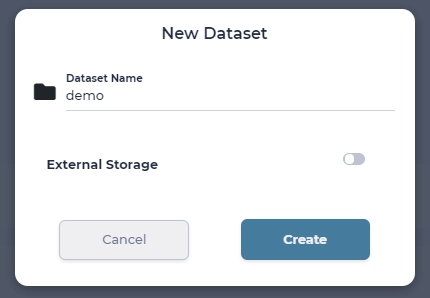
named ‘demo’ for this dataset
This will create an empty dataset, where you can upload your custom dataset. Typically, a dataset needs to follow certain structure, we describe structure used in the classification template below.
Folder format
If non-standard dataset is needed, convert it to the next folder format yourself. Create train and test folders each with subdirectories of classes.
train
|----- class1
       |----- trimage1
              trimage2
              trimage3
              ...
       class2
       ...
test
|----- class1
       |----- valimage1
              valimage2
              valimage3
              ...
       class2
       ...
After creating a dataset with required structure, we need to upload it into MLSteam platform
Upload files to dataset
To upload files to a dataset, simply drag and drop files from local PC or click Add Data -> Local -> Browse to select local files.
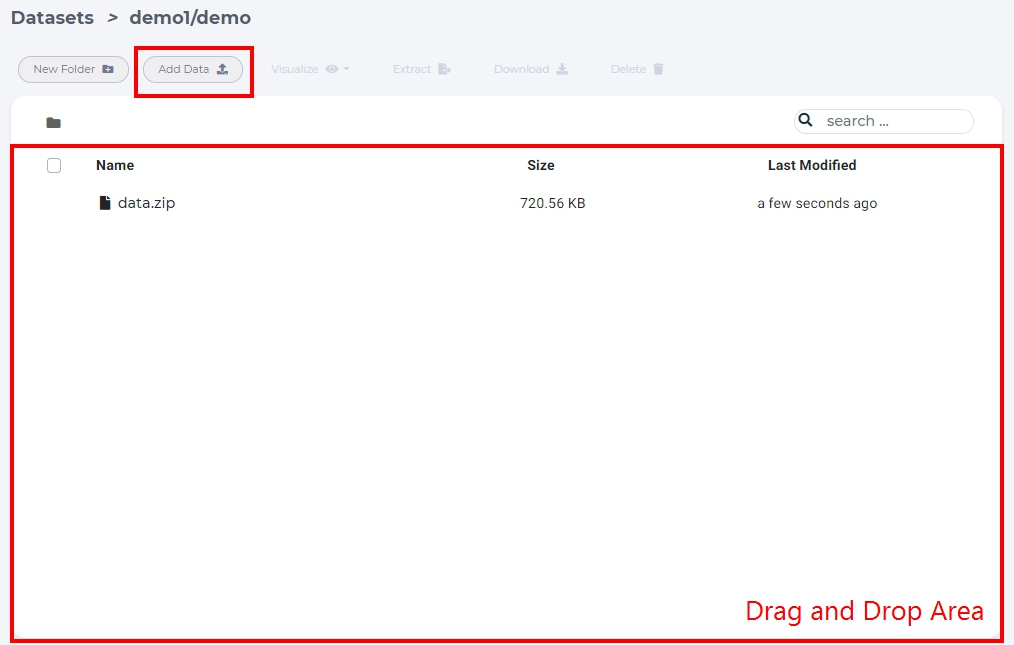

Extract files from archive
Uploading too many files at the same time will cause your web browser to freeze. A better way to upload large collection of files is to compress them first into one archive file and uncompress the file on the dataset page.
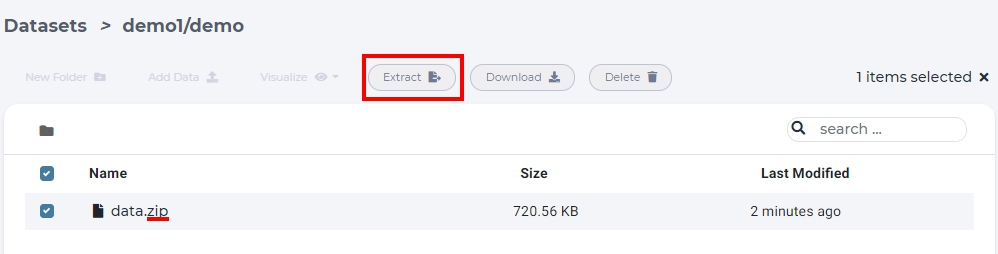
select archive file and click “Extract”.
Tip
Supported compress file format tar, tgz, tar.gz, zip.
Attach custom dataset
After creating the dataset, we need to go back to the template lab. For this click “Project” -> “Lab”.
Click start button to start the lab.
Detach the MNIST dataset in the dataset tab
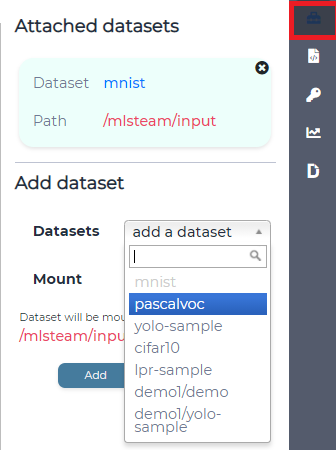
To attach dataset to lab enter it’s name and click “Attach dataset”.
Training hyperparameters
MLSteam platform supports native change of training parameters via a friendly UI. To enable this feature, you must specify your hyperparameters in the mlsteam.yml file. Let’s check the structure of this file provided in the classification template.

When you submit a Job to run this Lab, the command line will be run with optimons specified after the params keyword. Parameters from this YAML file can be automatically set and changed from the Parameters tab on the right side of the screen.
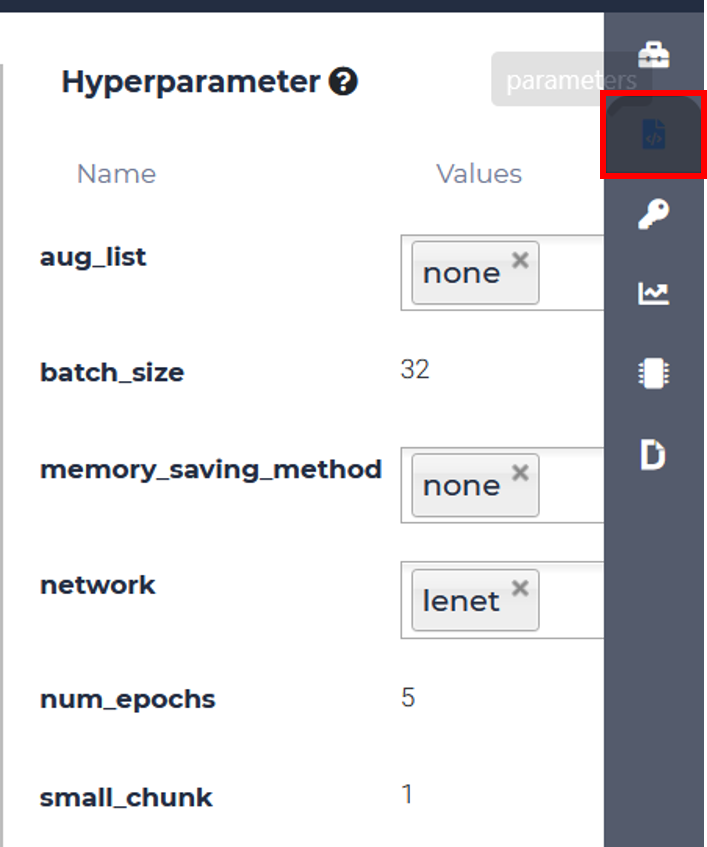
Classification Template Parameters (optional)
For this classification template, following parameters are supported:
aug_list
num_epoch
batch_size
memory_saving_method - whether to apply or not GPU memory optimization
small_chunk - forward accumulation times on each GPU
network - network .py file to use
aug_list
none - do not apply any augmentation mechanism.
color_distortion - apply color distortion to training images
flip_random - randomply flip training images.
both - use both options.
num_epoch
Specify the number of times we run through the while training dataset, positive integer
batch_size
Specify the number of datapoints to compute gradient on at once, positive integer
memory_saving_method
none - do not apply any memory saving mechanism.
recomputing - update graph to minimize GPU memory utilization.
small_chunk
Small chunk number means number of forward accumulation times on each GPU before doing backforward propogation. This can speed up GPU computing in multiple GPU setup when no nv-link is presented.
network
Specify which network to use.
lenet
resnet50
vgg16
Example
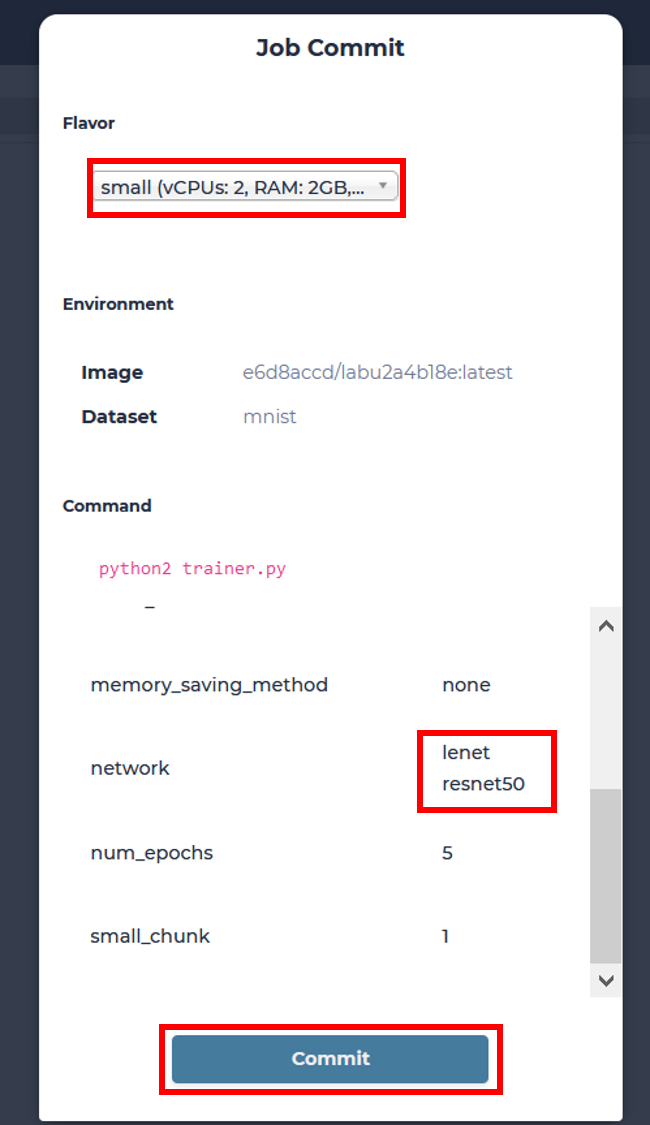
MLSteam allows users to automatically run multiple jobs with every combination of parameters they have specified. We will compare how 2 different networks will perform on the same classification task using MNIST dataset. First, modify the parameters tab to add another network.
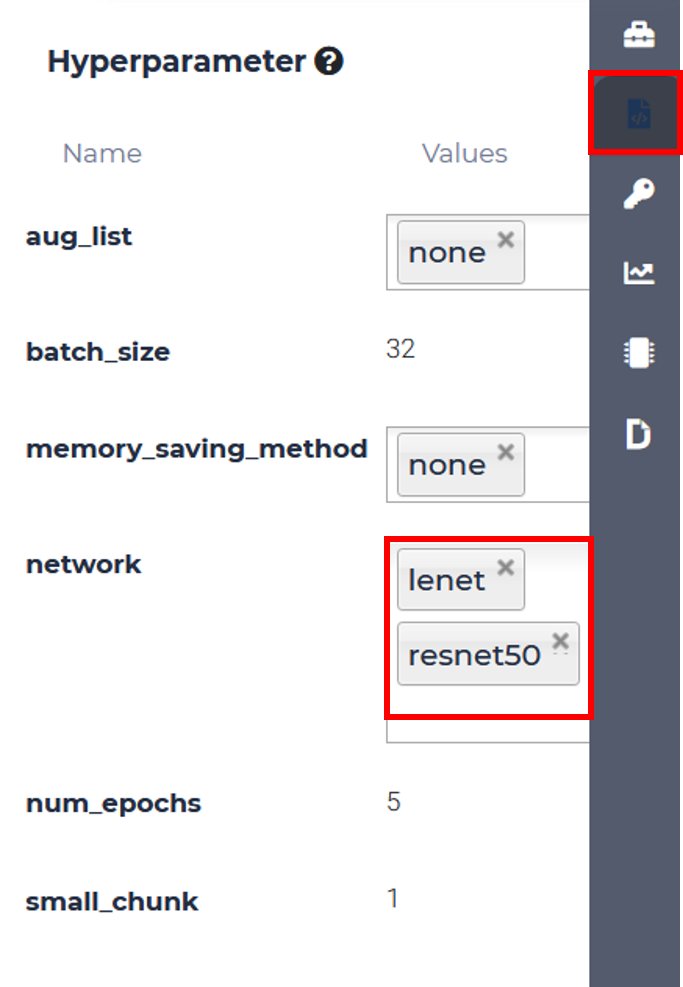
Then simply click Submit Job, choose an appropriate flavor, and MLSteam will do everything else for you!
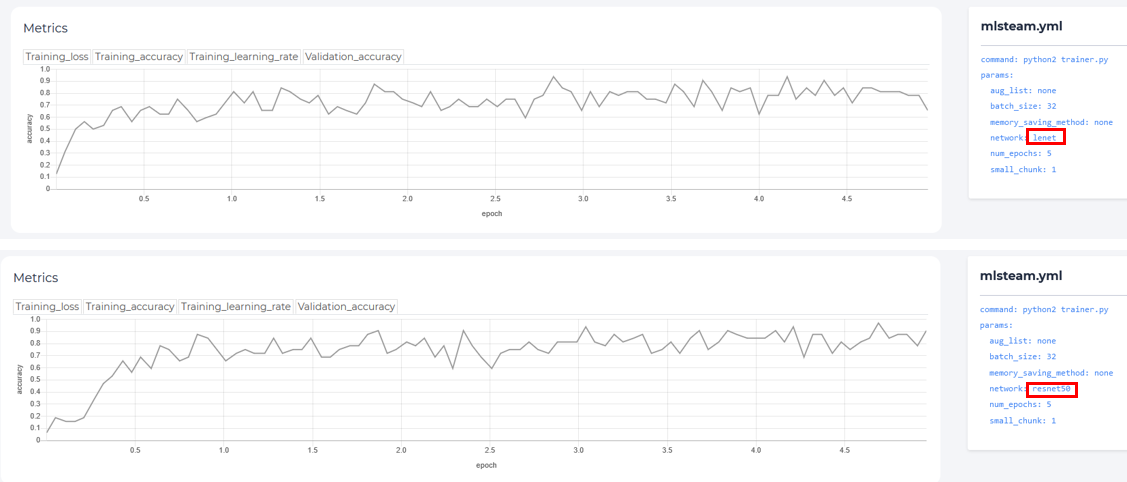
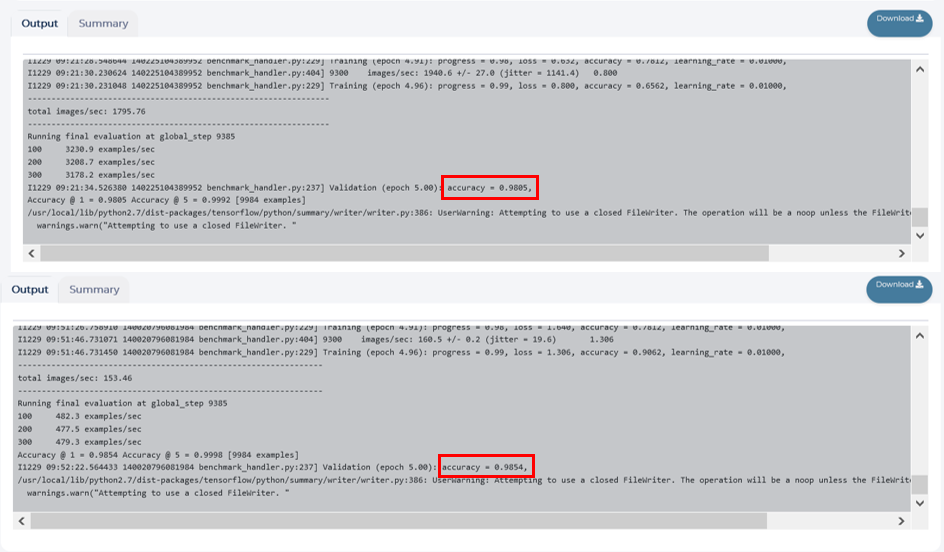
Two jobs have started running. You only need to check the results, after they are ready.

Note
Notice that each job uses a GPU, make sure you don’t run out of GPU resources!
There’s a 30min difference between training time of 2 different networks.

Final validation accuracy is only slightly higher for resnet50 (0.9854 vs. 0.9805), but training time is significantly larger
How to use TensorBoard
TensorBoard provides the visualization and tooling needed for machine learning experimentation:
Tracking and visualizing metrics such as loss and accuracy
Visualizing the model graph (ops and layers)
Viewing histograms of weights, biases, or other tensors as they change over time
Projecting embeddings to a lower dimensional space
Displaying images, text, and audio data
Profiling TensorFlow programs
And much more
Tip
TensorBoard working with TensorFlow-based code.
Starting TensorBoard
Summit a job in the first, and wait for the job finished.
Then specify the file path of training result in logdir and click start. (The default directory is /mlsteam/output)

Click the url for starting TensorBoard.

For more details, please see the link https://www.tensorflow.org/tensorboard/get_started.