Folder
A Folder is a collection of data organized in files and directories. Files in folder, like dateset, could be used in labs for model training and validation.
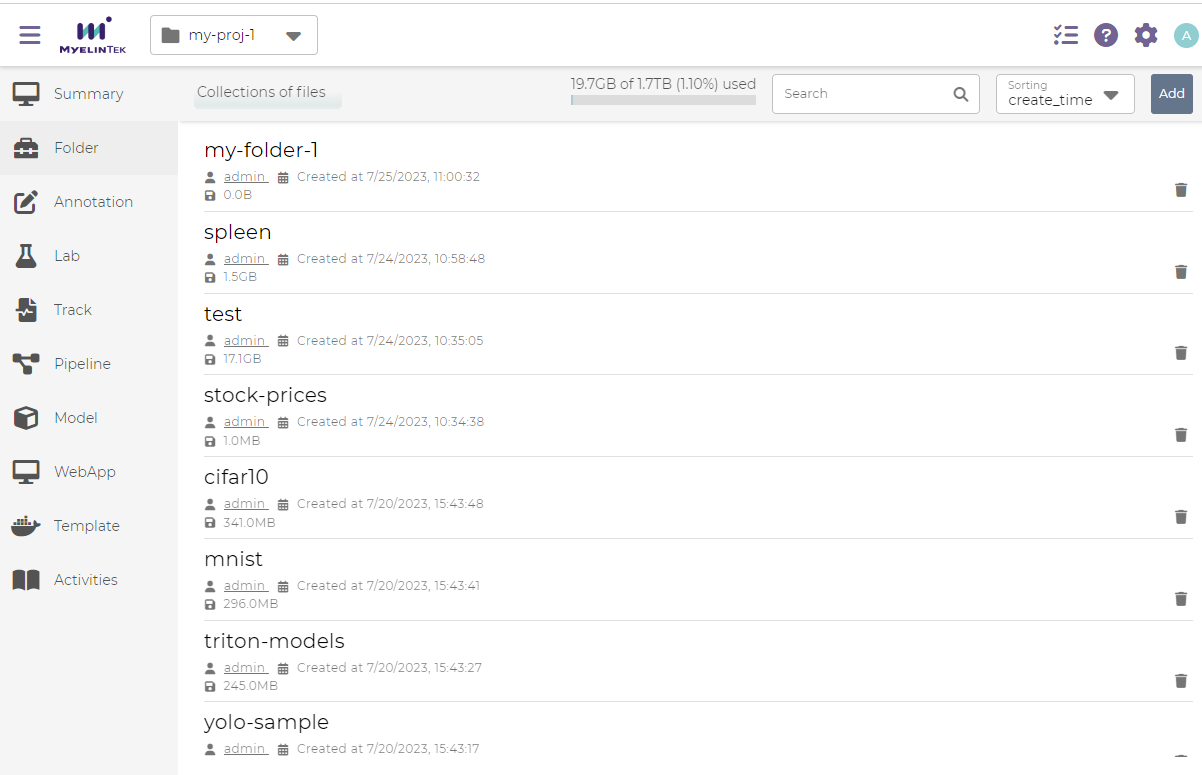
The project folder page lists all project-scoped folders for the current project. A system folder is not accessible by a project before it is added as a project-scoped folder.
A folder could have multiple versions by creating snapshots and could also revert to a previous saved version. (snapshot only support btrfs filesystem)
Create and Manage a Project-Scoped Folder
To create a folder:
Click on the ADD button in the folder page.
Select the folder type and fill in the fields:
Empty Folder (create an empty folder stored in the MLSteam system space):
Folder name: folder name
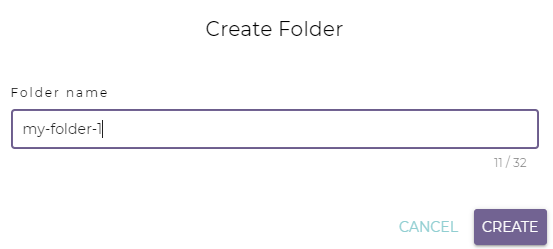
Mount NFS (mount an existing folder stored in a remote NFS space):
Name: folder name
NFS server path: NFS share path. E.g.,
192.168.0.1:/nfs/folder-1
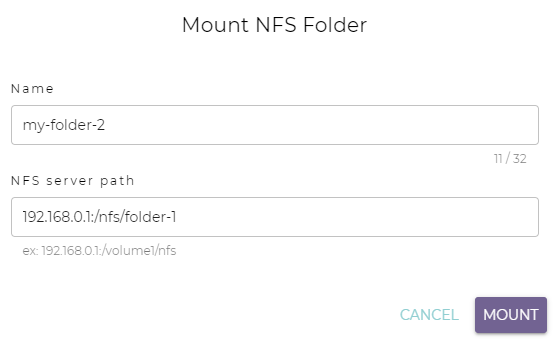
Mount CIFS (mount an existing folder stored in a remote CIFS/SMB space):
Name: folder name
CIFS server path: CIFS share path. E.g.,
//192.168.0.1/share/folder-xUser: CIFS username
Password: CIFS password
Note
Using a mounted folder is essentially accessing a remote network folder. There are no requirements for the internal folder or file structure of a remote network folder to mount. Changes to such a folder will be written to the remote space.
Click on the CREATE or the IMPORT button.
More operations on a folder are available in the folder page.
To create a folder in a folder:
In the folder page, click on the NEW FOLDER button.
Input the folder name.
Click on the OK button.
To upload files to a folder, drag and drop the files into the files area.
Another method for file uploading:
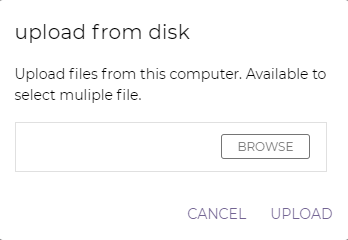
In the folder page, click on the New button, and select File From Disk or File From URL
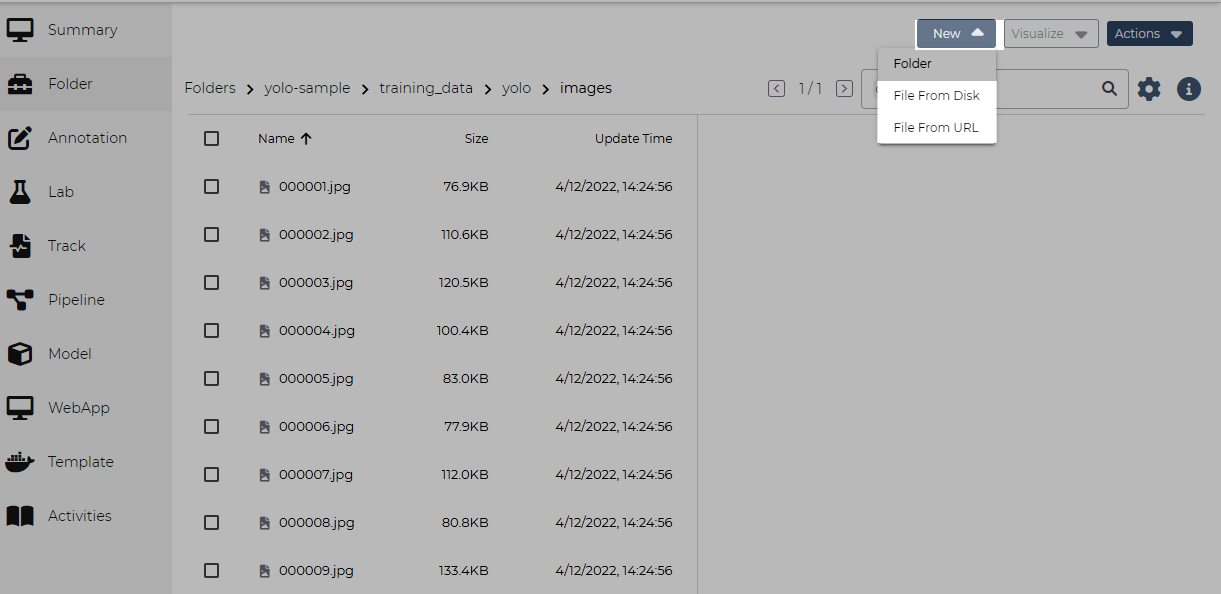
To add files from disk, click on the BROWSE button and select a local file to upload. Repeat this step to add more files.
To add files from URL, input the remote link of web source data. Repeat this step to add more URLs.
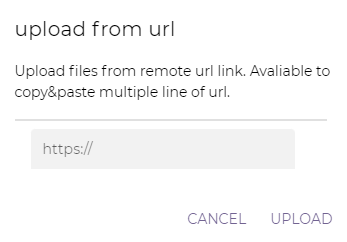
Note
Password-protected links are unsupported.
Click on the UPLOAD button.
Note
To upload many files efficiently:
Compress all files in an archive file (.zip, .tar, .tar.gz, or .tgz).
Upload the archive file.
Extract the files from the archive.
To extract the files from an archive:
Select the archive file for extraction (.zip, .tar, .tar.gz, or .tgz).
Click on the EXTRACT button.
Click on the OK button.
To download a file from the folder:
Select the file to download.
Click on the Action button in the top toolbar or simply right-click, then select download in function list.
To delete one or multiple files from the folder:
Select the file(s) to delete.
Click on the Action button in the top toolbar or simply right-click, then select delete in function list.
Create a Project-Scoped Folder by Cloning
In situations where modifications to a read-only folder (such as a built-in folder) is needed, or to leverage a folder that belongs to another project, one could clone the folder of interest and use the clone instead.
To clone a folder:
Click on the ADD button in the folder page.
Select Import folder from the menu.
Select the folder to clone.
Note
folder belonging to the current project are not listed here. To modify such a folder and to preserve its current data, snapshot the folder instead.
Click on the IMPORT button.
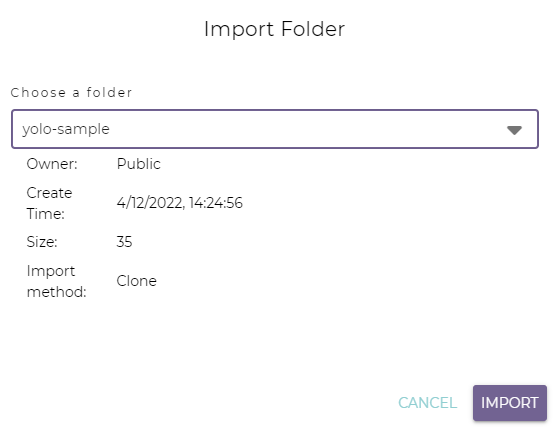
Note
The cloned folder will belong to the current project and be accessible by the labs and pipeline in the same project.
Delete a Folder
To delete a folder:
Clock on the delete button.

Click on the OK button.
Note
Deleting a mounted folder does not delete the folder contents; it only removes the linkage to the remote space.
Deleting a folder does not affect its cloned folder(s).
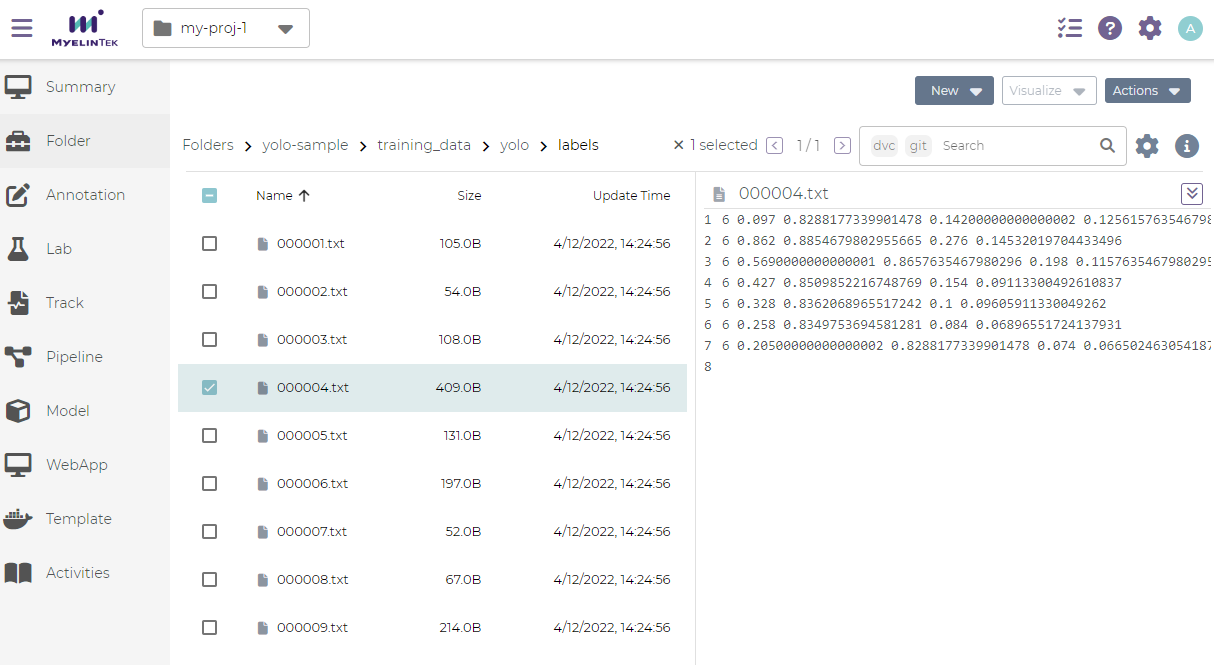
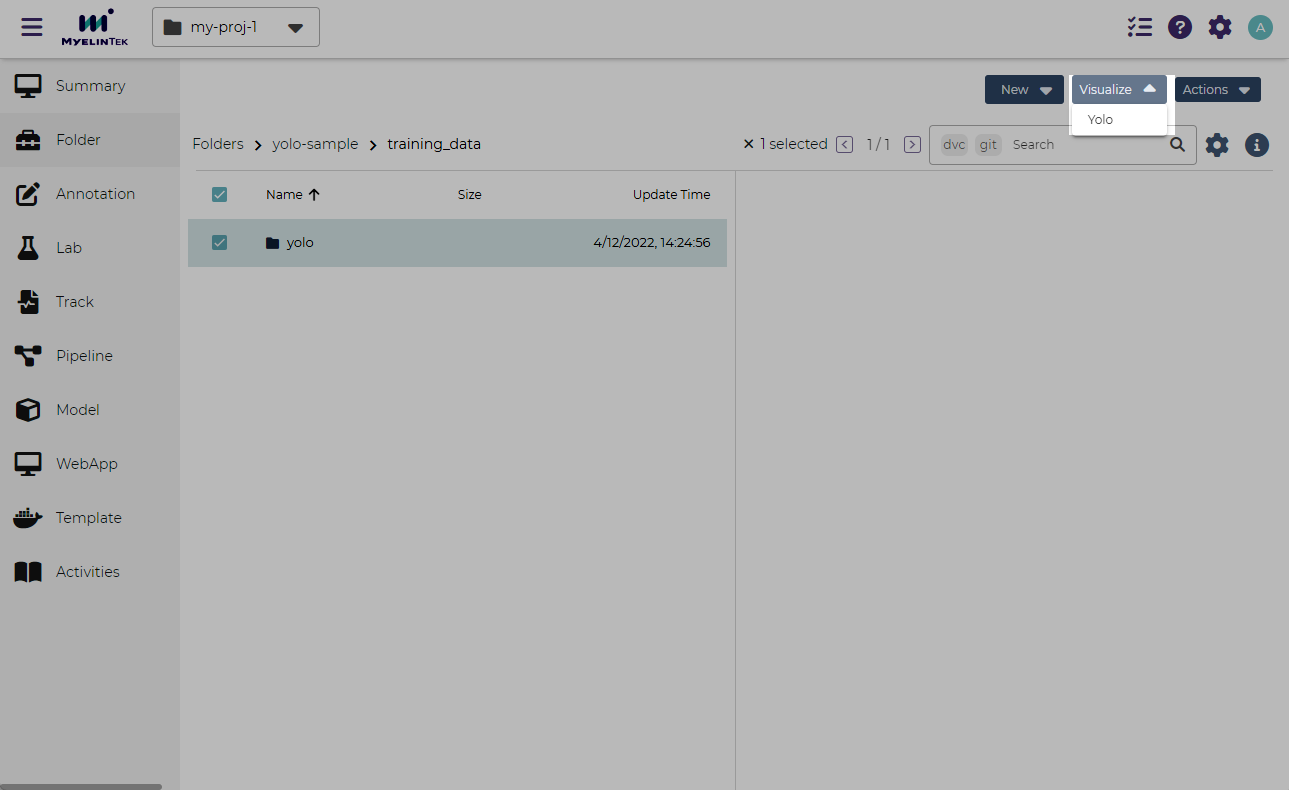
Preview Bounding Box Images in a folder
To preview the bounding box images in a labelled folder:
Select the folder that contains the labelled images.
Click on the VISUALIZE button.
Select the label format yolo.
Fill in the fields:
class_file: file specifying the label index names
label_path: directory for label files
predict_path: (optional) model prediction results
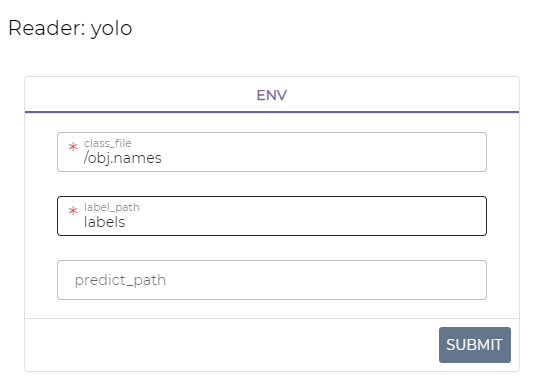
Note
A path could be:
Relative path: starting from the current displayed directory
Absolute path: prefixed by
/, starting from the root directory of the dataset
Click on the SUBMIT button.
The related files and directories will then be added the yolo tags. Bounding boxes and the index names are displayed in the preview area.
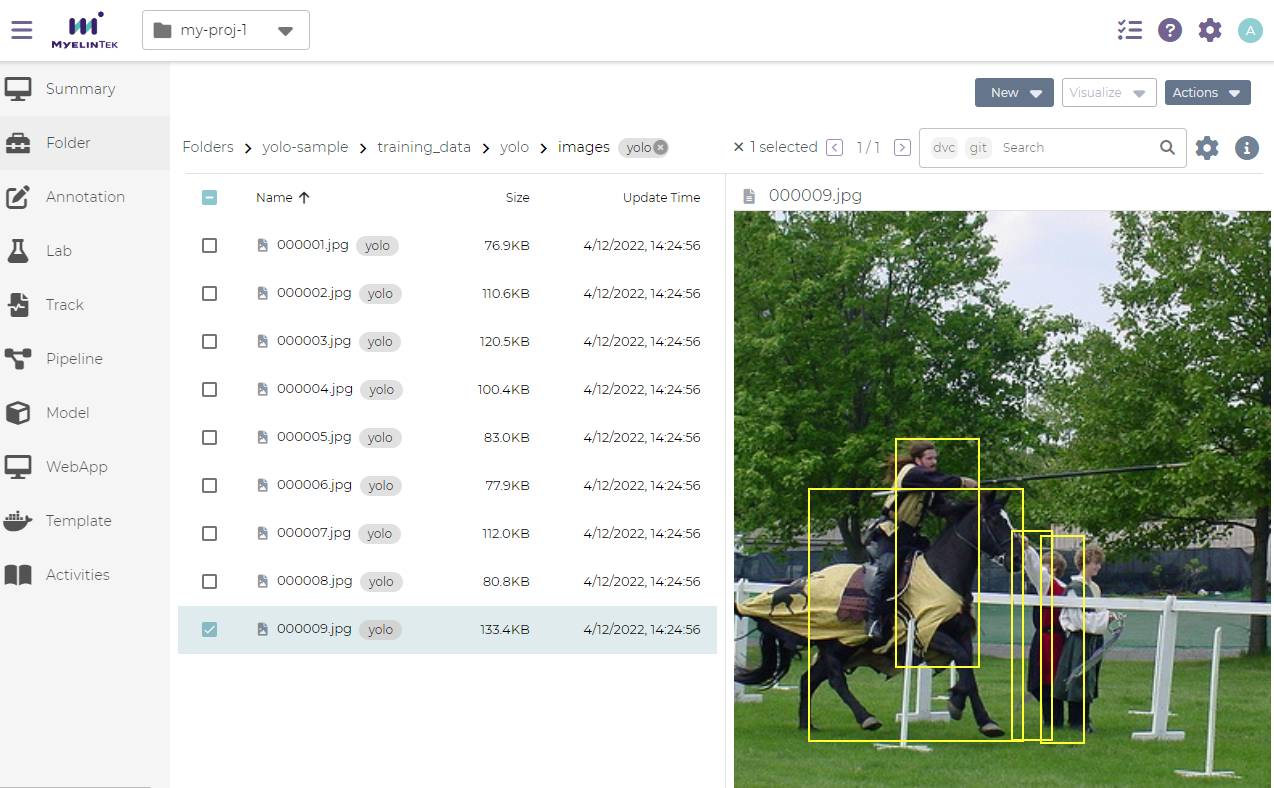
Yolo tags could also be removed by clicking on the cross button in the end of tag.

Snapshot a Folder (only support btrfs filesystem)
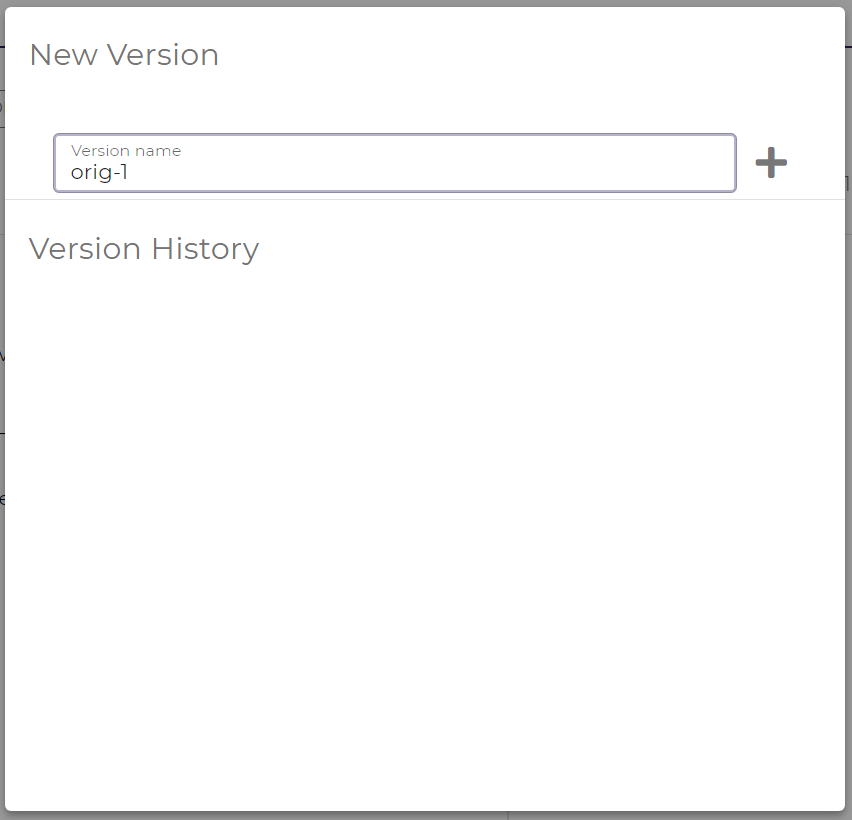
To save the current folder version (snapshot):
In the folder page, click on the VERSIONING button.
Fill in the version name.
Click on the add button.
To restore the folder to a saved version:
In the folder page, click on the VERSIONING button.
Click on the Restore button for the version.
