Lab
A lab is a Web IDE (based on JupyterLab with MLSteam’s add-on functionalities) that organizes files and datasets. You may design ML models and make experiments in a lab. When the development is done, you may convert a lab into a template for reuse in other labs, pipelines or deployment.
Create a Lab
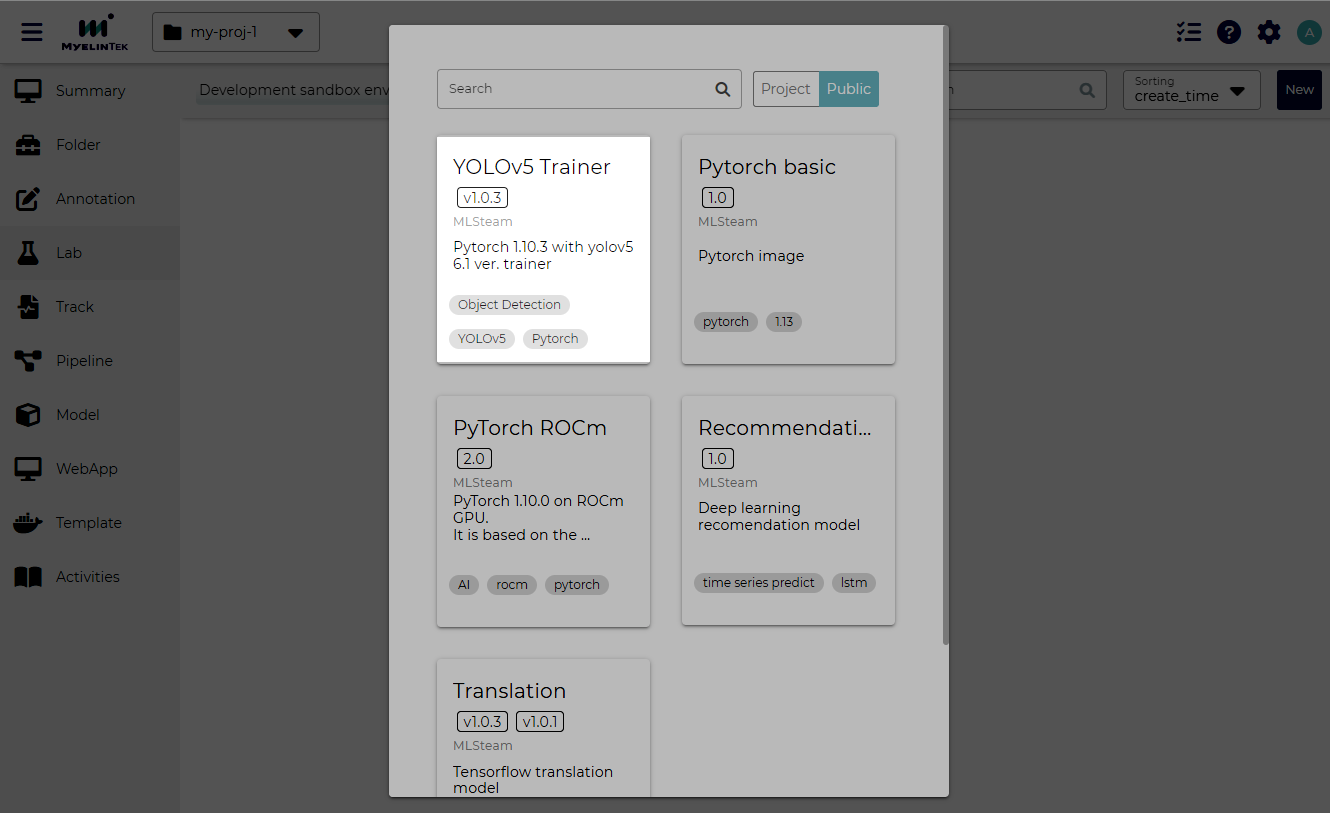
A lab is created from a pre-defined template.
In the lab page, click on the NEW button.
Note
A project should be created first before we could create or use a lab.
Select a template.
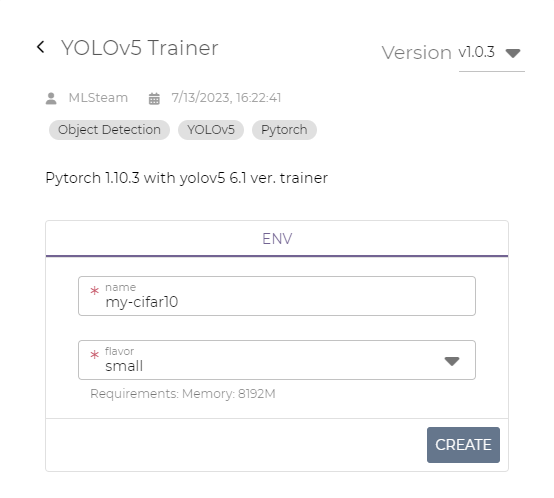
Fill in the fields in the dialog, and then click on the CREATE button.
Name: lab name
Flavor: the resources allocated for the lab
Note
Some labs require one or more GPUs to run. Make sure you select a flavor that meets the lab’s requirements.
GPUs are independently allocated for each started lab or pipeline run. If a lab could not be started due to a shortage of resources, try to stop unused labs or to stop pipeline runs.
Run a Lab
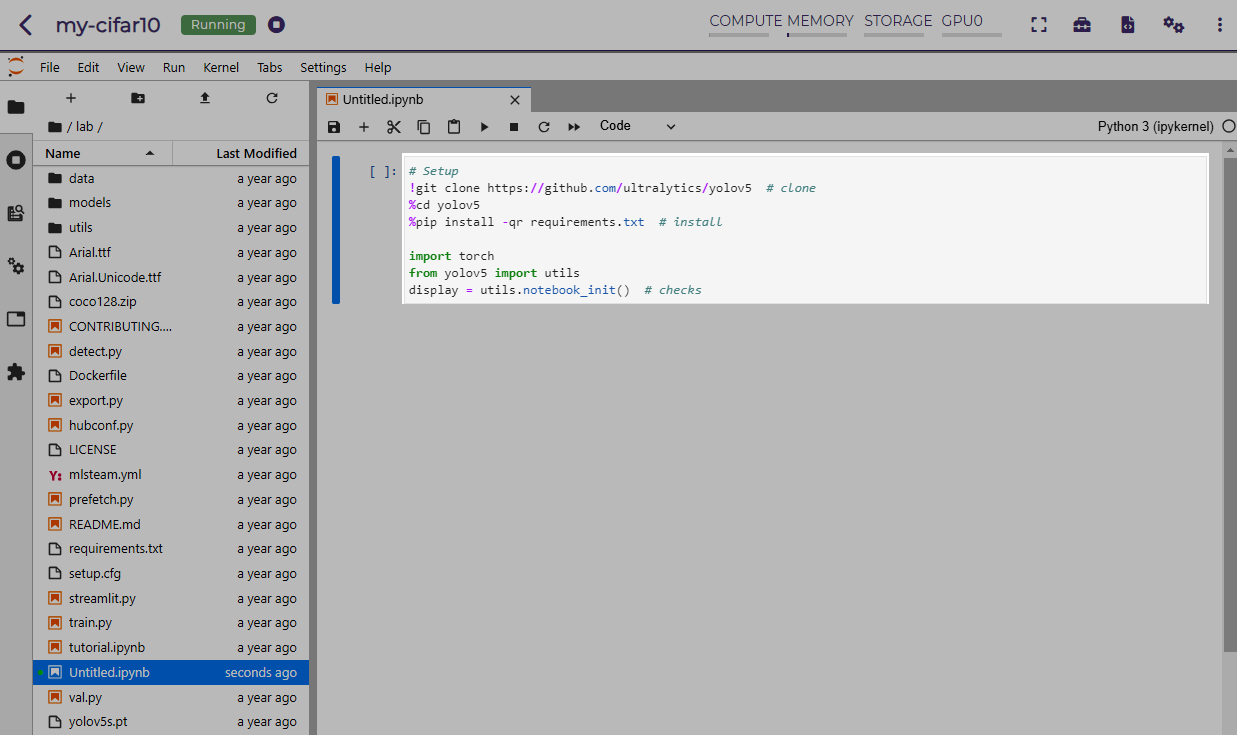
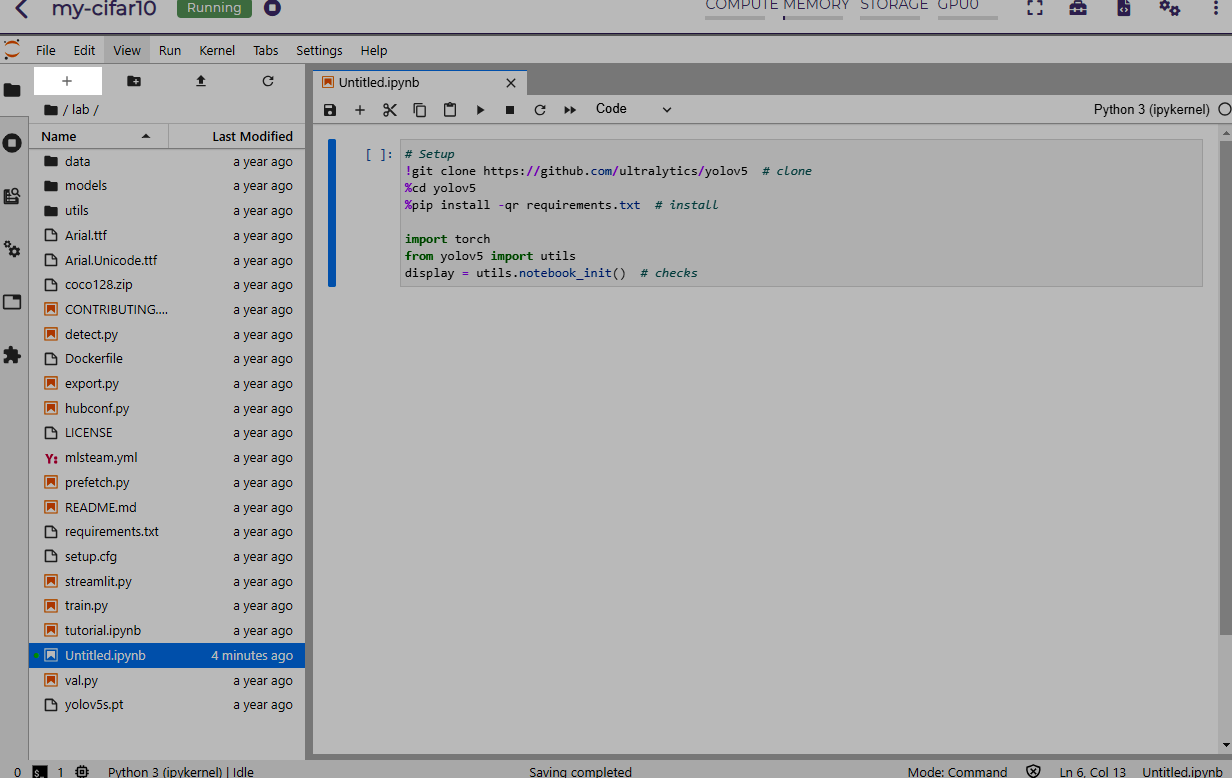
After a lab is created, the lab development environment, JupyterLab, could be accessed by clicking on the Jupyter button.

Program code in a JupyterLab Notebook is organized in cells.
A JupyterLab Notebook file has a name ended with .ipynb
and could be opened by double clicking on the entry in the File Browser on the left.
In JupyterLab Notebook, code is run in a process called the Kernel.
To run (evaluate) the program code in a single cell, click on the menu item: Run → Run Selected Cells or press the Shift-Enter key combination.
Note
Depending on the Kernel execution state, sometimes you may need to run all previous cells before running the current one. Click on the menu item: Run → Run All Above Selected Cell.
To run all the program code from a clean Kernel execution state, click on the menu item: Run → Restart Kernel and Run All Cells.
To open a terminal for running commands:
Click on the New Launcher icon in File Browser or click on the menu item: File → New Launcher.
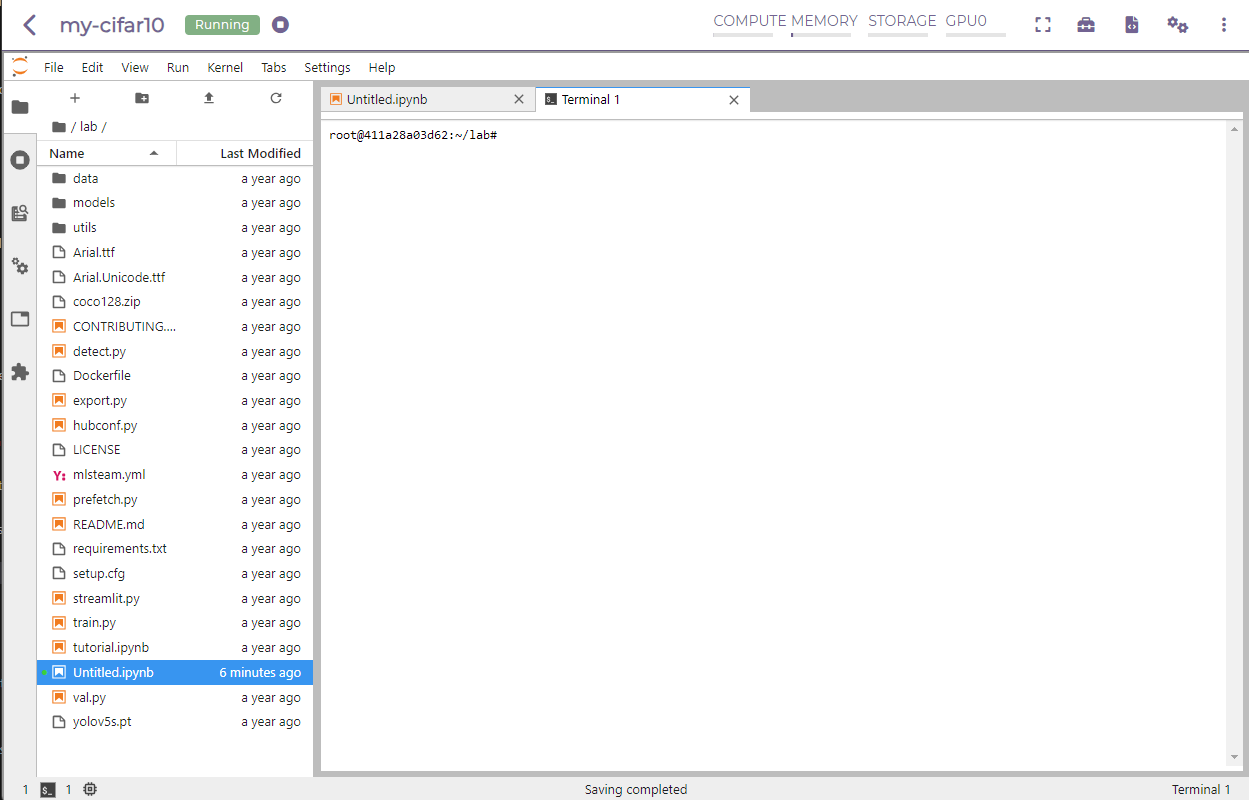
Click on the Terminal icon in the Launcher tab.
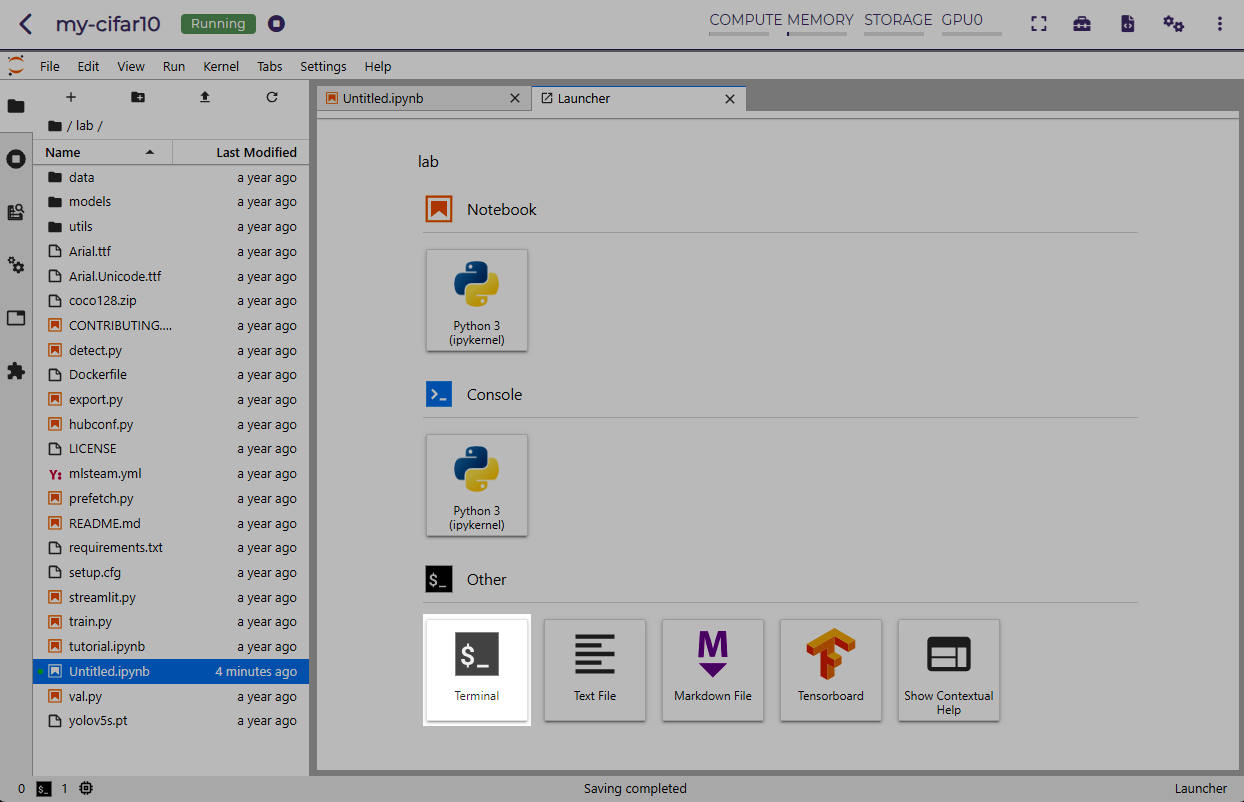
A Linux terminal will open. You could type and run shell commands now.
Jupyter also supports adding, deleting, and renaming files in its File Browser on the left.
Note
Refer to JupyterLab Documentation for more usage information.
Attach or Detach a Folder
To list and manage the folder attachments, click on the top area. A side bar will be opened.
To attach or detach a dataset:
Click on the settings button in the dataset side bar.

Toggle on a dataset to attach or toggle off a dataset to detach.
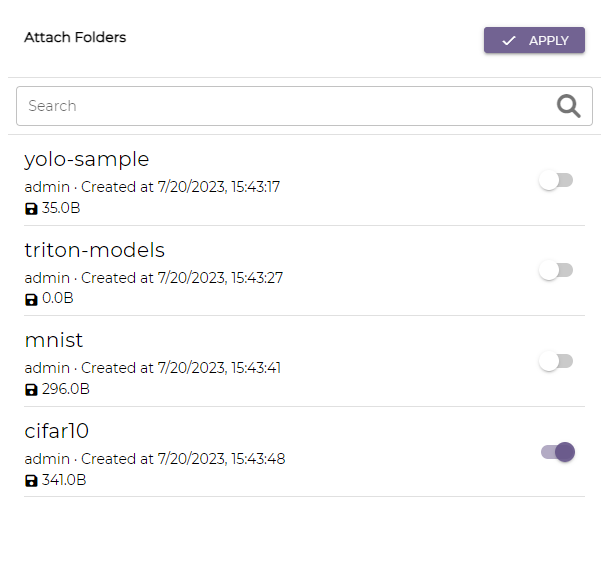
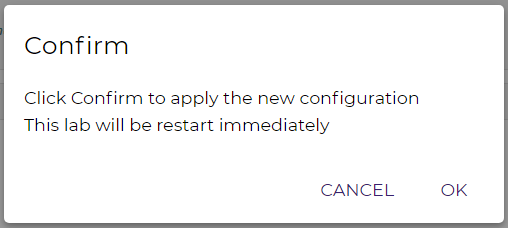
Click on the APPLY button.
Click on the OK button. The lab will be restarted to apply the new configuration.
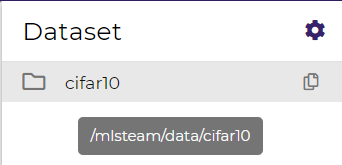
Note
The dataset path is available by hovering over the dataset or by clicking on the copy icon in the end.
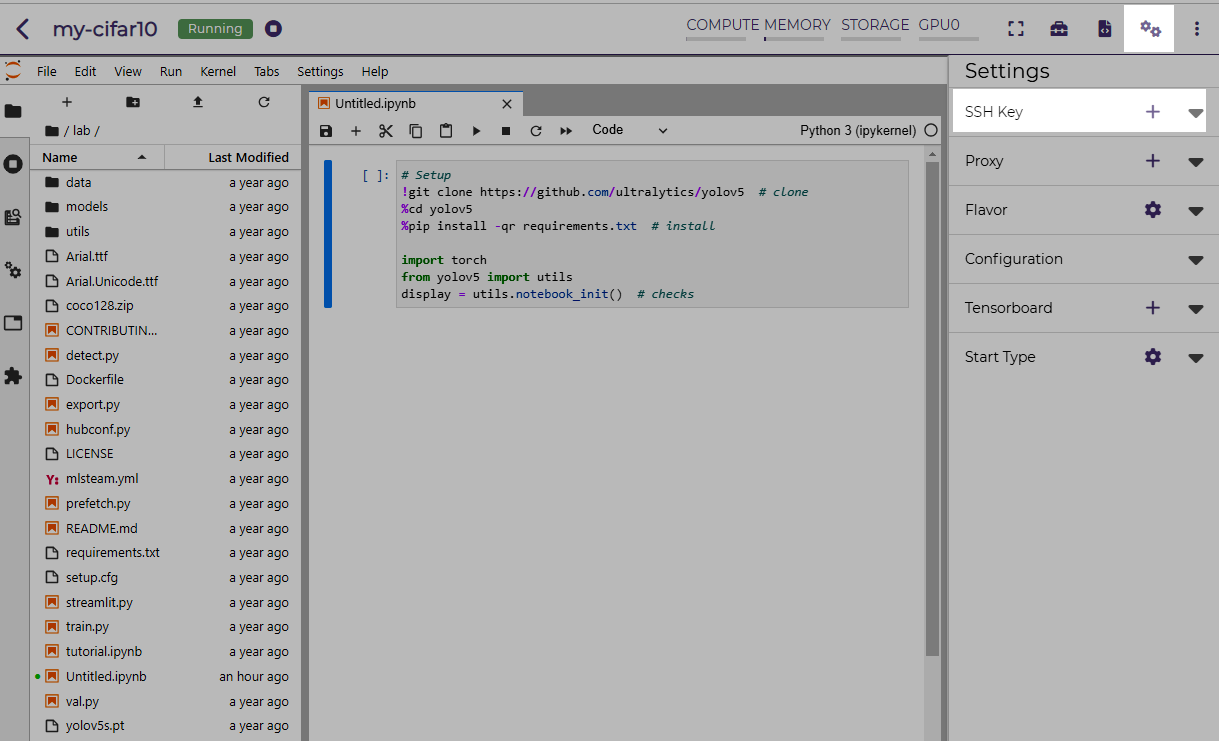
Monitor Resource Consumption in a Lab
To monitor the real-time resource consumption, click on the top area. A watch window will be opened.

Hardware resources displayed:
Compute
CPU utilization in percentage
Memory
memory utilization in percentage
used memory in GB
total memory in GB
Storage
disk storage in percentage
used storage in GB
total storage in GB
GPU
GPU compute utilization in percentage
used GPU memory in GB
total GPU memory in GB
Stop or Delete a Lab
To delete a lab:
If the lab is in the running state, stop the lab by clicking on the stop button.

Click on the delete button.

SSH into a Lab
MLSteam also supports accessing a lab with SSH, which is handy for developers to use their favorite editors or tools to accelerate ML design and experiments.
Preparation
Enable SSH access to a lab.
In the lab’s page, open the settings side bar by clicking on settings button on the top.
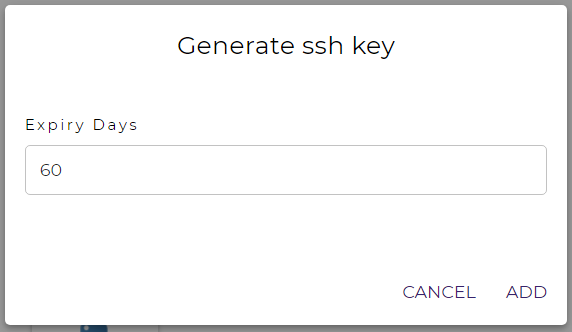
Create a SSH access key if none exists by clicking on the add button in the SSH Key section.
Input the key expiration days.
Click on the ADD button.
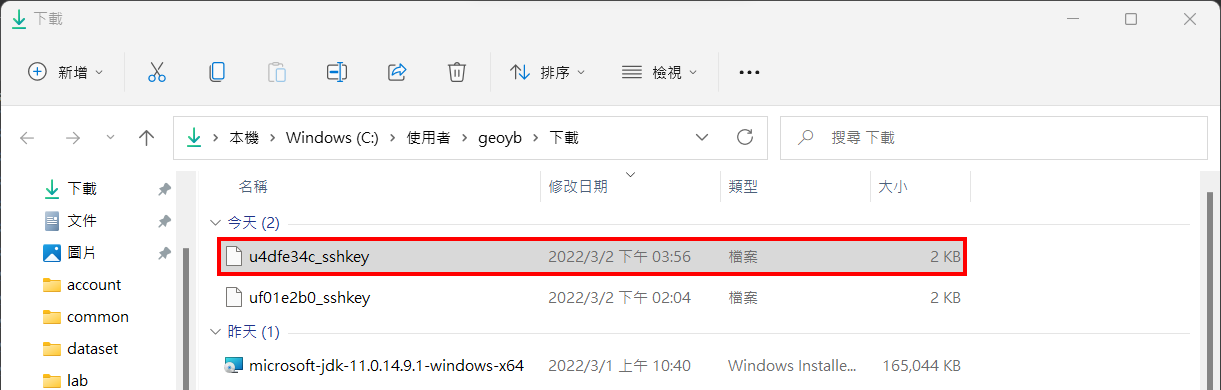
Download the SSH access key by expanding the SSH Key section and clicking on the download button.

Save the SSH access key to the local computer.
Note
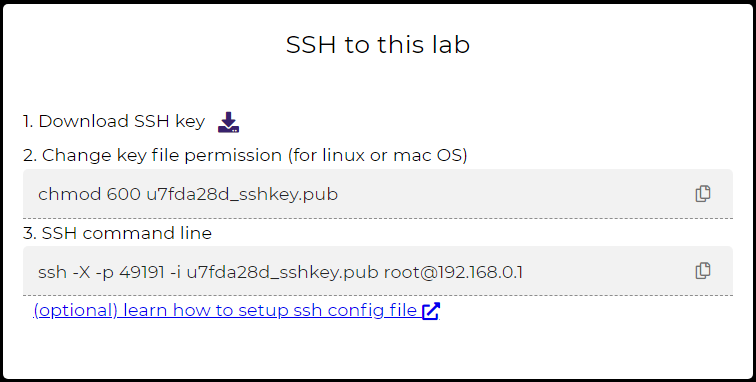
For the Linux operating systems, change the file permission to 600.
chmod 600 /path/to/access/key/file
# for example, chmod 600 ~/Downloads/u7fda28d_sshkey.pub
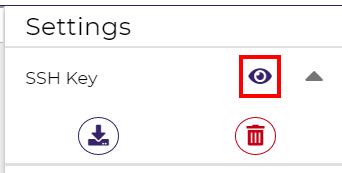
View the SSH information by clicking on the view icon.
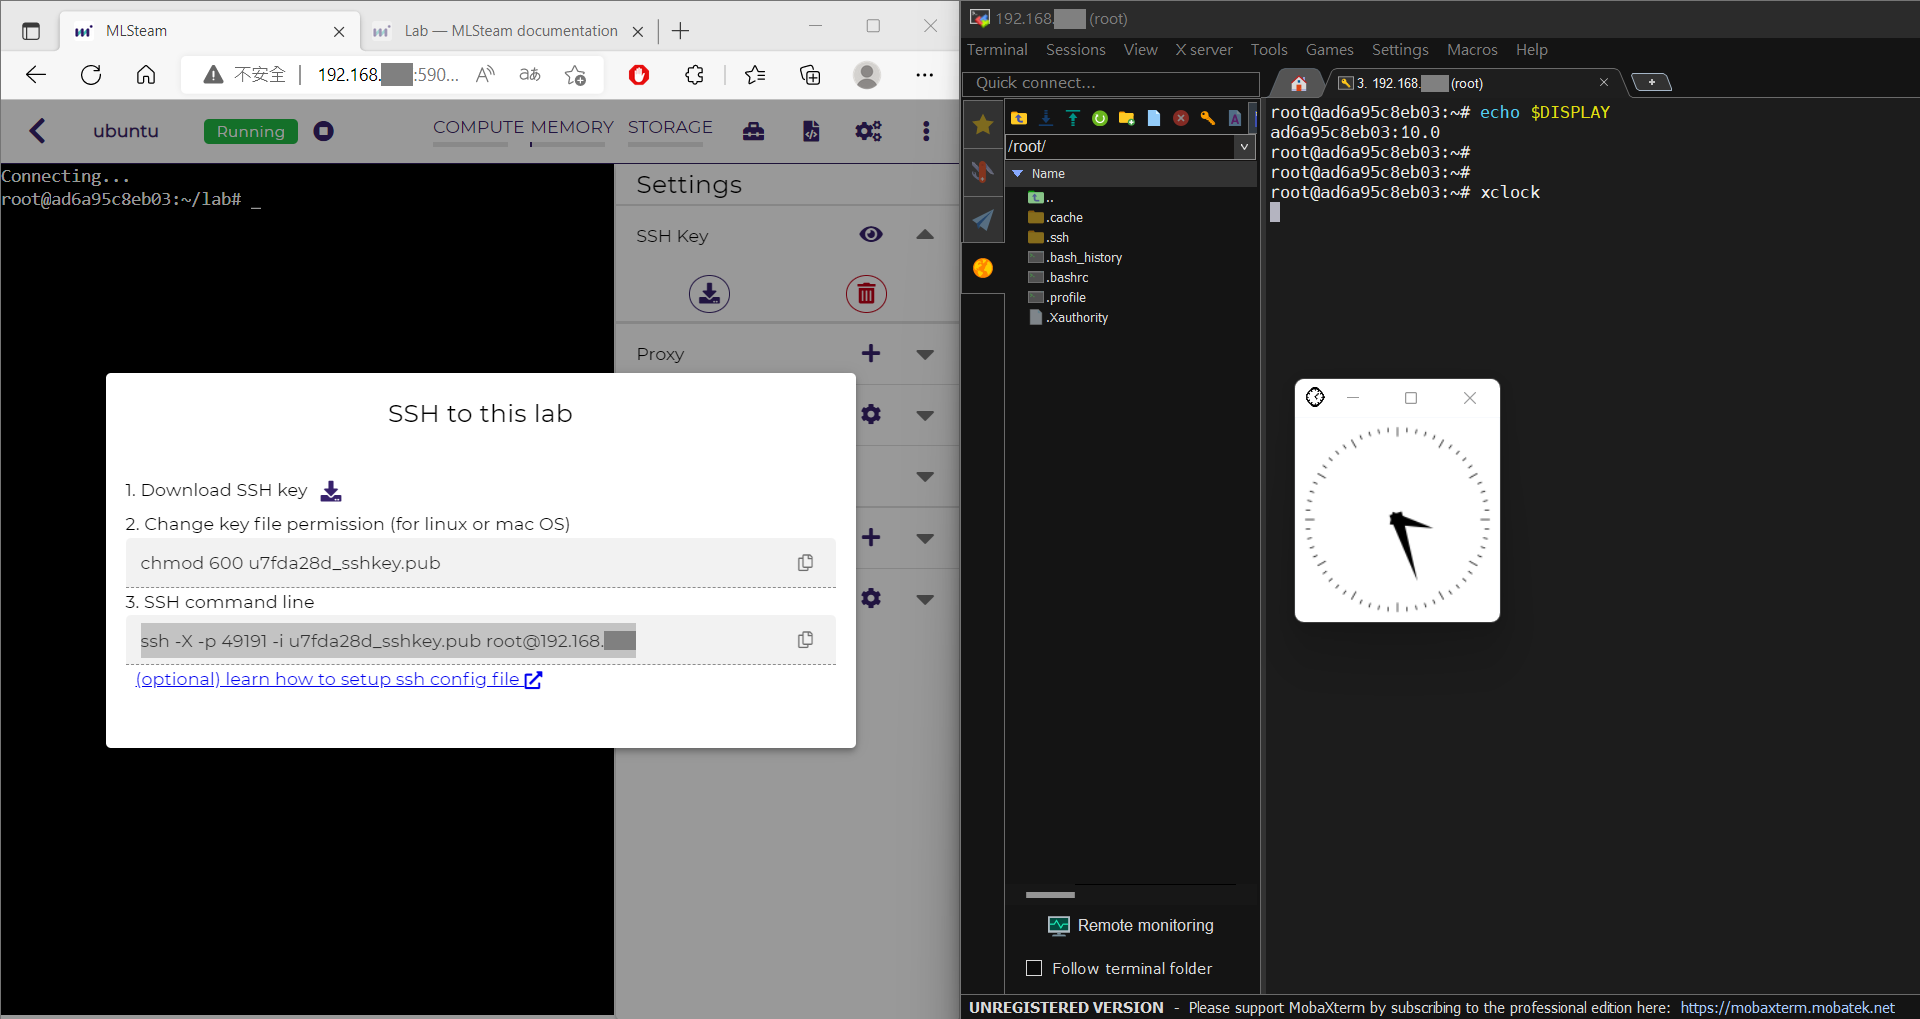
Now, you could access the lab using an SSH client tool, such as command-line, VSCode, or MobaXterm.
Command Line
Open a command-line console.
Copy the command from the SSH command line displayed in the lab page, and run it in the console.
Note
Change
SSH_ACCESS_KEY_FILEto the actual SSH key file location.ssh -X -p SSH_PORT -i SSH_ACCESS_KEY_FILE USER@SSH_HOST # for example, ssh -X -p 49191 -i ~/Downloads/u7fda28d_sshkey.pub root@192.168.0.1
You may receive a warning message
The authenticity of host ... can't be established.for the first time you make an SSH connection to the lab. Enteryesto continue connecting.
VSCode
Install VSCode on the local computer.
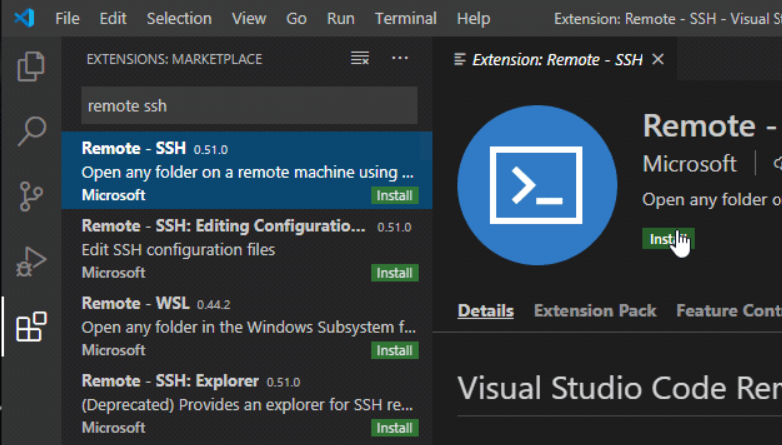
Open VSCode, search and install the Remote SSH extension.
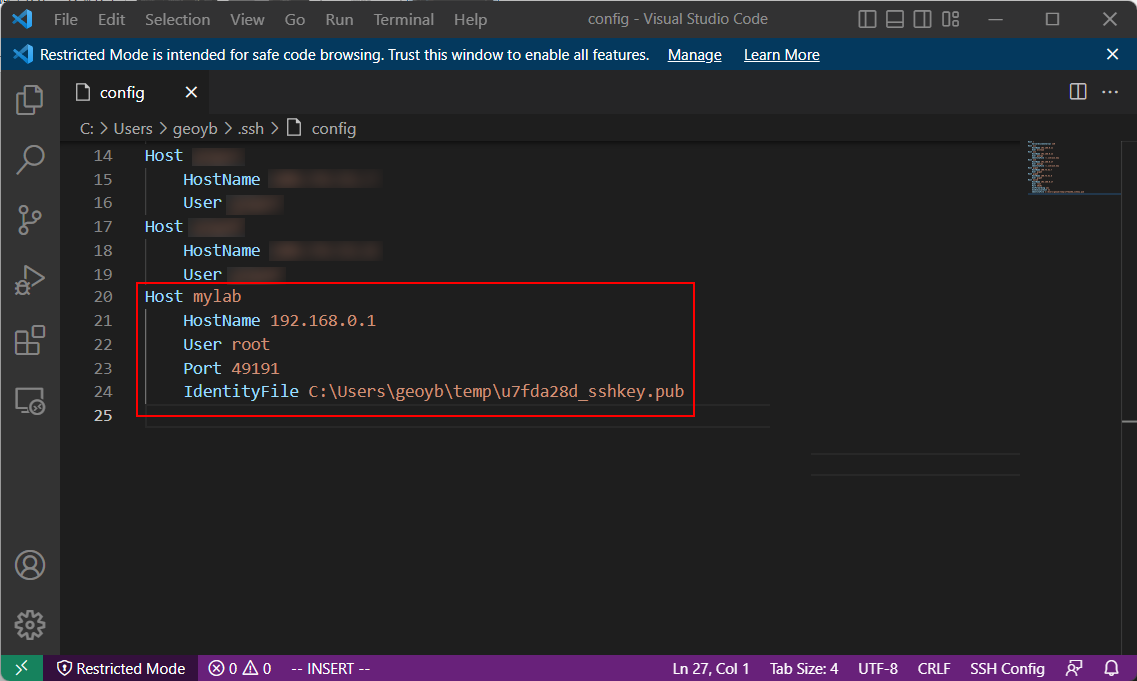
Edit the SSH configuration file and add the configuration according to the SSH command line displayed in the lab page.
Note
The SSH configuration file on a Windows computer is at
C:\Users\{USER-NAME}\.ssh\config. On a MacOS or Linux computer, it is at~/.ssh/ssh_config.SSH configuration format:
Host UNIQUE_SSH_CONNECTION_NAME
    HostName SSH_HOST_IP_OR_DOMAIN_NAME
    User USERNAME
    Port SSH_PORT
    IdentityFile SSH_ACCESS_KEY_FILE
For example,
Host mylab
    HostName 192.168.0.1
    User root
    Port 49191
    IdentityFile C:\Users\geoyb\temp\u7fda28d_sshkey.pub
In VSCode, open the Remote Explorer panel on the left.
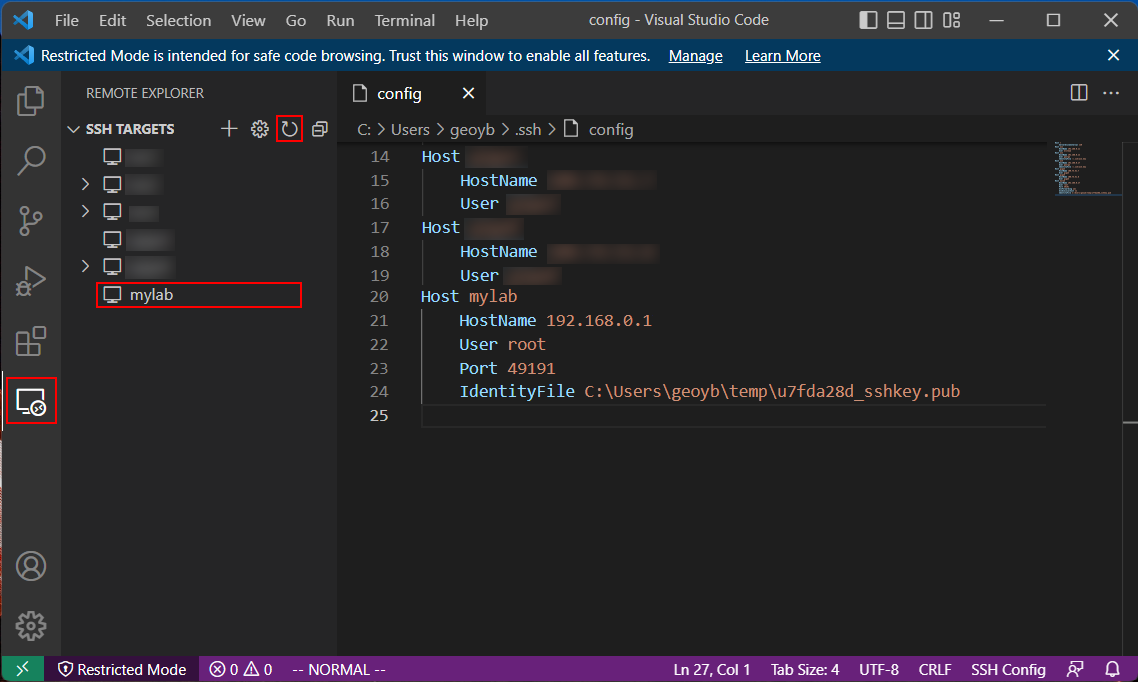
Note
If the SSH host has not been displayed, refresh the list by clicking on the refresh button.
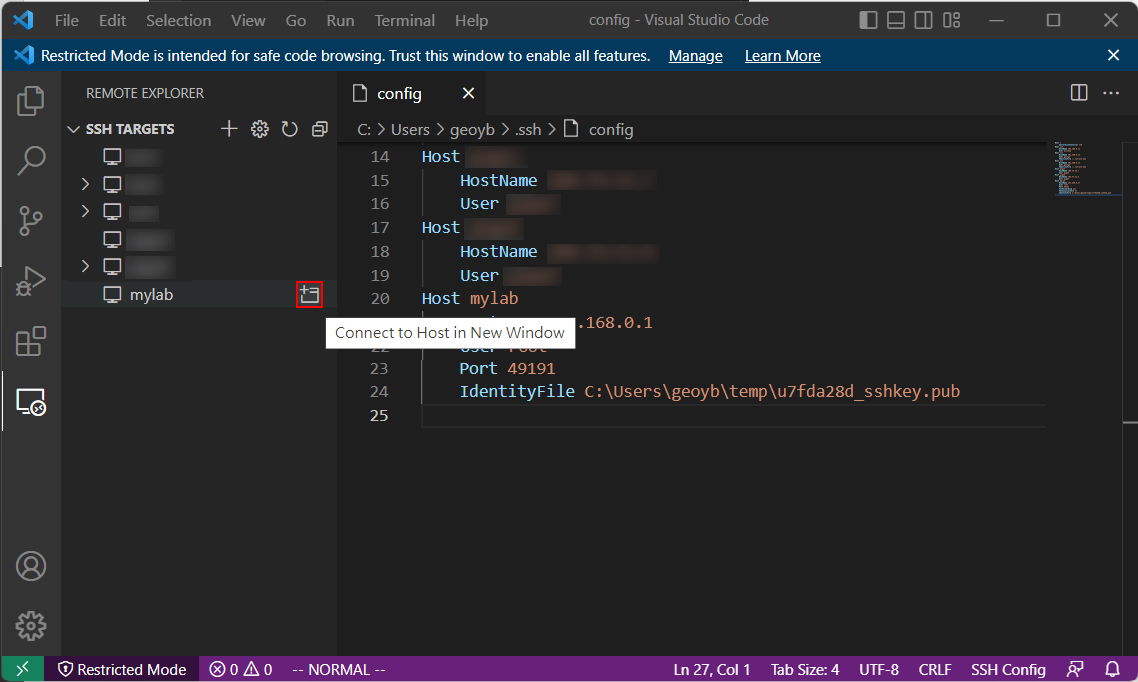
Connect to the SSH host by clicking on the connection button. This will open a new VSCode window.
Answer the questions from VSCode on opening the remote host:
Select platform of the remote host:
LinuxAre you sure you want to continue?
Continue
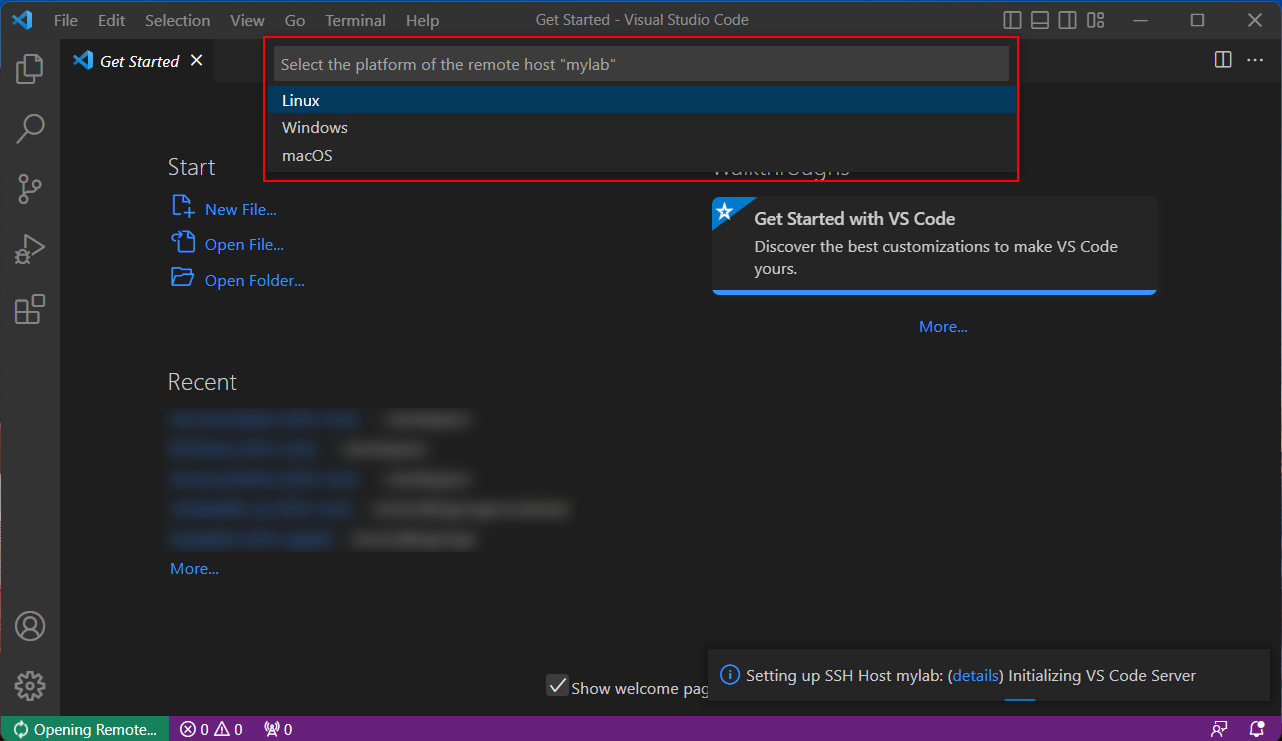
Wait while VSCode is initializing the remote host.
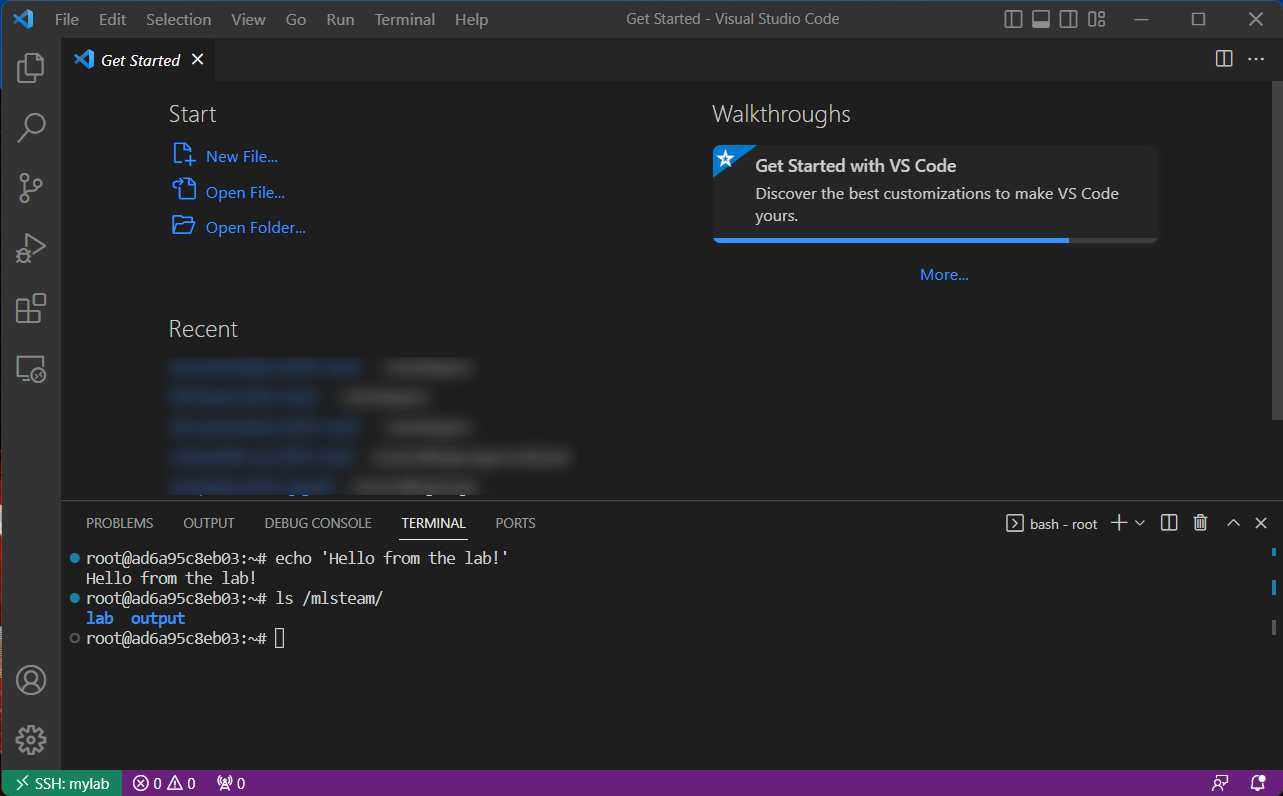
Finally, open the terminal by clicking on the menu item: Terminal → New Terminal
Now, you could run commands in the lab through the terminal.
MobaXterm
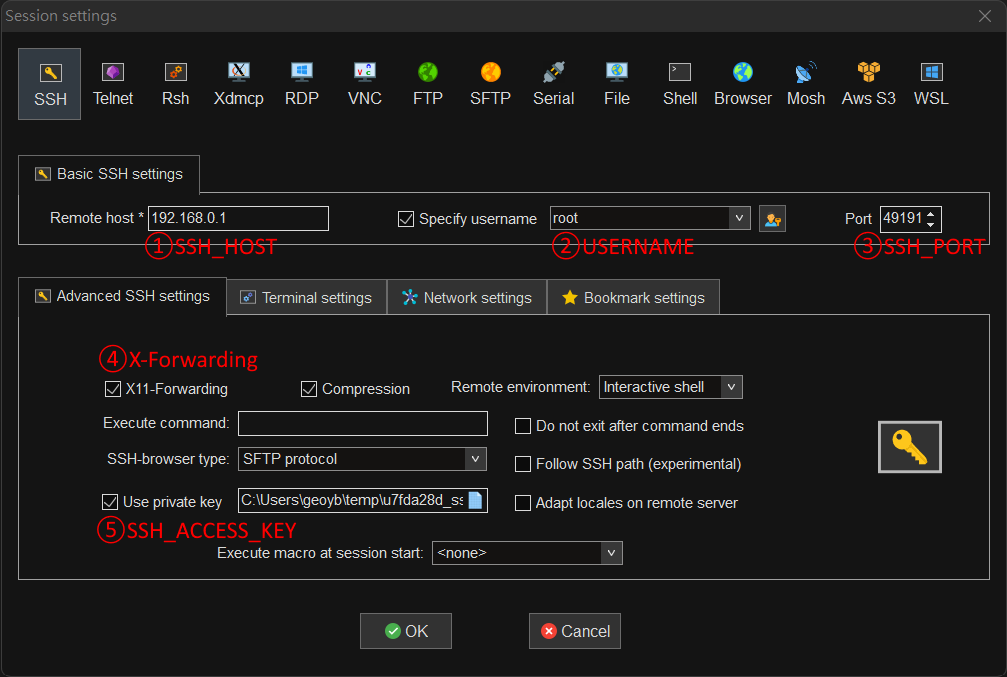
Windows users may also use MobaXterm to make SSH connection.
Note
In session settings, specify SSH_HOST, USERNAME, SSH_PORT, X11 forwarding,
and SSH_ACCESS_KEY according to the SSH command line displayed in the lab page.
Hyperparameter Tuning by Submitting Tracks
To run ML experiments with a set a hyperparameters:
Create/modify
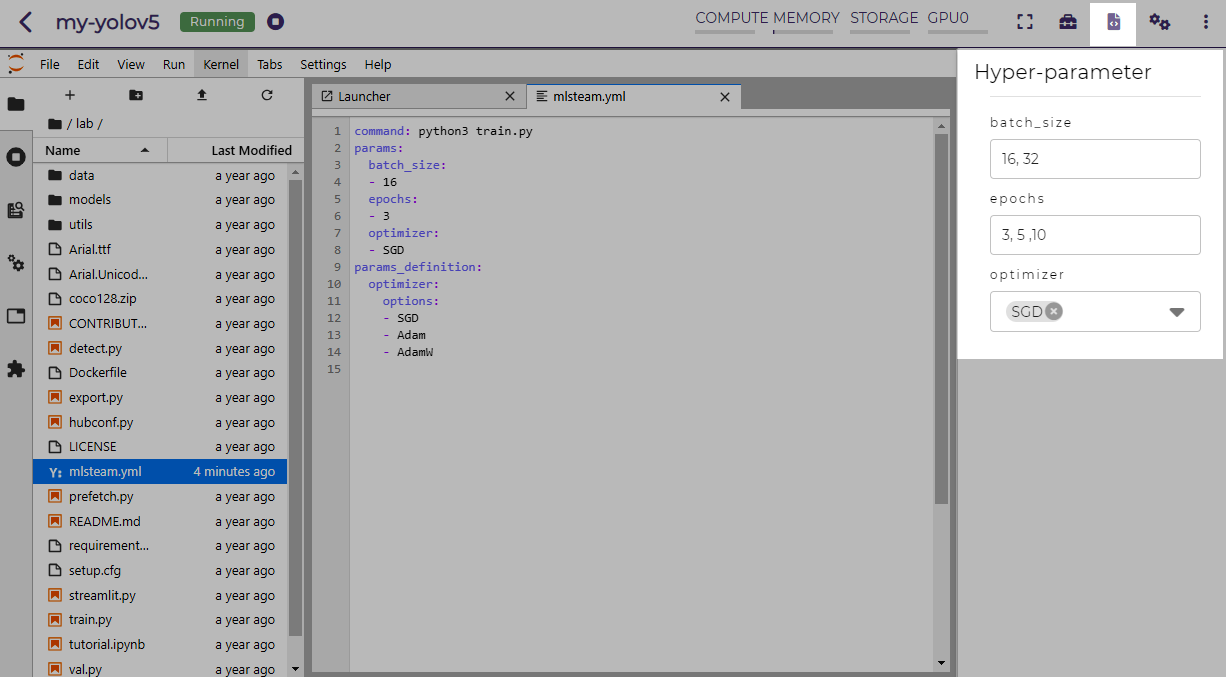
mlsteam.ymlfile in the/mlsteam/labdirectory.commandfield is required. Defineparamsfields to serve as hyperparameters to be appended to the command (values can be adjusted later).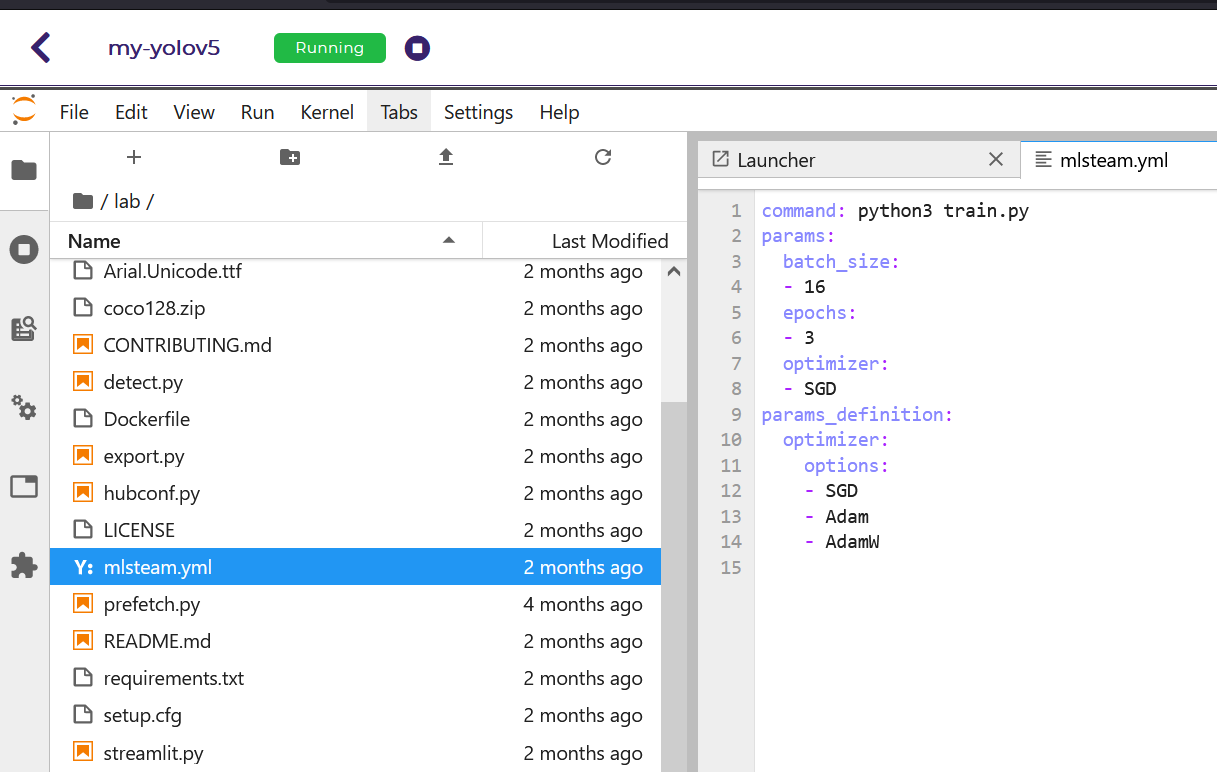
In the lab page, click on the hyperparameter icon in the top area.
Fill in the parameters to use in the sidebar.
Note
You could provide multiple parameter values delimited by commas.
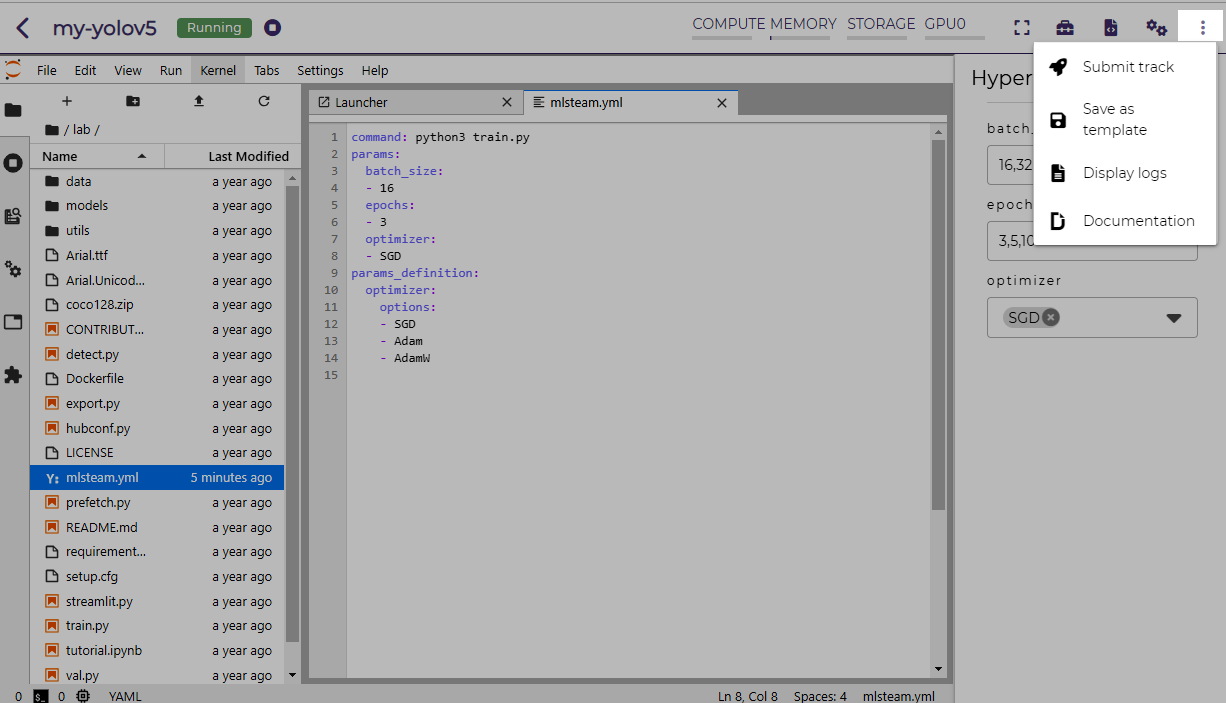
Click on the Submit track menu item to submit the experiments as track.
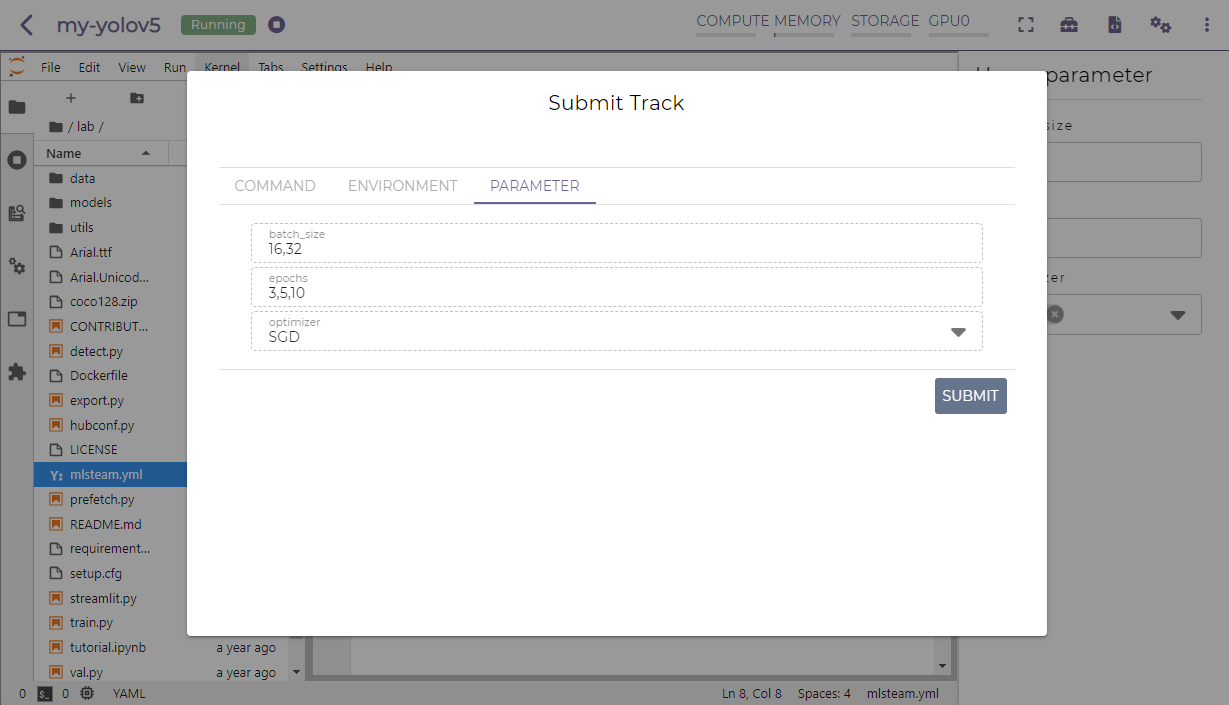
Click on the SUBMIT button.
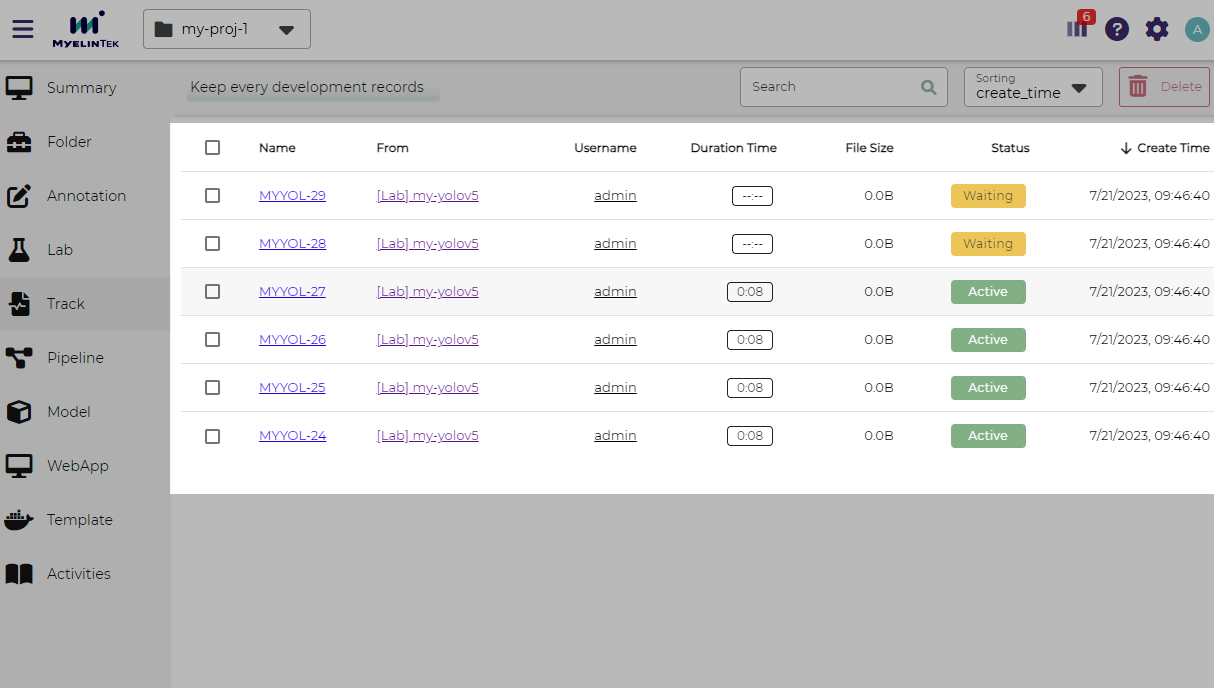
A new browser window will open, which shows the submitted tracks.
Note
Each combination of the parameter values is used to the ML experiment with a track.
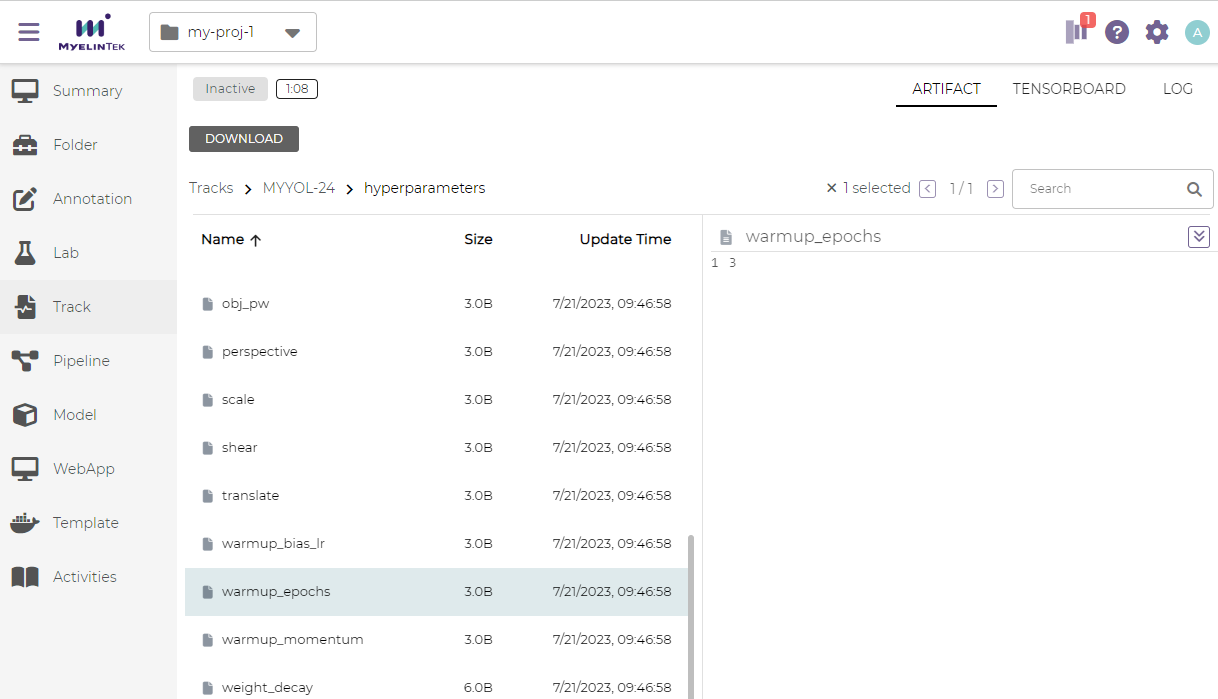
In the above example,
batch_sizeis given 2 values (16 and 32),epochsgiven 3 values (3, 5, and 10), andoptimizergiven 1 value (SGD), so there are 6 (= 2 * 3 * 1) tracks in total.The parameter values used and other logged data could be observed by clicking into a track.
Note
Refer to the track documentation for the concepts of track.
Troubleshooting & FAQs
Contents
Q: How to run Linux commands in a Lab?
Yes, three methods are available:
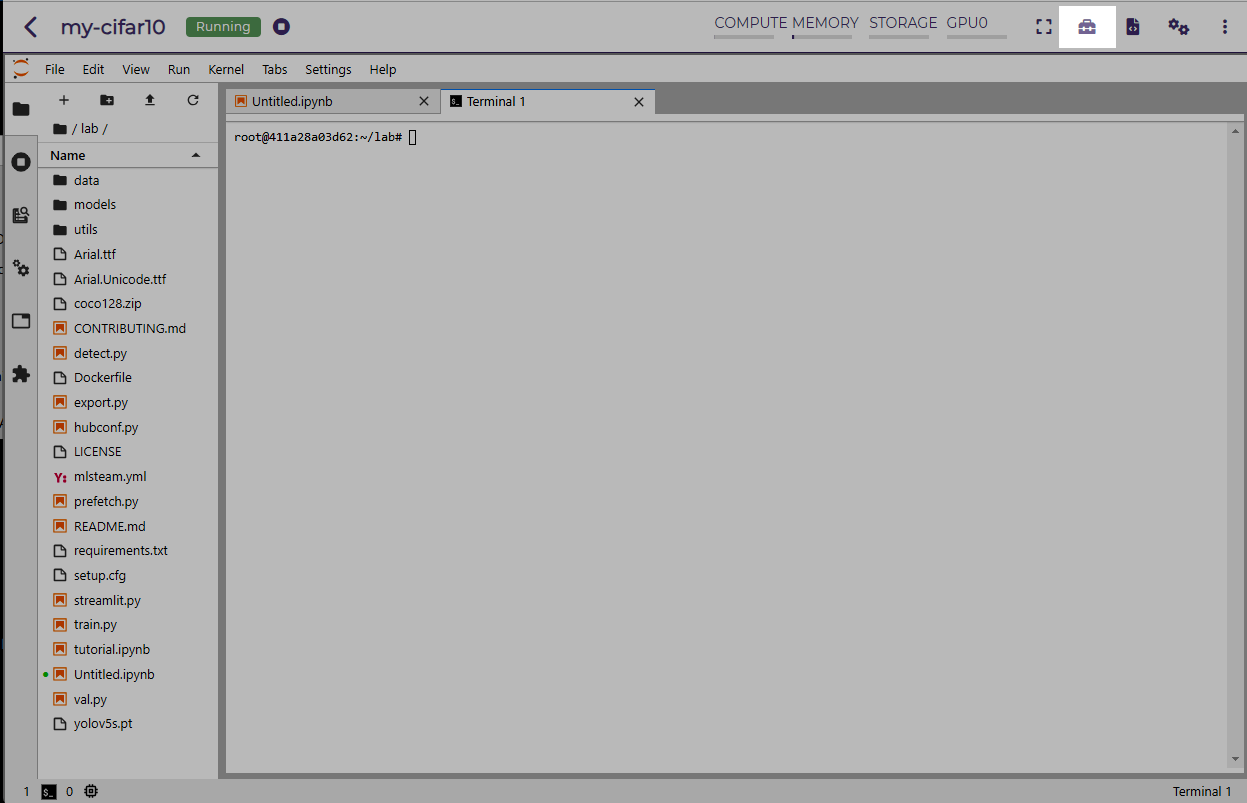
Open a JupyterLab Web terminal and run commands in MLSteam.
Open an independent Web terminal by clicking on the terminal button for the lab.


Set up SSH access to the lab and run commands with your favorite tools on the local computer, such as an SSH client or VSCode.
Q: How to view the ML program and run the experiments on the local computer?
MLSteam includes a powerful Jupyter-based interface for viewing, editing, and running the ML programs.
However, if you prefer using a handy tool on the local computer.
You could do so by setting up SSH access to the lab.
The lab files are under the /mlsteam directory.
The instructions below are for VSCode.
To view and edit files in the lab:
Open the Explorer panel on the left.
Click on the Open Folder button.

Go to the
/mlsteamdirectory and click on the OK button.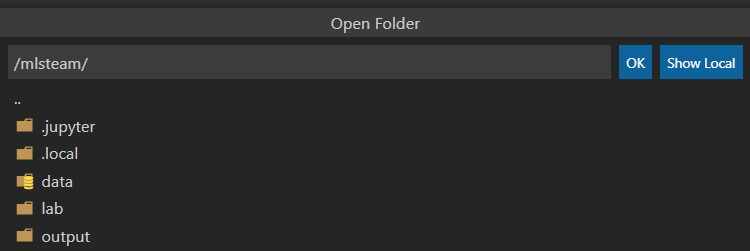
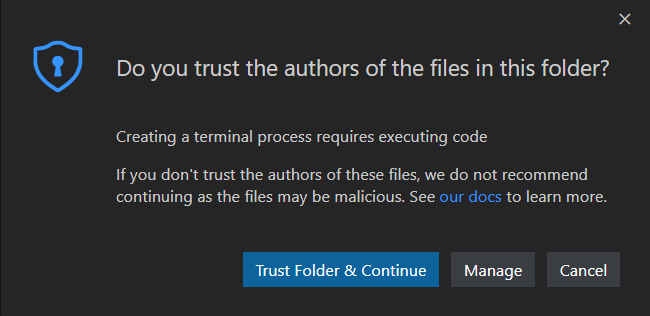
Click on the Trust Folder & Continue button.
Then, you could view and edit the files in usual way.
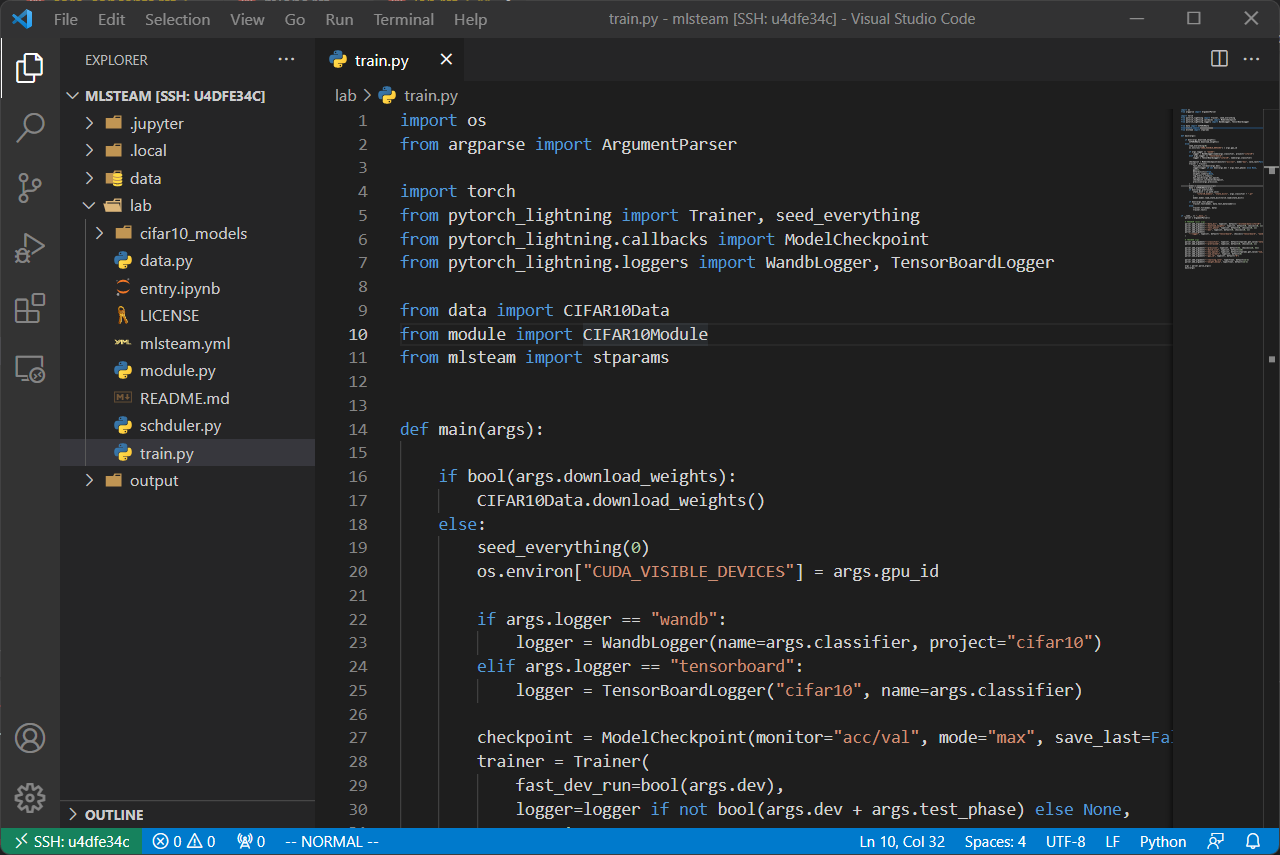
Note
VSCode access the files remotely. The files are still saved in the MLSteam system.
You may install Python extension for Visual Studio Code to use the advanced features for Python files.
It is possible to view, edit, and run a JupyterLab Notebook program in VSCode when the relevant extensions are installed. However, such a feature, provided by the VSCode community, is currently unstable. It is suggested using the MLSteam’s JupyterLab Web interface to deal with JupyterLab Notebook programs directly.
Q: How to add Jupyter support in a lab?
To add Jupyter support in a lab:
Ensure JupyterLab is installed.
In the lab’s terminal, run the following command:
jupyter lab --version
If the command fails, install the latest version of JupyterLab by
pip3 install jupyterlab
Change the lab’s start type.
In the lab’s page, open the settings side bar by clicking on settings button on the top.

Expand the Start Type section in the side bar and click on the settings button.
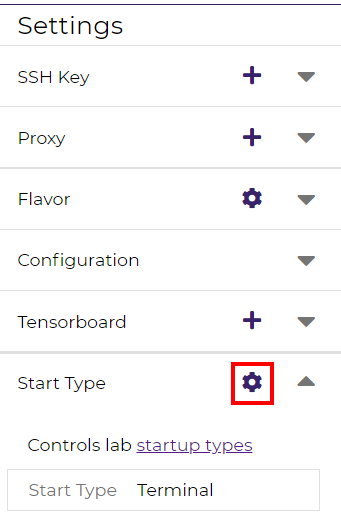
In the popped up dialog, select the start type option Jupyter + Terminal, and click on the Update button. The lab will be restarted with the new start type settings. You could then access Jupyter.
Note
If the lab fails to start after you update the settings, repeat the above steps and change the start type back to Terminal, and it should be able to start again. You may check the JupyterLab installation through the lab’s terminal.
Q: How to change the type of GPU used in a lab?
It is achieved through changing the flavor of a lab.
Ensure the flavor for the target GPU type exists.
Note
A flavor could be created in the management page.
Open the JupyterLab for the lab.
Open the settings side bar by clicking on the settings button on the top.
Expand the Specification section in the side bar and click on the settings button.
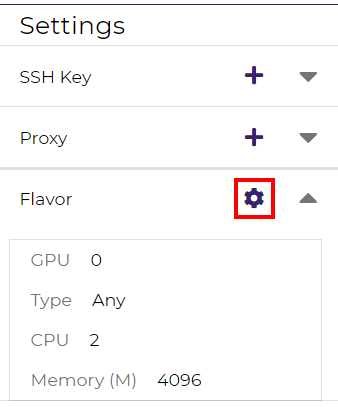
Select the flavor with the target GPU.
Click on the UPDATE button.

Click on the OK button. The lab will run on the selected GPU type after a restart.
Q: How to access other Web services running in a lab?
To access the services in a lab, export the corresponding port(s) with proxy:
Click on the settings button.
Expand the Proxy section in the side bar and click on the add button.
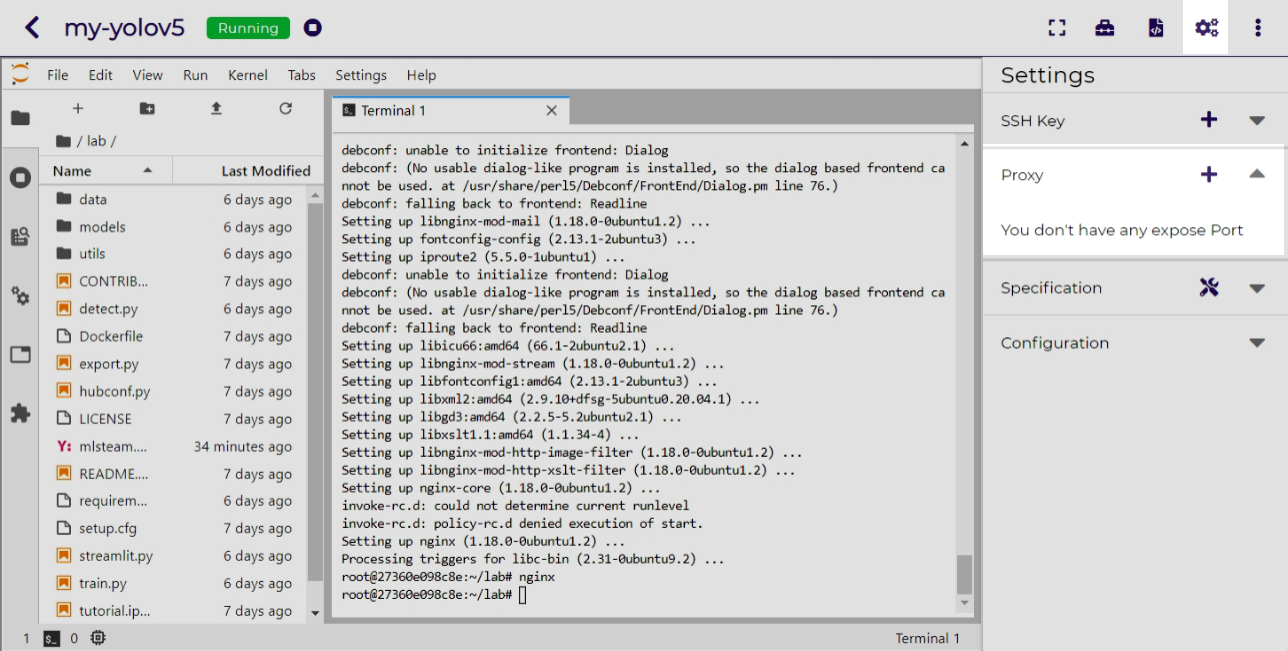
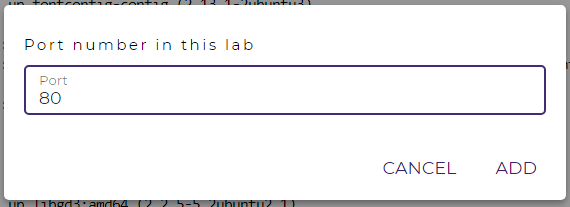
Fill in the port the service is running on.
Click on the ADD button.
Note
Repeat the port adding steps for each port needed in accessing the service.
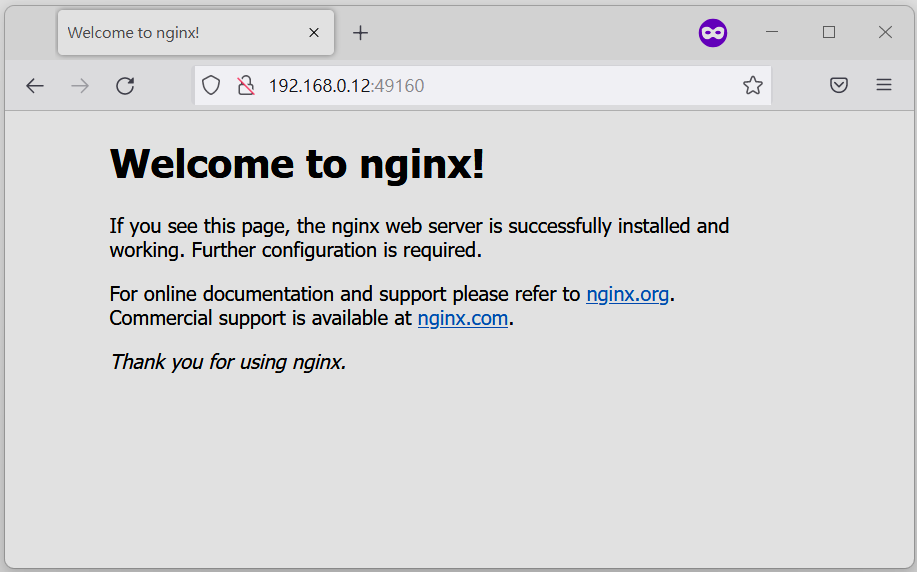
The mapping between service ports and exposed ports are displayed. You could now access the service with URL
{MLSteam address}:{Exposed port}.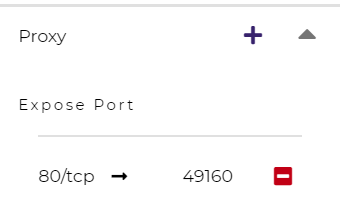
Q: How to avoid other programs from sharing the GPU card(s) used in my lab?
By default, a GPU card may be shared among running of programs, which is possible in situations where multiple running programs are using GPUs in the lab, or where other programs on the host machine (not managed by MLSteam) are using the same GPUs. Sharing a GPU card would enhance the GPU utilization but may also affect the amount of GPU resources (such as GPU computation cores or GPU memory) available for a single running program.
It is possible to restrict how a GPU device is used by setting the accelerator compute mode.
Click on the settings button.
Expand the Configuration section in the side bar and open the Accelerator Mode menu.
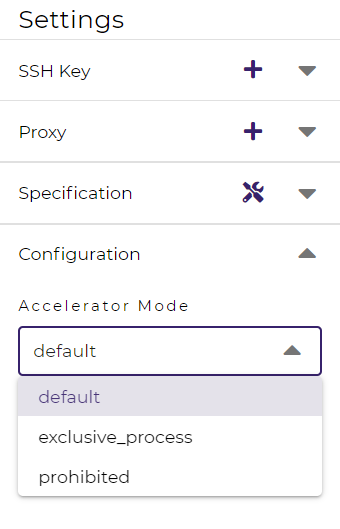
Select the accelerator compute mode. Available modes:
default: multiple processes can use the GPU device at the same time
exclusive_process: only one process can use the GPU device at the same time
prohibited: no processes can use the GPU device
Note
A process could be roughly thought of as a running program. Each running program has a process; sometimes a running program may have multiple processes, though.
Q: How to increase the shared memory size in the lab?
Some programs require more shared memory, especially those that communicate heavily between processes with shared memory buffer, or those that use many GPU cores and consume lots of data.
To increase (or decrease) the shared memory size in a lab:
Click on the settings button.
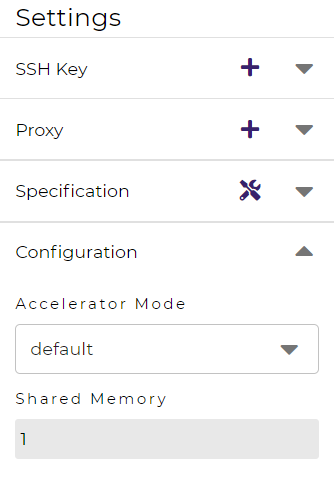
Expand the Configuration section in the side bar and fill in the Shared Memory field.
Note
The shared memory size is in
GBand should be a positive integer.The lab will be restarted with the new setting.
Q: How to access Linux Graphics User Interface (X Window System) applications installed in the lab?
To run a Linux application and access it at the local desktop environment:
Set up SSH access to the lab.
Add an SSH access key in the lab if none exists.
Download the SSH access key and save it at client side.
(Linux or macOS users) Change the file permission mode for the SSH access key.
Copy the SSH access command.
Connect to the lab from the client side.
Run the SSH access command (copied from the previous step) in a commandline console, or with a user-friendly software such as MobaXterm.
Now, you may run the desired Linux application through the SSH connection at client side, and the window will be displayed at client side.