WebApp
A WebApp enables deployment of a Web-based ML applications in a simple way. Services for project users may also be provided as a WebApp.
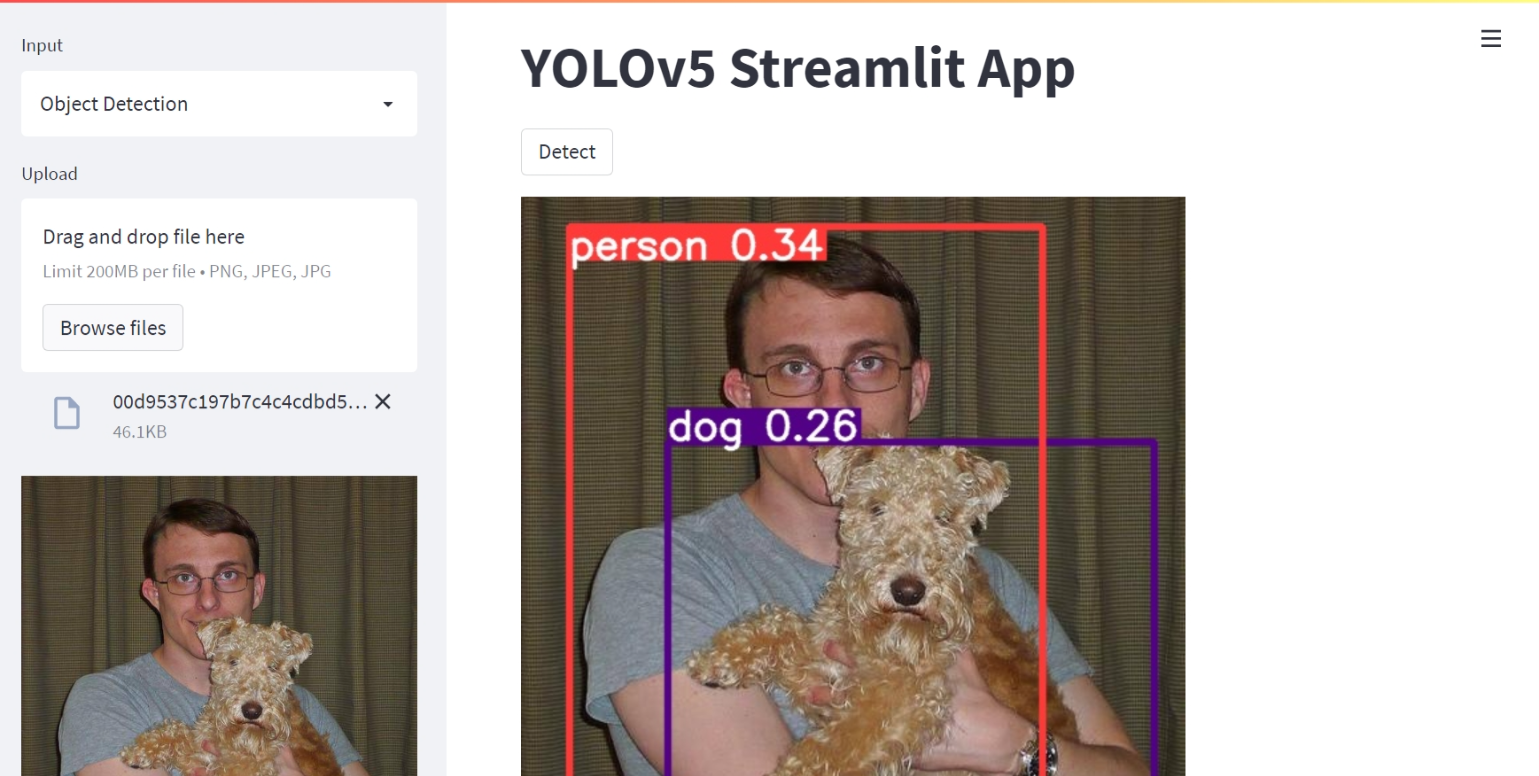
For example, the YOLOv5 Inference WebApp detects the objects and their boundaries in a user-provided image.
Create a WebApp
To create a WebApp:
In the WebApp page, click on the NEW button.
Select the WebApp template.
Fill in the settings.
Note
The settings vary with the selected template.
For example, the YOLOv5 Inference template has settings for the WebApp name, flavor, bind port, WebApp protocol, and model. YOLOv5 Inference requires a model containing a weights file named yolov5.pt in the model’s root directory.
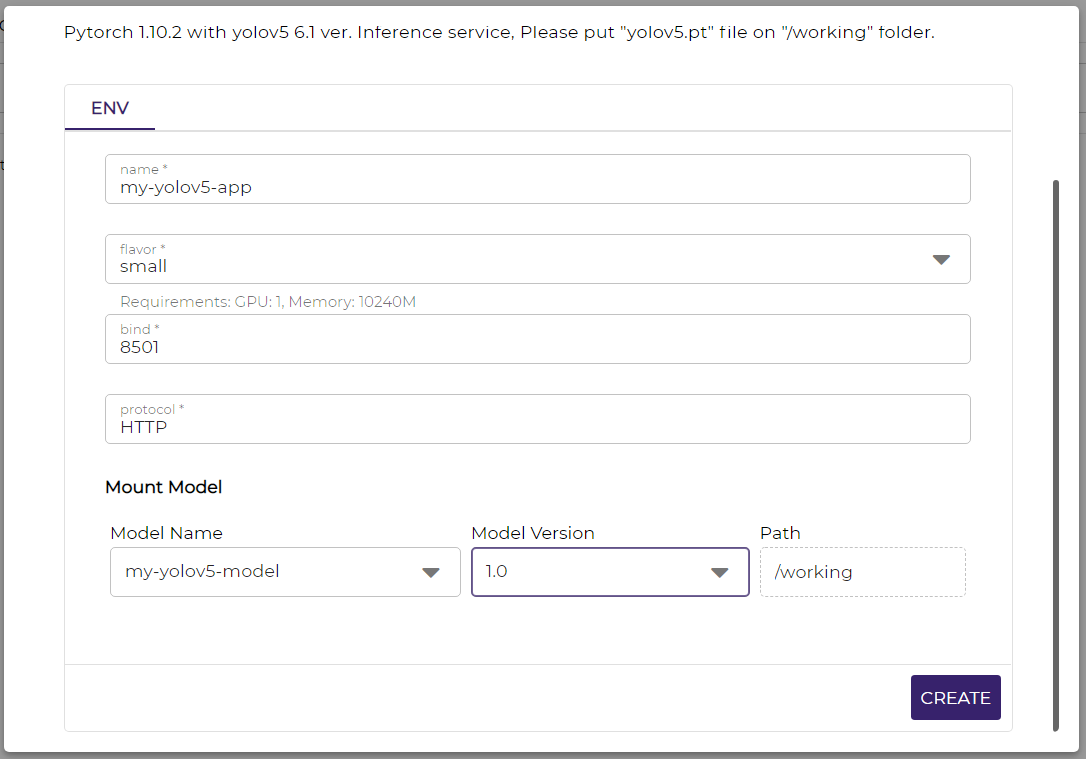
Click on the CREATE button.
To access a WebApp:
Start the WebApp if it has not been in the Running state.
Click on the open button.

The WebApp will be opened in a new tab or window.
Delete a WebApp
To delete a WebApp:
Click on the stop button if the WebApp is still in the Running state.

Click on the delete button.

Setup Label Studio
Label Studio is a data annotation tool, available as a WebApp in MLSteam. To setup Label Studio:
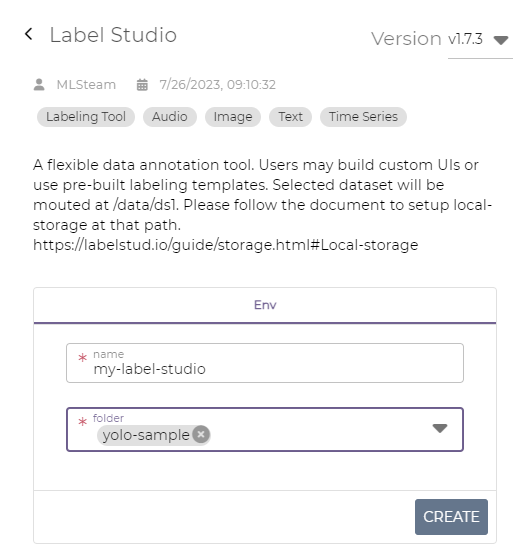
Create a project-scoped folder,
yolo-sampleas example here, and add anoutputdirectory in the folder.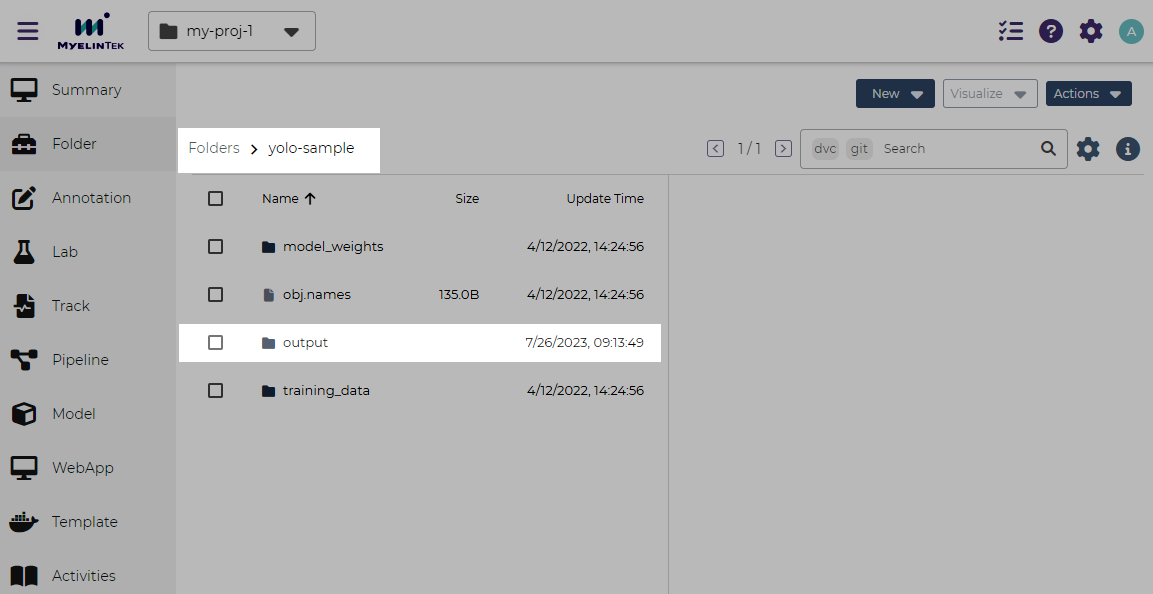
Create a Label Studio WebApp with folder
yolo-sampleMount folder:
yolo-sample
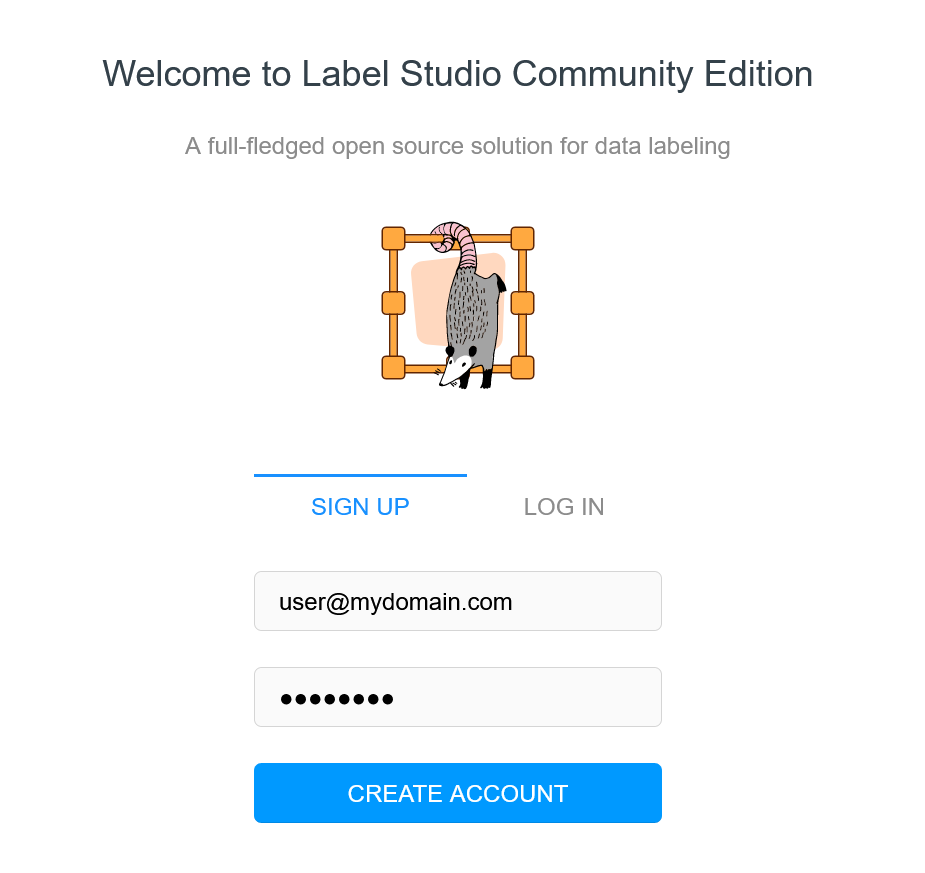
Open the Label Studio WebApp.
Create a new account with your email address and a new password.
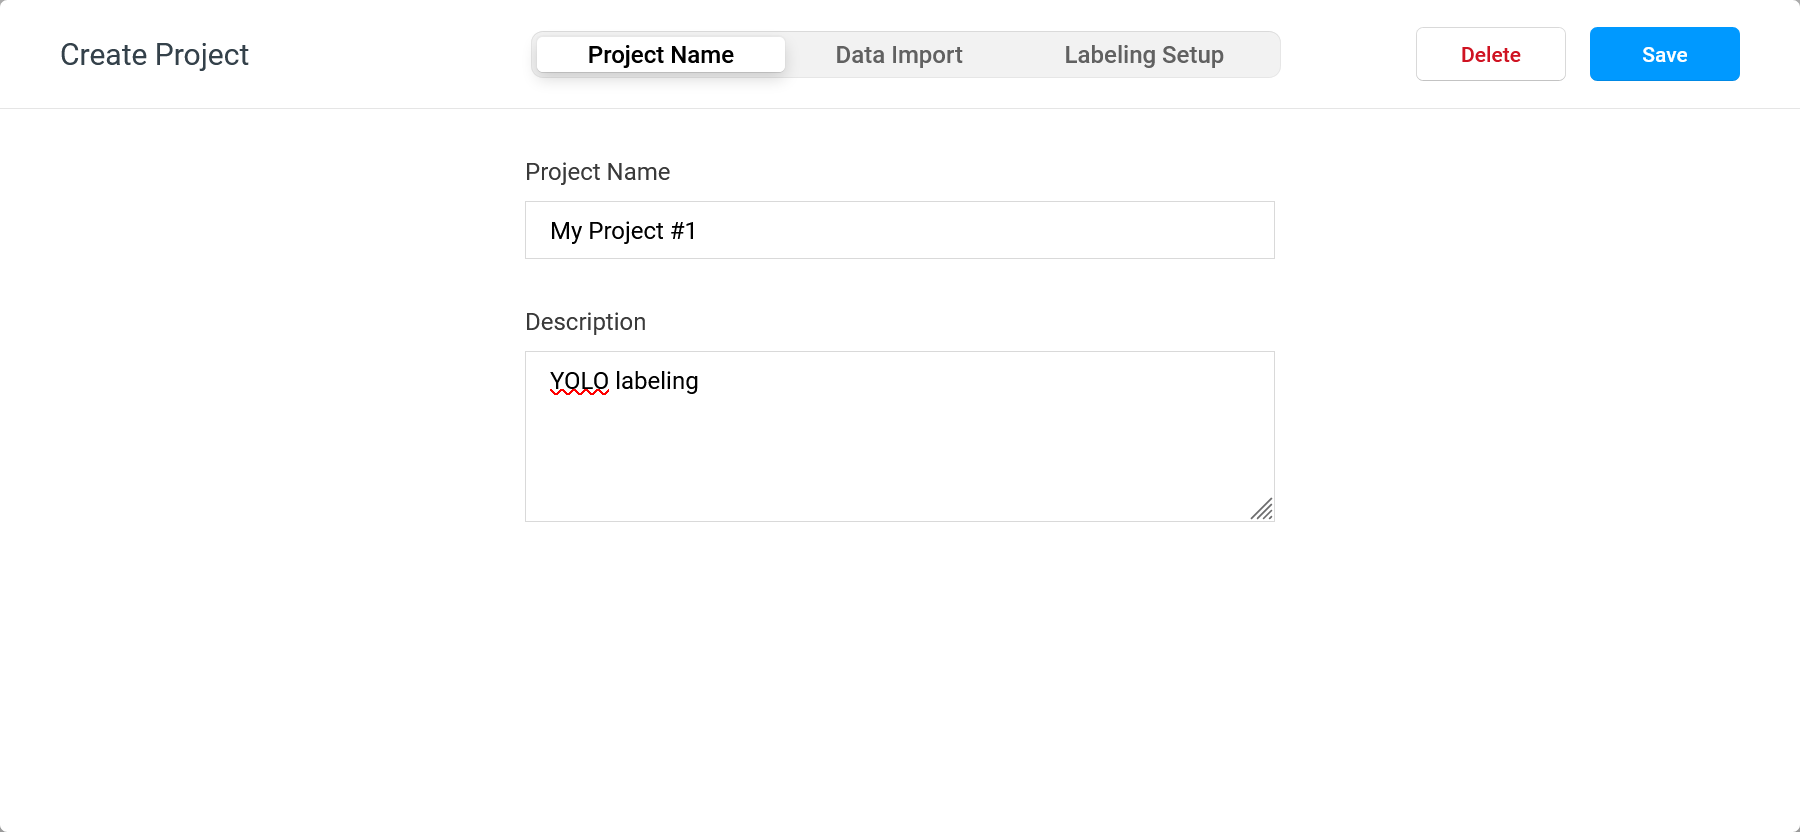
Click on the Create Project button.
In the dialog, fill in the following fields, and click on the Save button:
Project name tab:
Project name: the project name
Description: a brief description (optional)
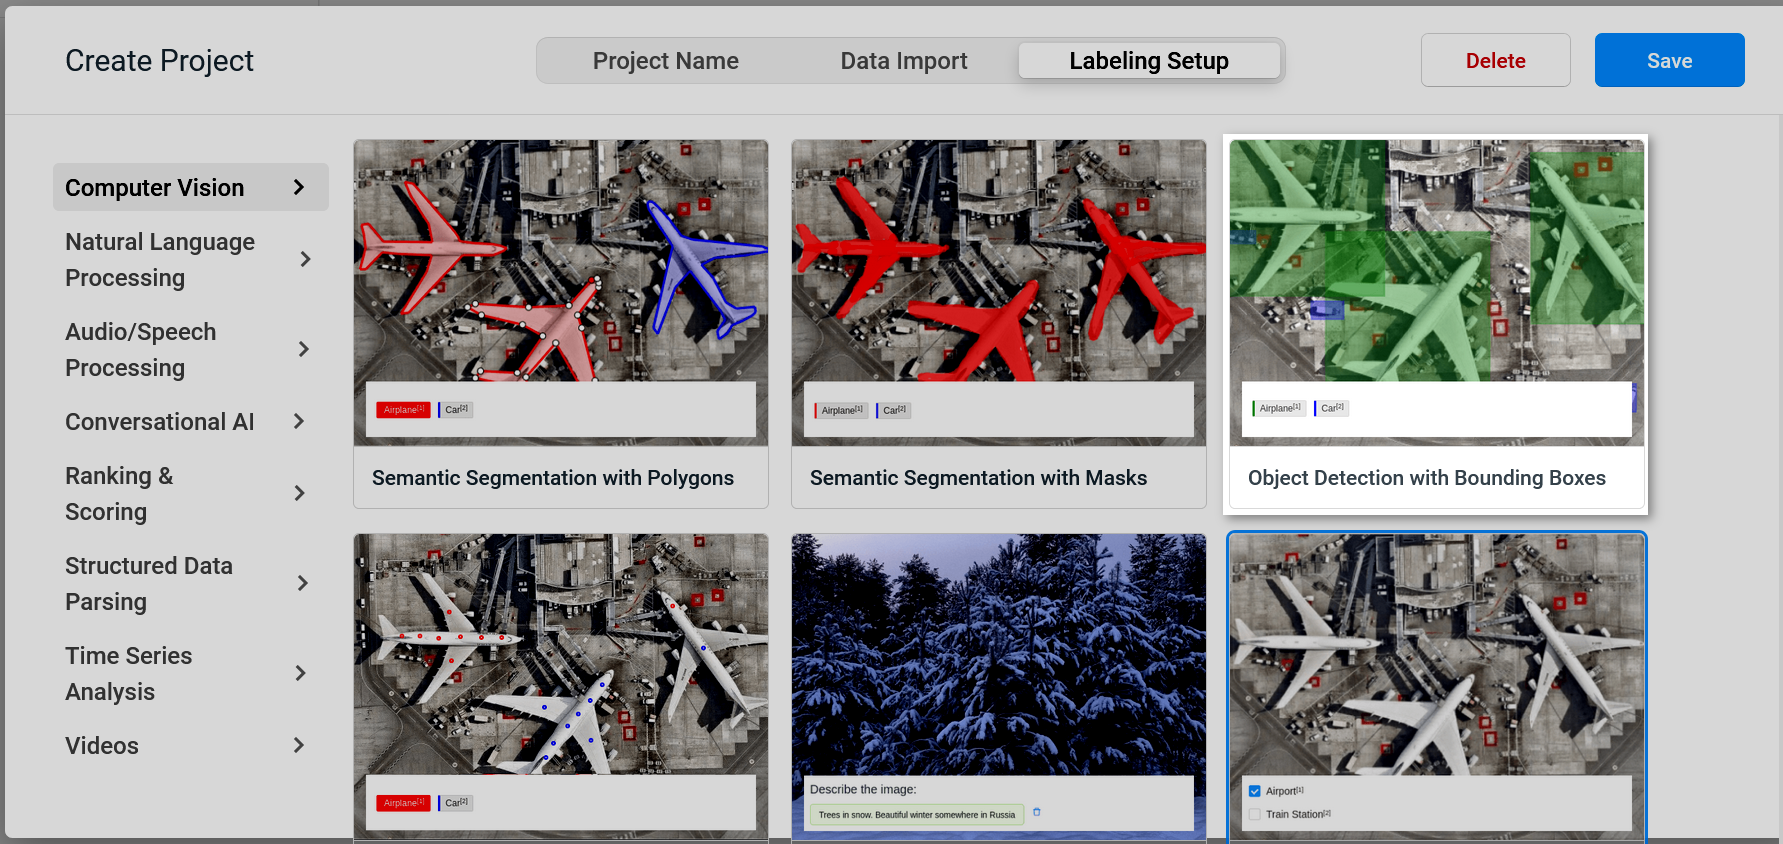
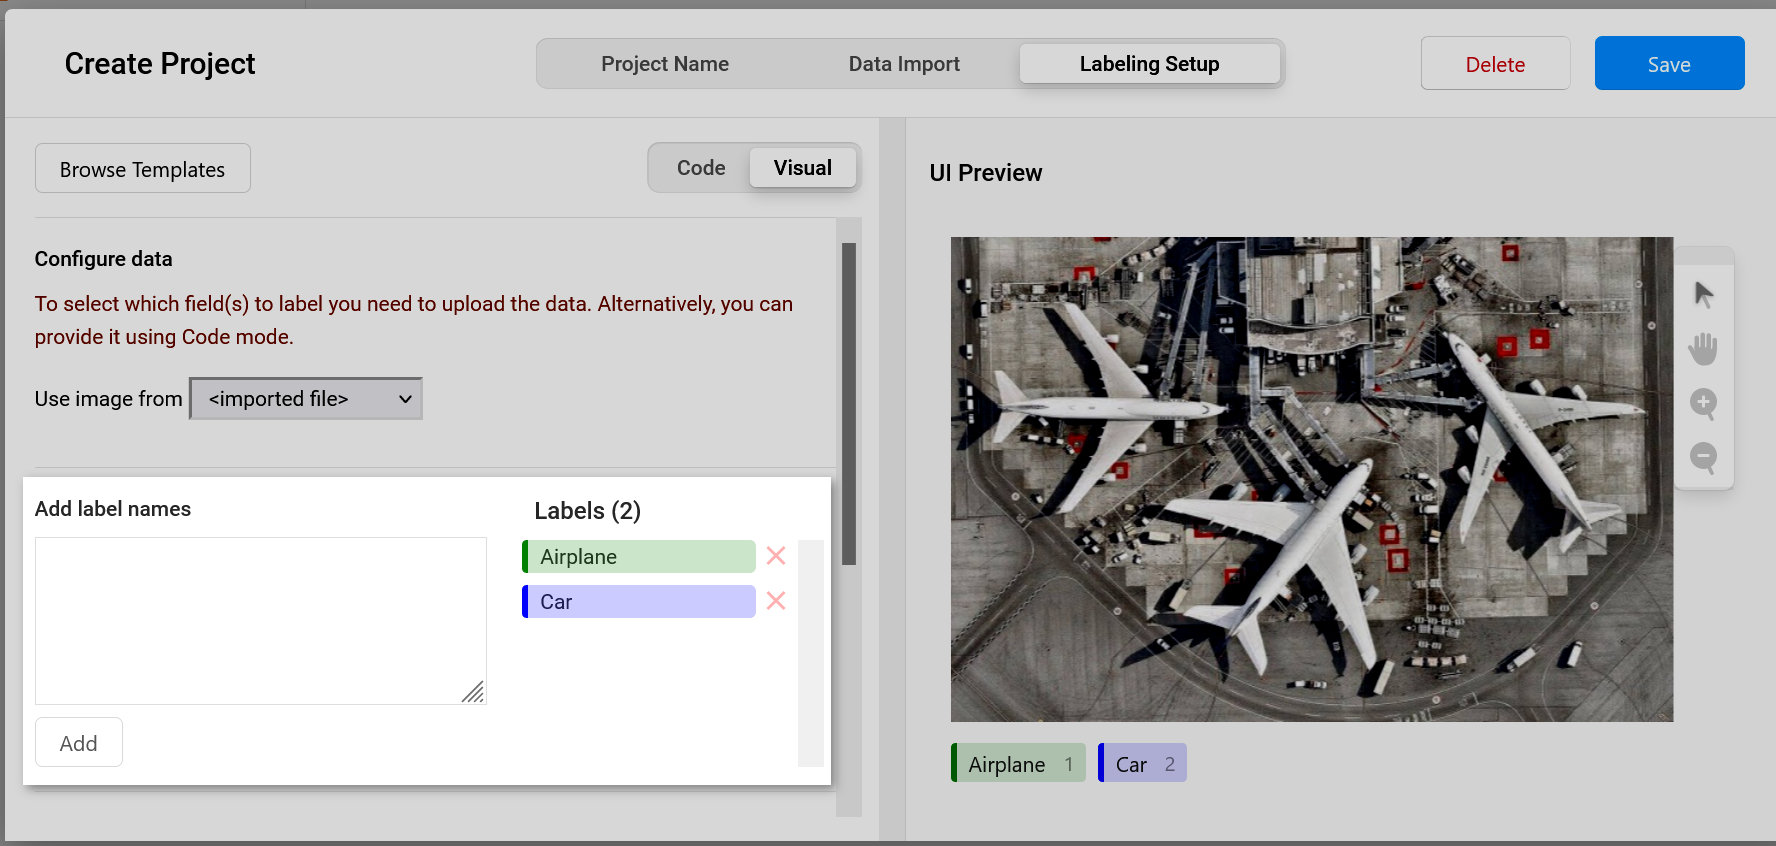
Labeling setup tab:
Select Object Detection with Bounding Boxes.
Define the labels.
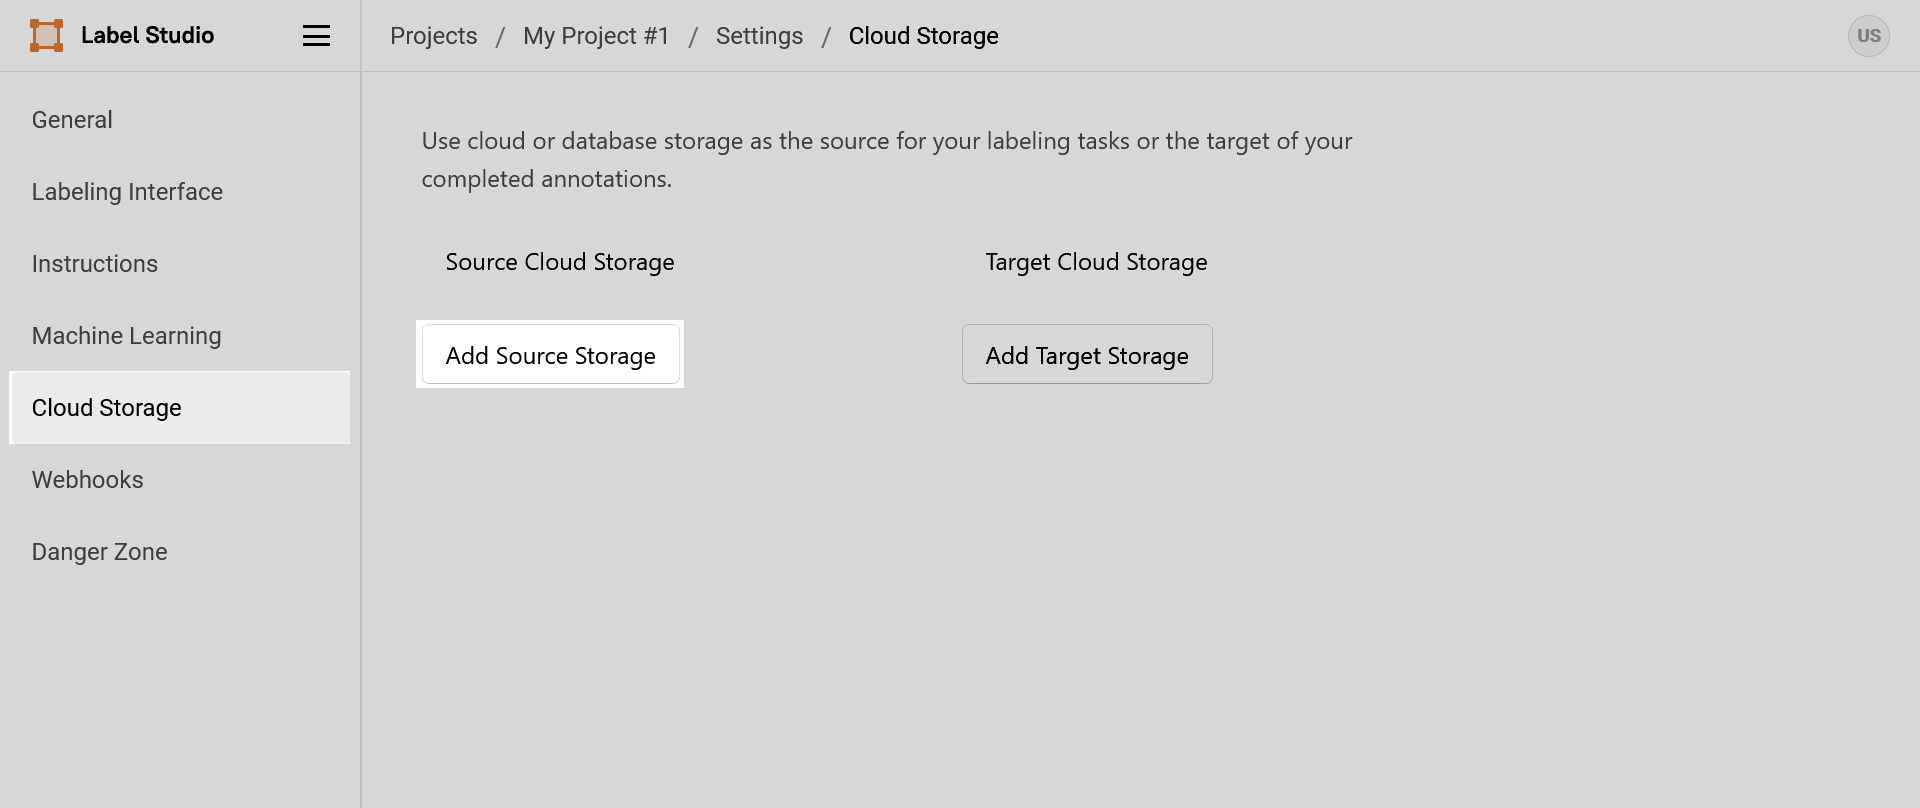
In the project page, click on the Settings button.
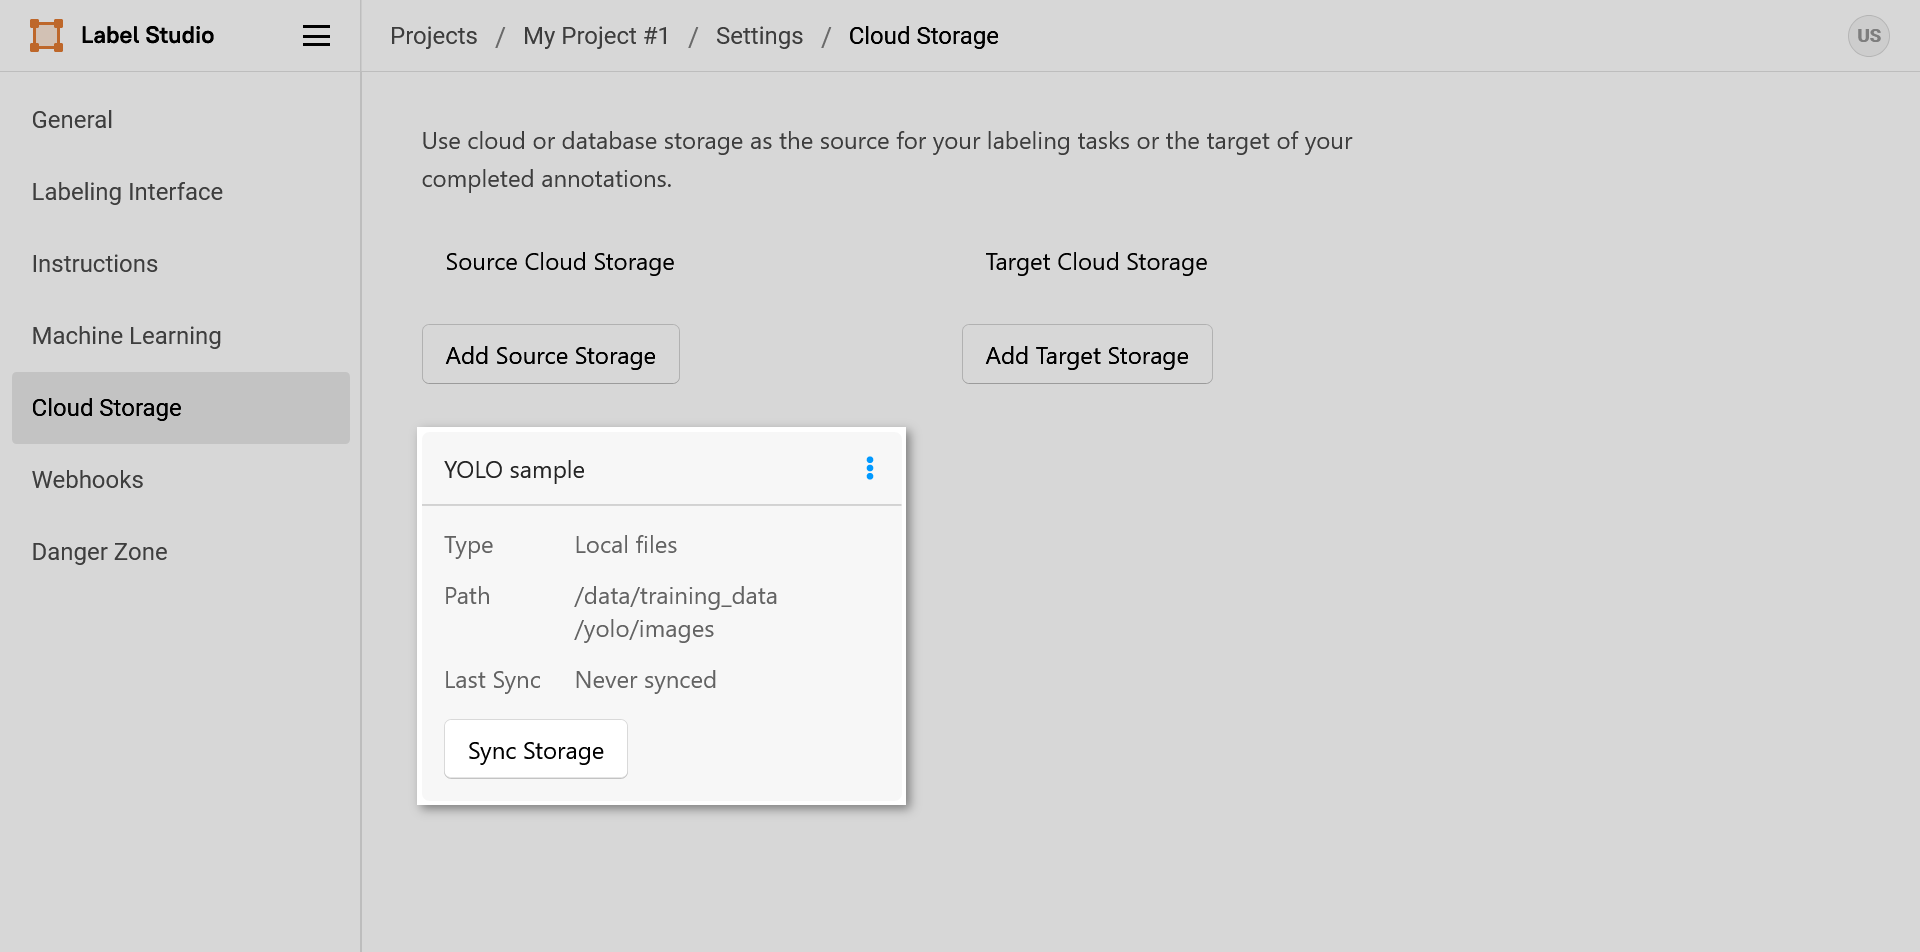
In the Cloud Storage section, click on the Add Source Storage button.
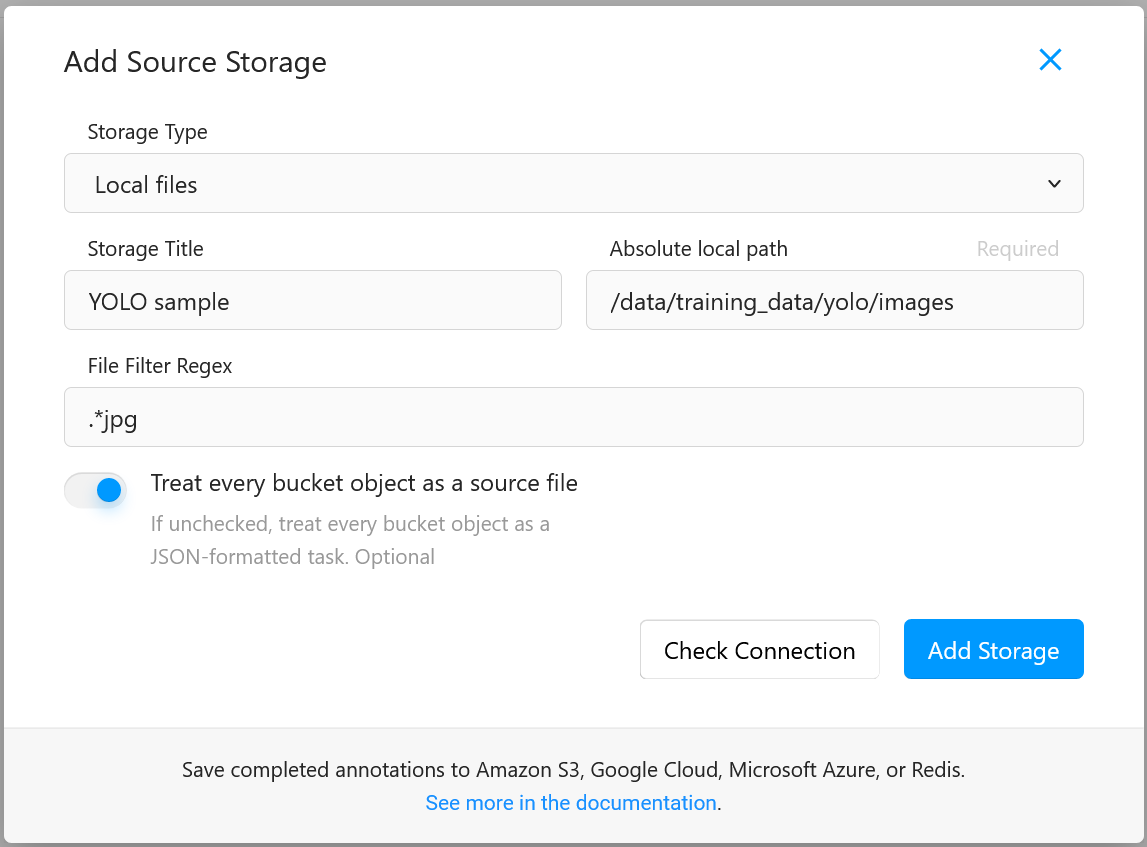
In the dialog, fill in the following fields, and click on the Add Storage button.
Storage type:
Local filesStorage title: a storage title (optional)
Absolute path: path to the images to label (for the yolo-sample dataset, this would be
/data/ds1/training_data/yolo/images)File filter regex: image file filter in regular expressions (optional) (for the yolo-sample dataset, this would be
.*jpg)Treat every bucket object as a source file:
enabled
Back to the project settings page, click on the Sync Storage button.
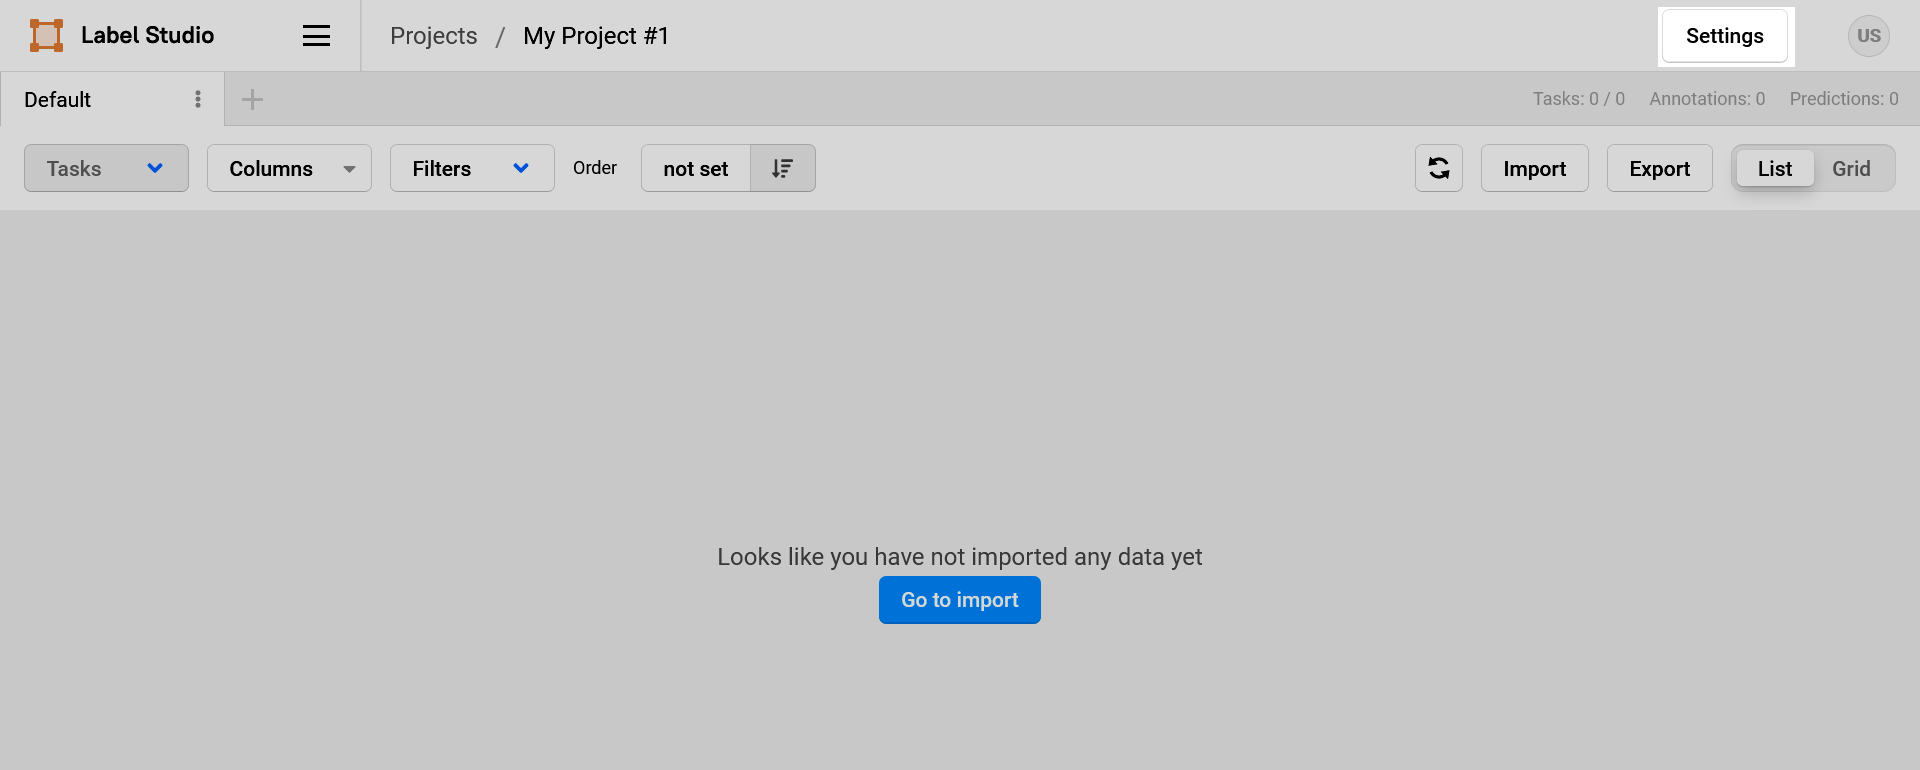
Back to the project main page by clicking on the top navbar.

Select an image to label, add the bounding boxes for the corresponding classes, and click on the Submit button.
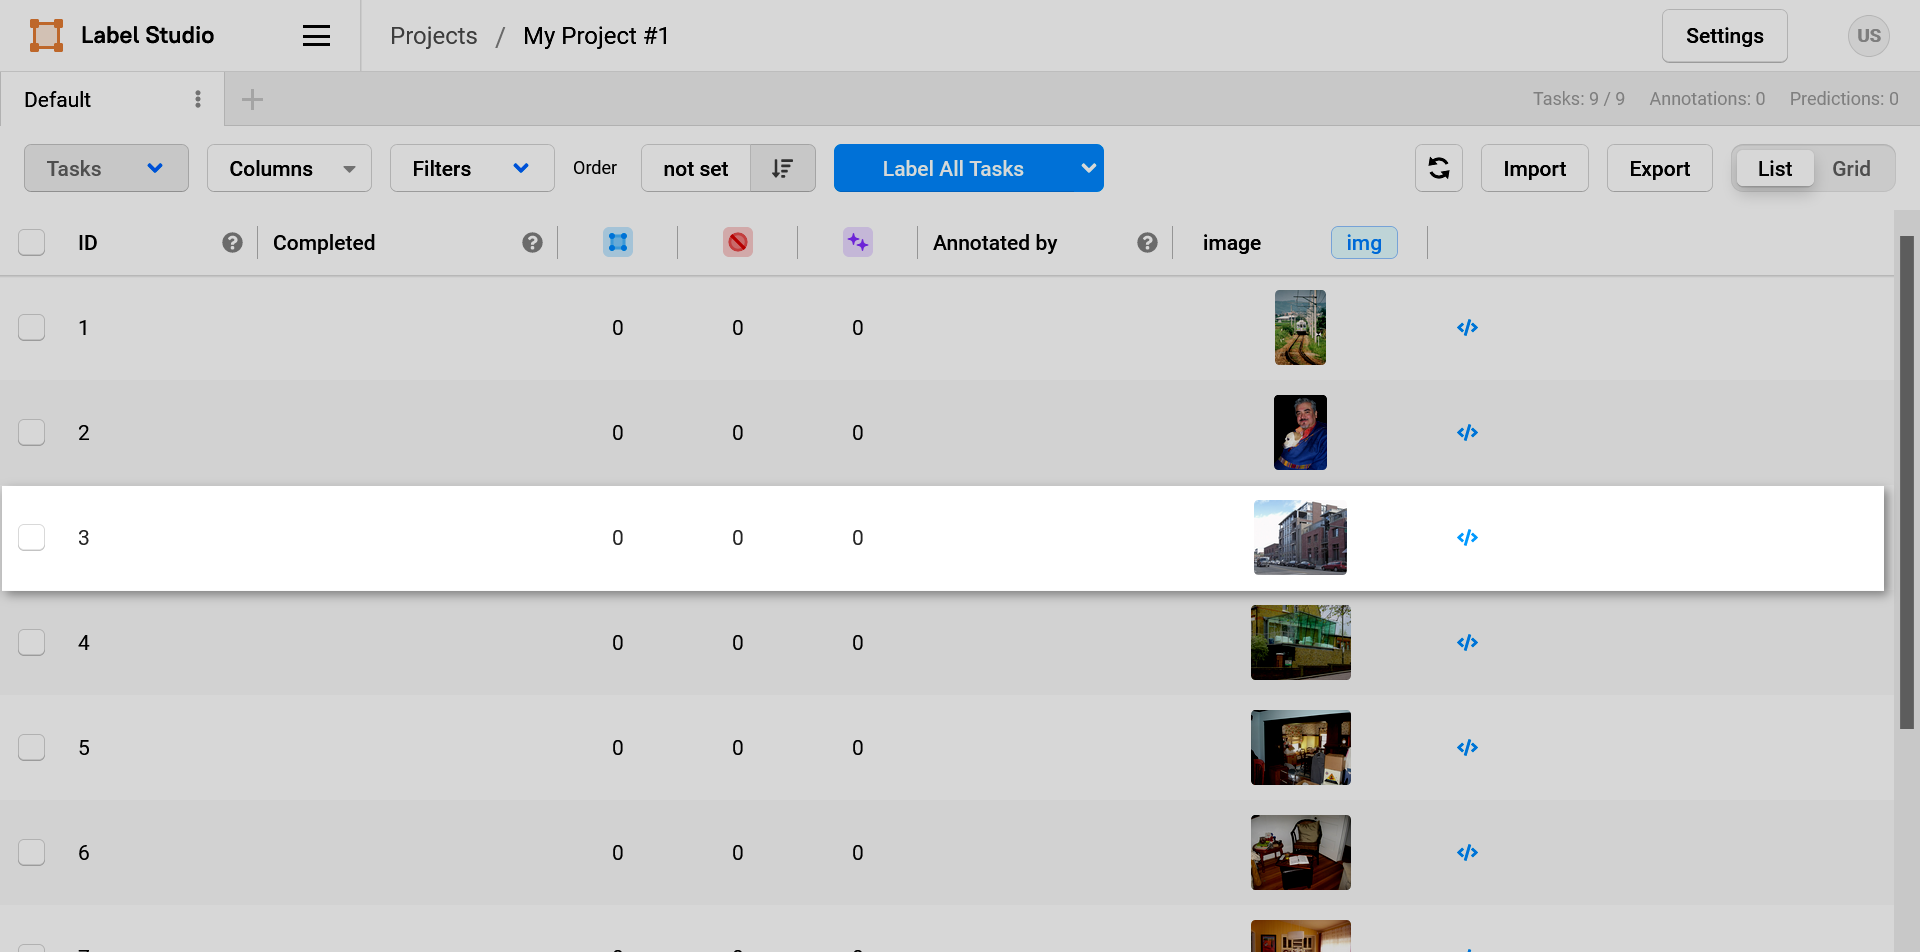
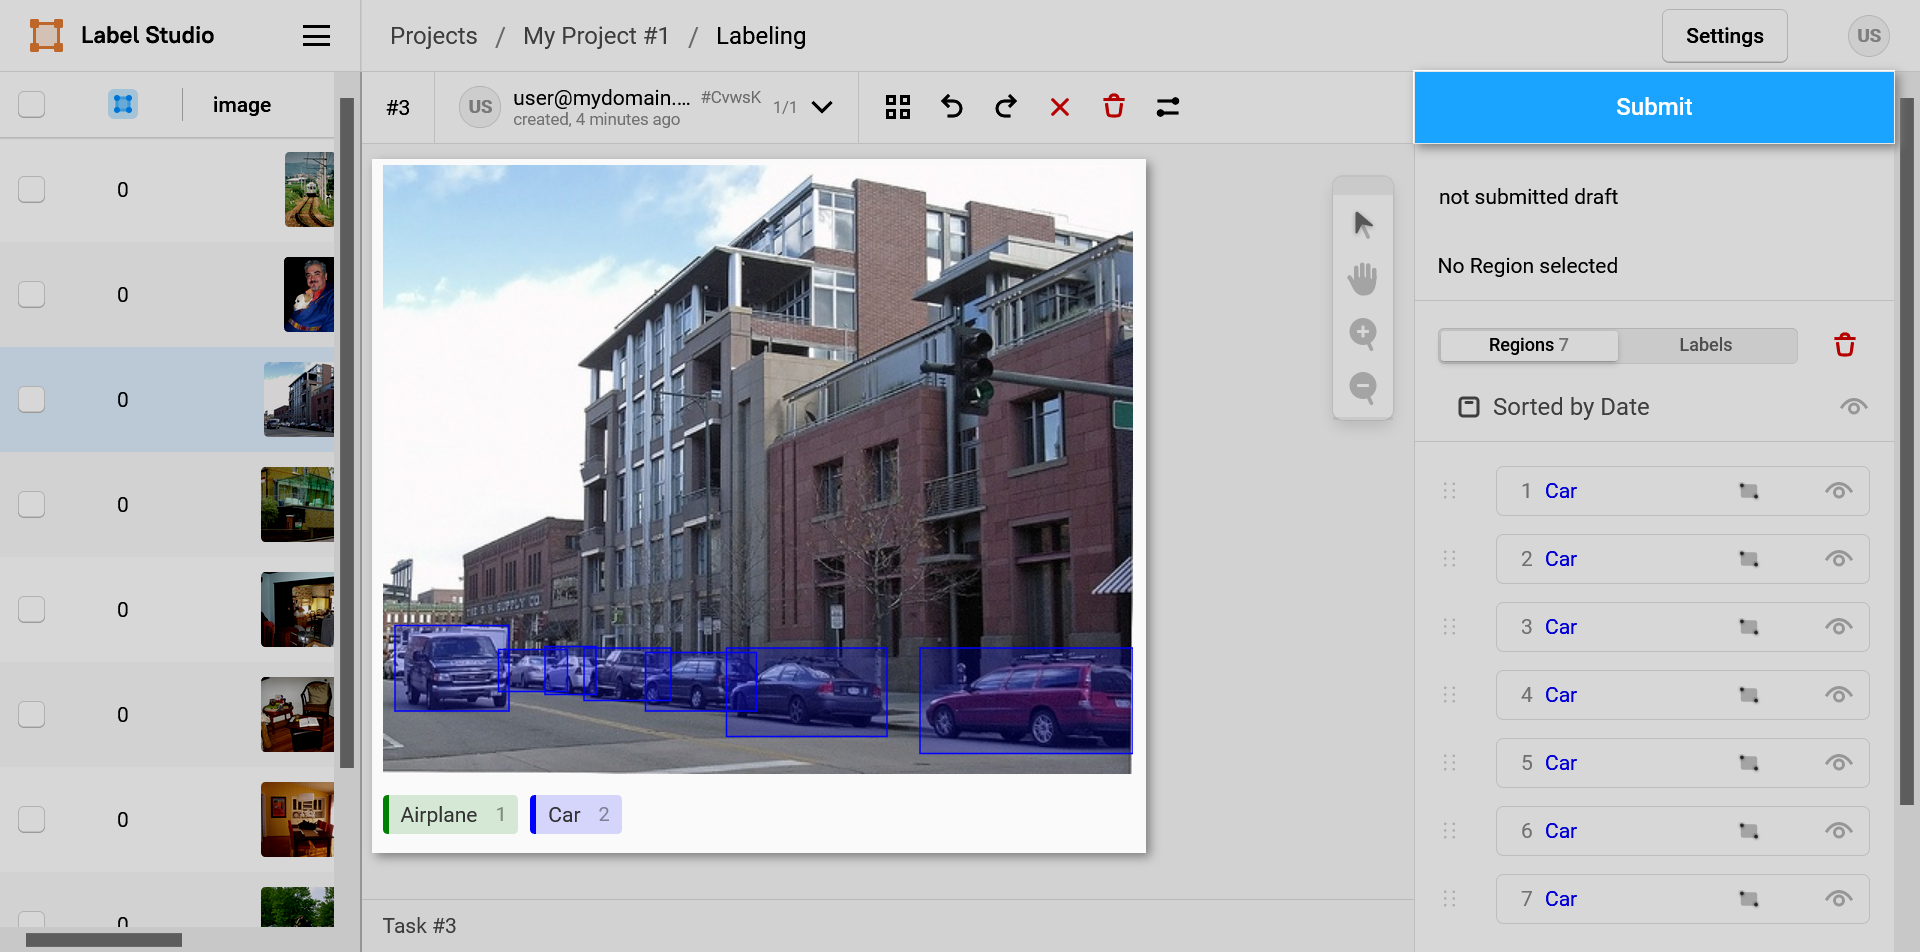
Repeat the previous step until all the images are labelled.
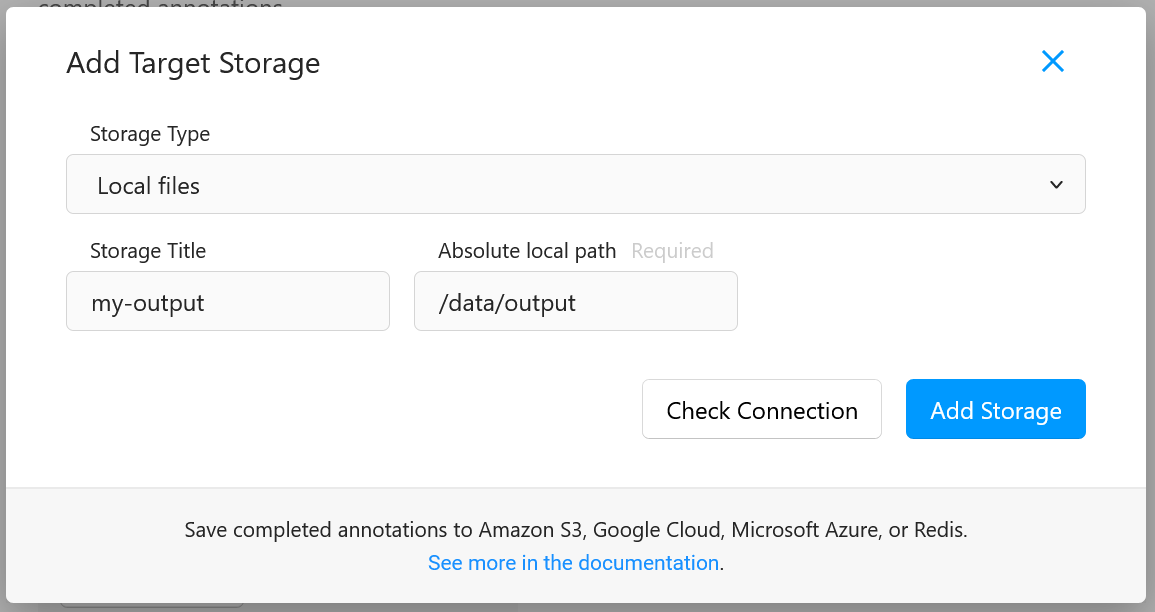
Back to the project settings page, click on the Add Target Storage button.
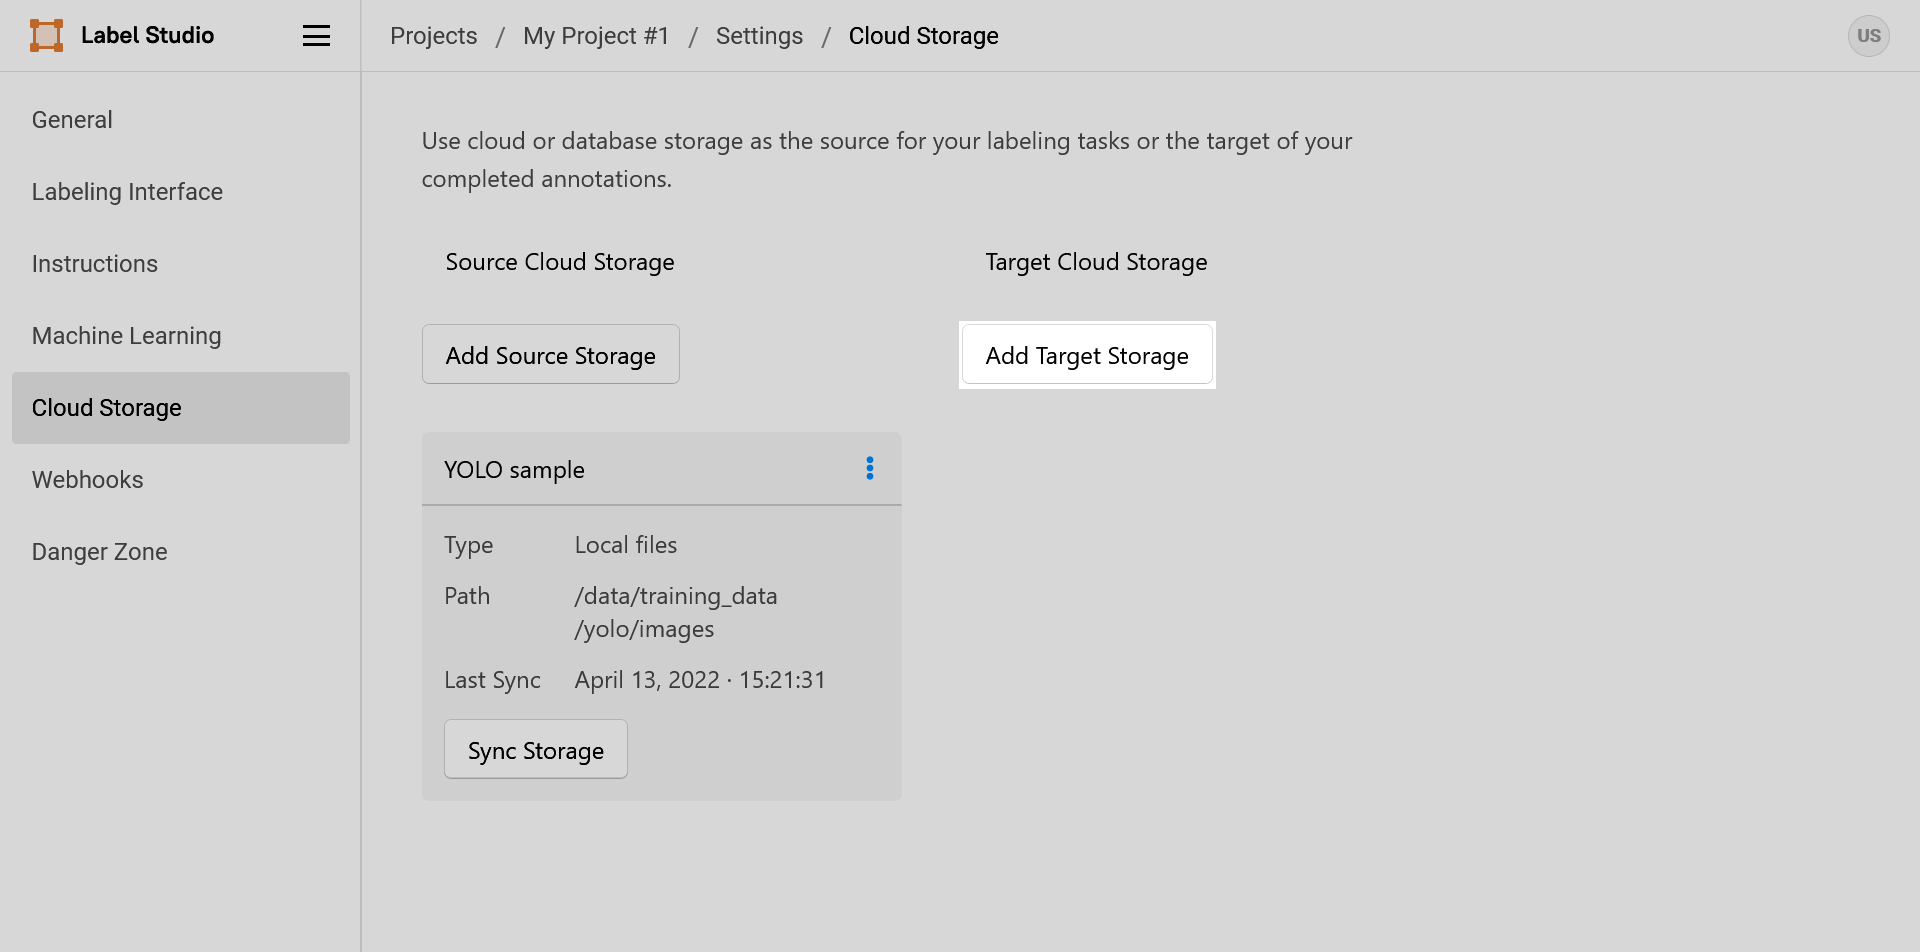
In the dialog, fill in the following fields, and click on the Add Storage button.
Storage type:
Local filesStorage title: a storage title (optional)
Absolute local path: the output path created in the mounted project-scoped folder (For example,
/data/output)
Back to the project settings page, click on the Sync Storage button.
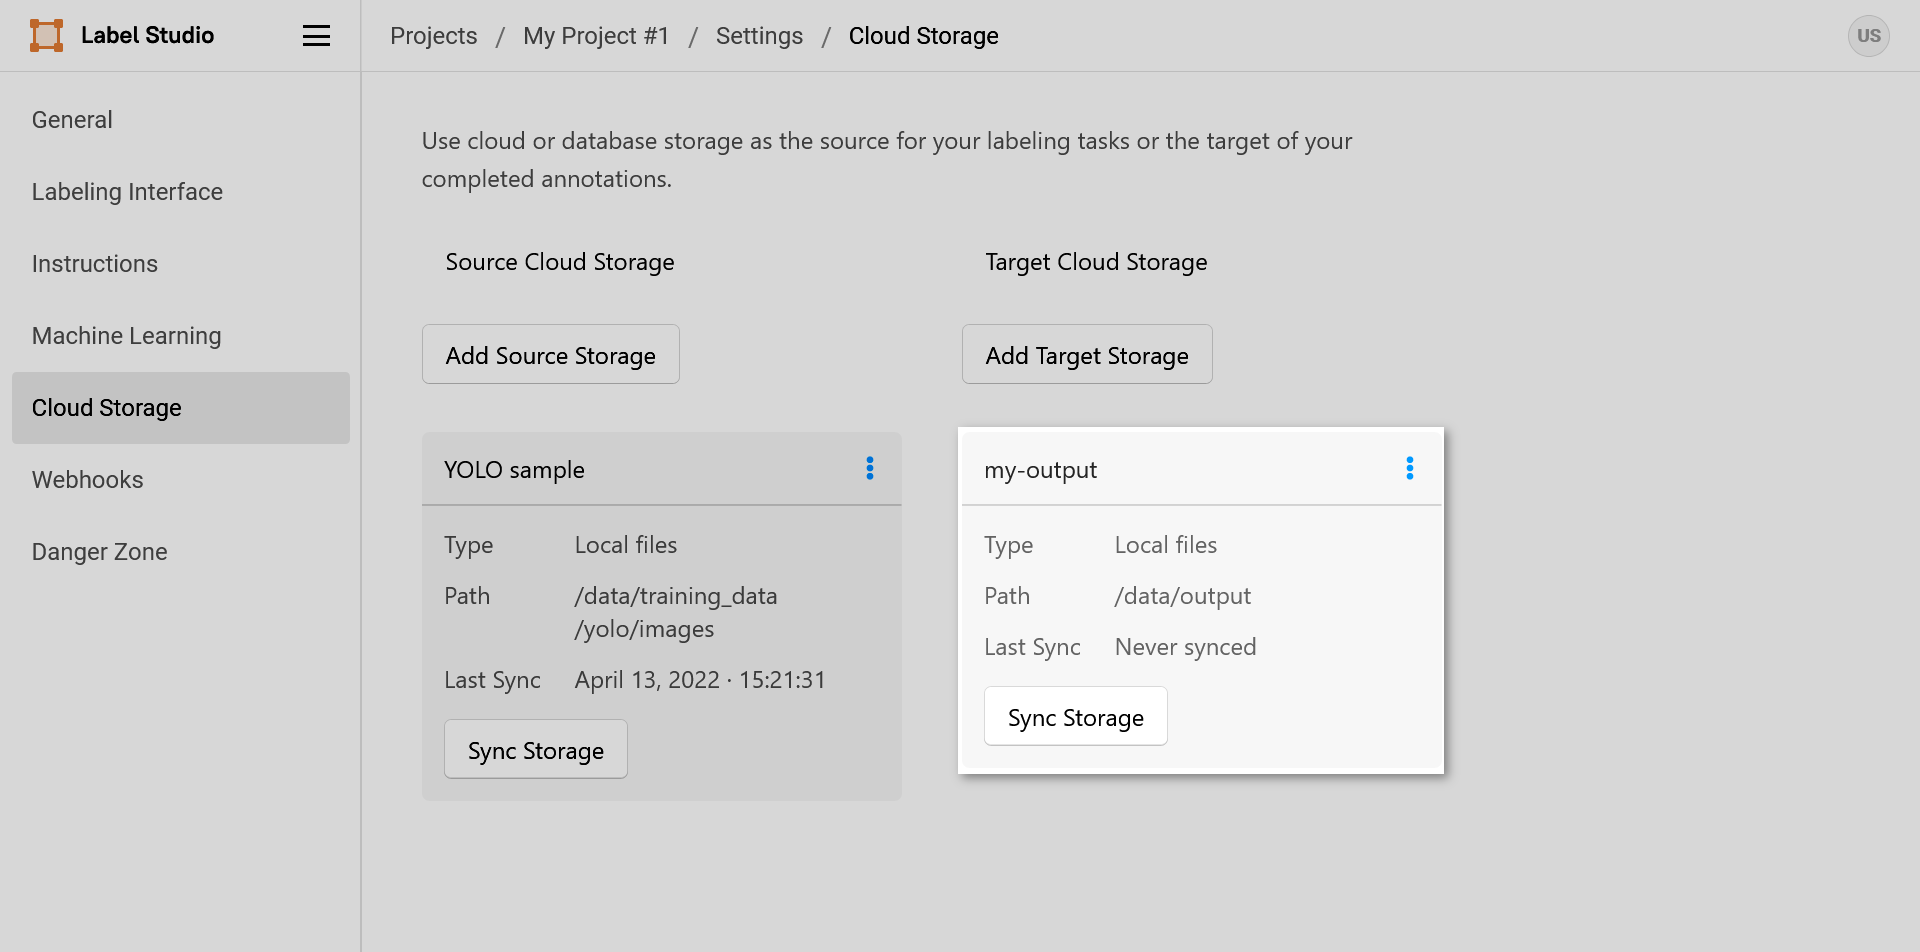
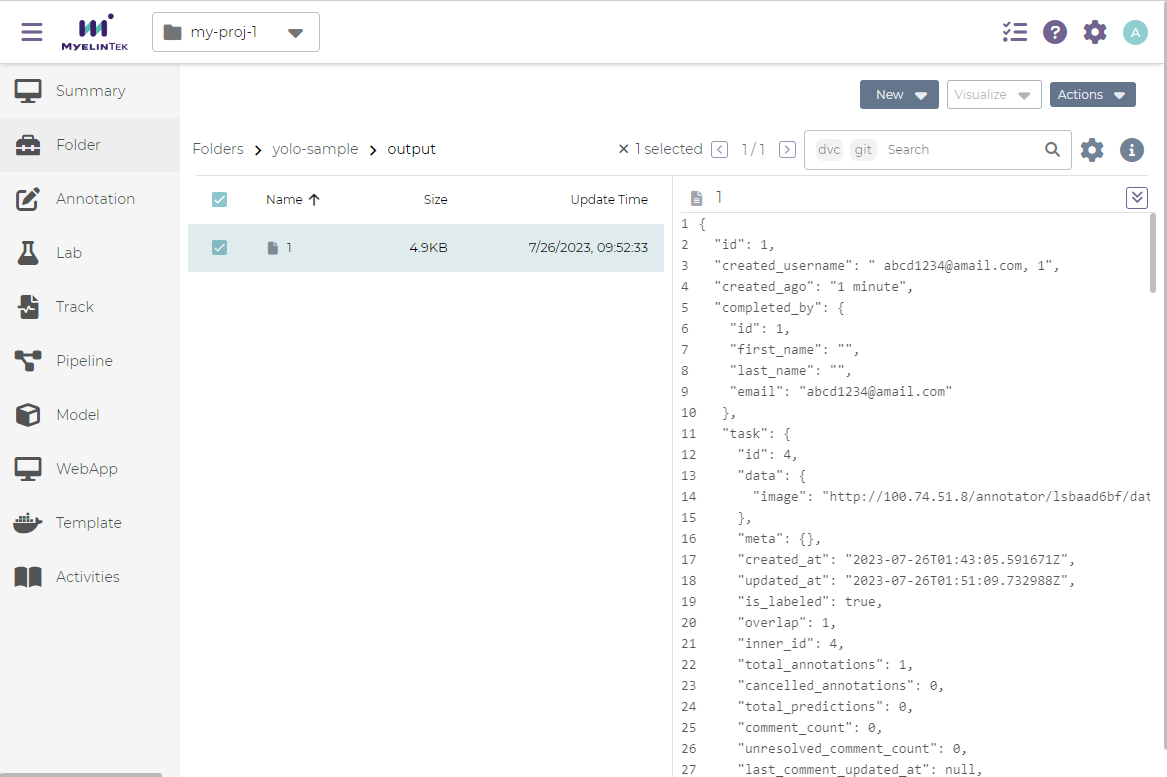
Back to the folder page, the labelling data will be saved in the output directory.
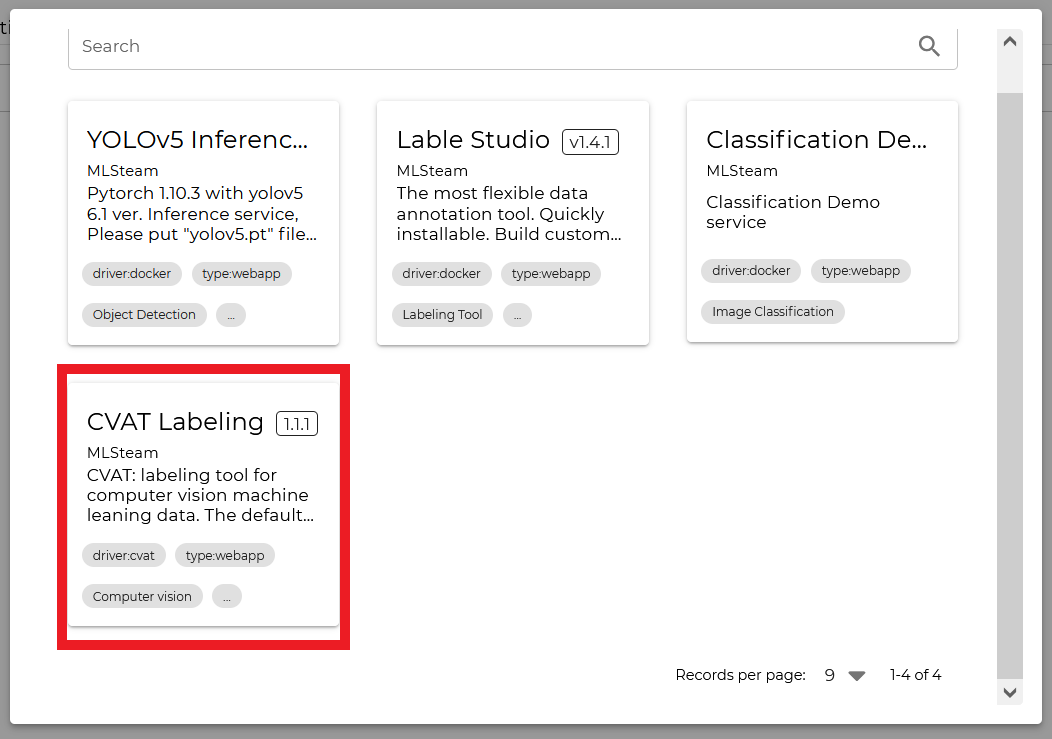
Setup CVAT
CVAT is a data annotation tool, available as a WebApp in MLSteam. To setup CVAT:
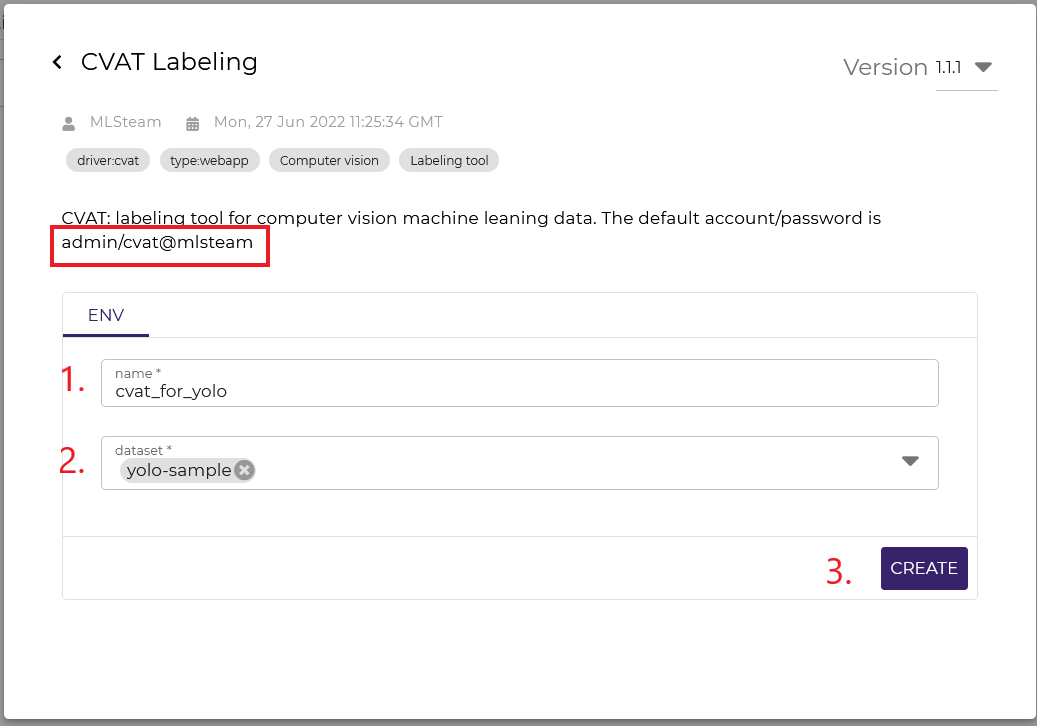
Create a CVAT WebApp from template.
Input name and select desired folder from the dropdown, then press “Create”. Notice default credentials.
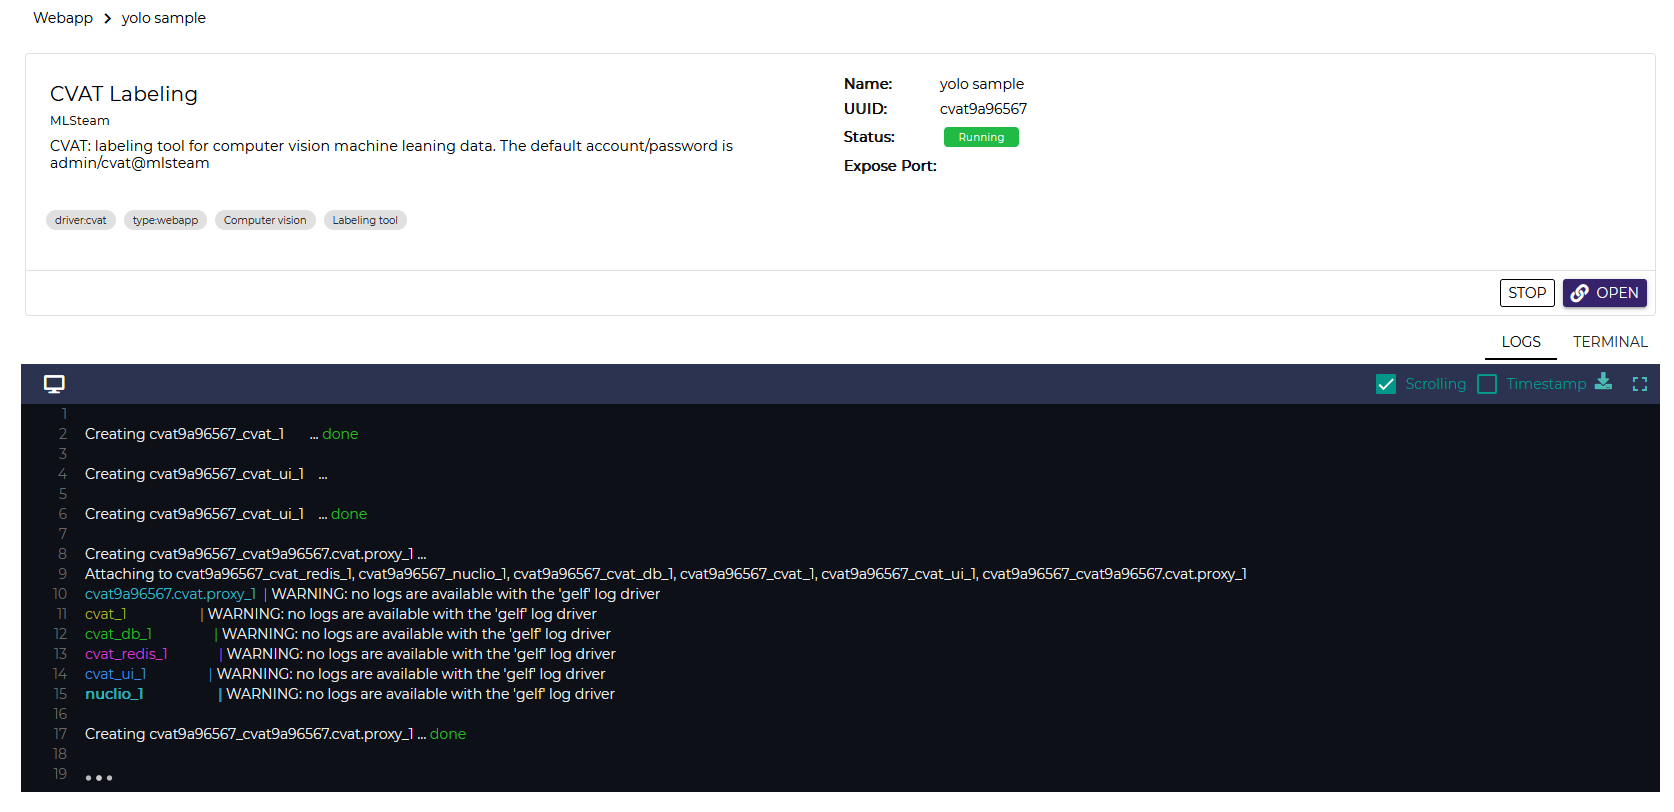
When the webapp is running press “External link” button to open CVAT.

Note
While CVAT status is running it might take few minutes for system to fully setup and create accaunt. You can check start up progress by checking the logs

In the CVAT tab input default credentials
admin/cvat@mlsteamPress “Create new task” button
Fill the task creation form fields. To use project dataset for annotation click “Connected file share” expand directory tree and sellect needed files.
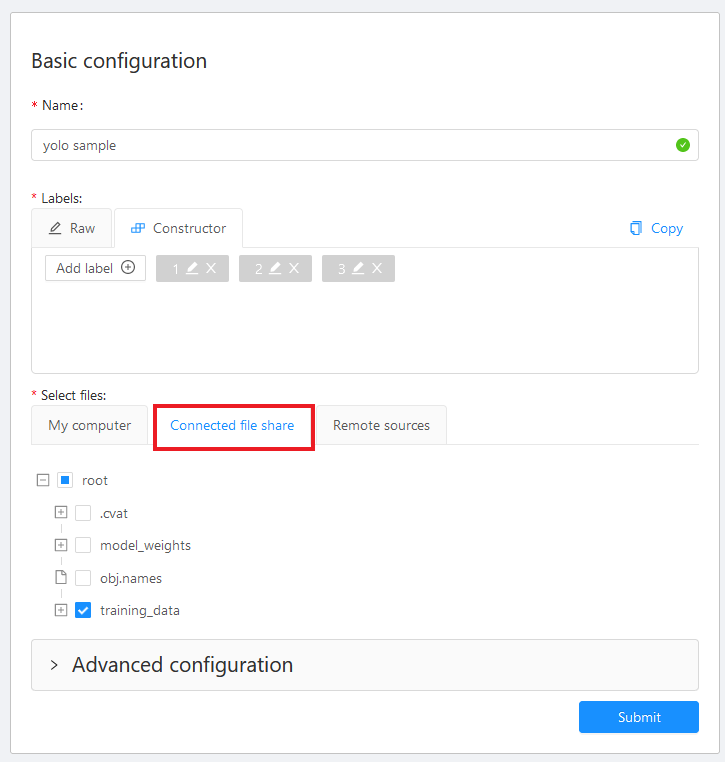
Warning
Don’t include
.cvatdirectory. It will result in error.Open task after submit
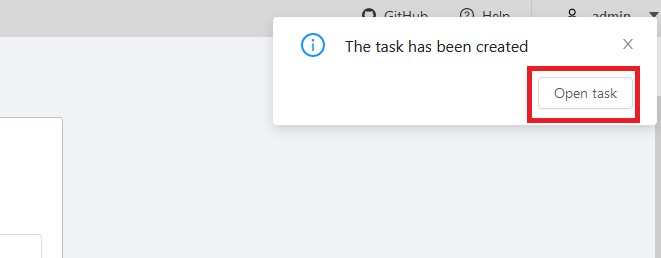
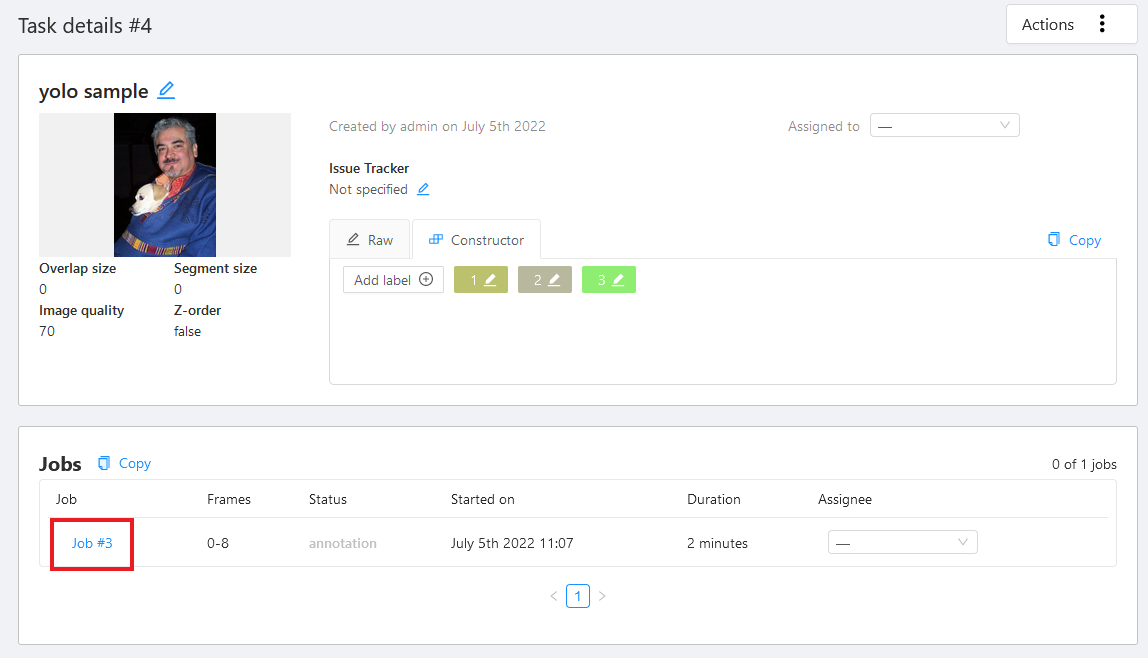
Open job
Do the labeling (labeling process is not covered here)
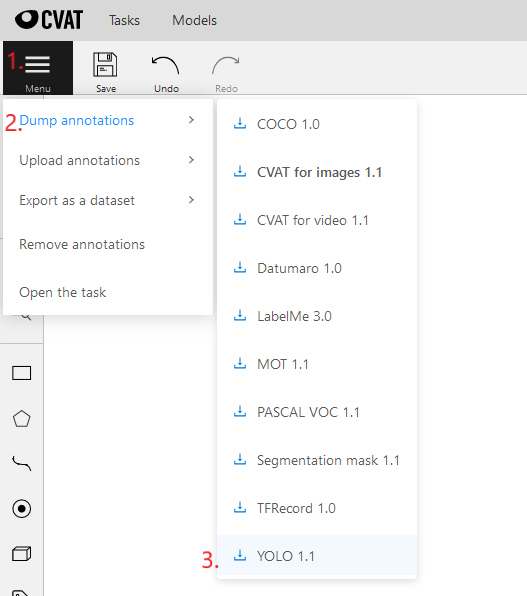
To use annotations, download them first then unzip and upload annotation file to MLSteam dataset. To download unnotations press “Menu”->”Dump annotations” then select desired format.